Table of Contents
Have you downloaded a file or done something on your iPhone but got a notification that there is not enough storage to complete it? Or maybe you’re just worried it’ll run out of space right when you need it most. If so, you’re not alone – most iPhone users encounter a storage space shortage at some point.
If your iPhone currently bugs you with that annoying “Storage Almost Full” alert (or anything like it), you’re in the right place. We went through a bunch of popular tips on how to get more iPhone storage, tested them out, and trimmed the list down to the ones that actually work. In this guide, we’ll walk you through these methods so you can return to taking photos, downloading apps, and using your device without those limits.
Is It Possible to Get More Storage on an iPhone?
Unlike some Android phones that come with a memory card slot, iPhones feature a fixed internal memory. Apple has not released an iPhone with expandable storage, and it is unlikely that the company ever will – partly because charging extra money for additional storage is a lucrative business model for them.
However, do not lose hope – you can still solve the problem using other methods. Below, we provide a handy table that outlines various strategies (both free and paid) you can use to achieve this without purchasing a new device. We’ll go over each option in more detail later in this article.
| Strategy | Specific methods | Method costs |
| Get rid of unnecessary temporary files | Clear browser cache to sweep out web remnants and dump apps cache, especially from storage-hogging apps like Telegram or Facebook. | Free |
| Keep only the most necessary apps | Offload seldom-used apps or delete them entirely to free up space. | Free |
| Properly manage multimedia files | Start by deleting duplicates, then tackle large attachments in text messages, and finally toss out other non-essential media. | Free |
| Take full advantage of cloud storage | Use features like “Optimize Photo Storage” and selectively move your data – like large documents or downloads – to iCloud. | Paid |
| Transfer data to an external storage device | If you’re still tight on space, expand your storage with an external device compatible with iPhones. | Paid |
Best of all, these strategies are universally applicable no matter if you’re using iOS 14, 15, 16, 17,18, or any iPhone from the iPhone 11 to the 16. To make things easier, we’ve split the methods into two sections: first, we’ll walk you through all the free options, then we’ll cover the paid ones.
How to Get More iPhone Storage for Free
All the free ways to make more storage on an iPhone involve removing unnecessary files of various categories. Just like it requires more than just wiping down surfaces to truly clean your home, the following methods will provide a better and more noticeable result when you use them in tandem. That’s why we recommend you go through them one by one.
Method 1: Organize Your Media Files
| Ease of Implementation | Time Required | Potential Storage Savings |
| Fairly Easy | Somewhat Time-Consuming | Significant |
A large portion of your iPhone’s storage is probably filled with media files, such as photos, videos, voice notes, and various attachments. What’s great is that you can easily get more storage space on your iPhone by deleting what you do not need.
1.1 Clear Unnecessary Items from Your Photos App
Let’s begin here, because the Photos app usually holds most of the images and videos on your iPhone, whether you took them yourself or downloaded them. There are a few ways to clean up your Photos app, but this article will highlight the best overall solution – using a free Clever Cleaner iPhone cleaning app, which combines all these methods in one place.

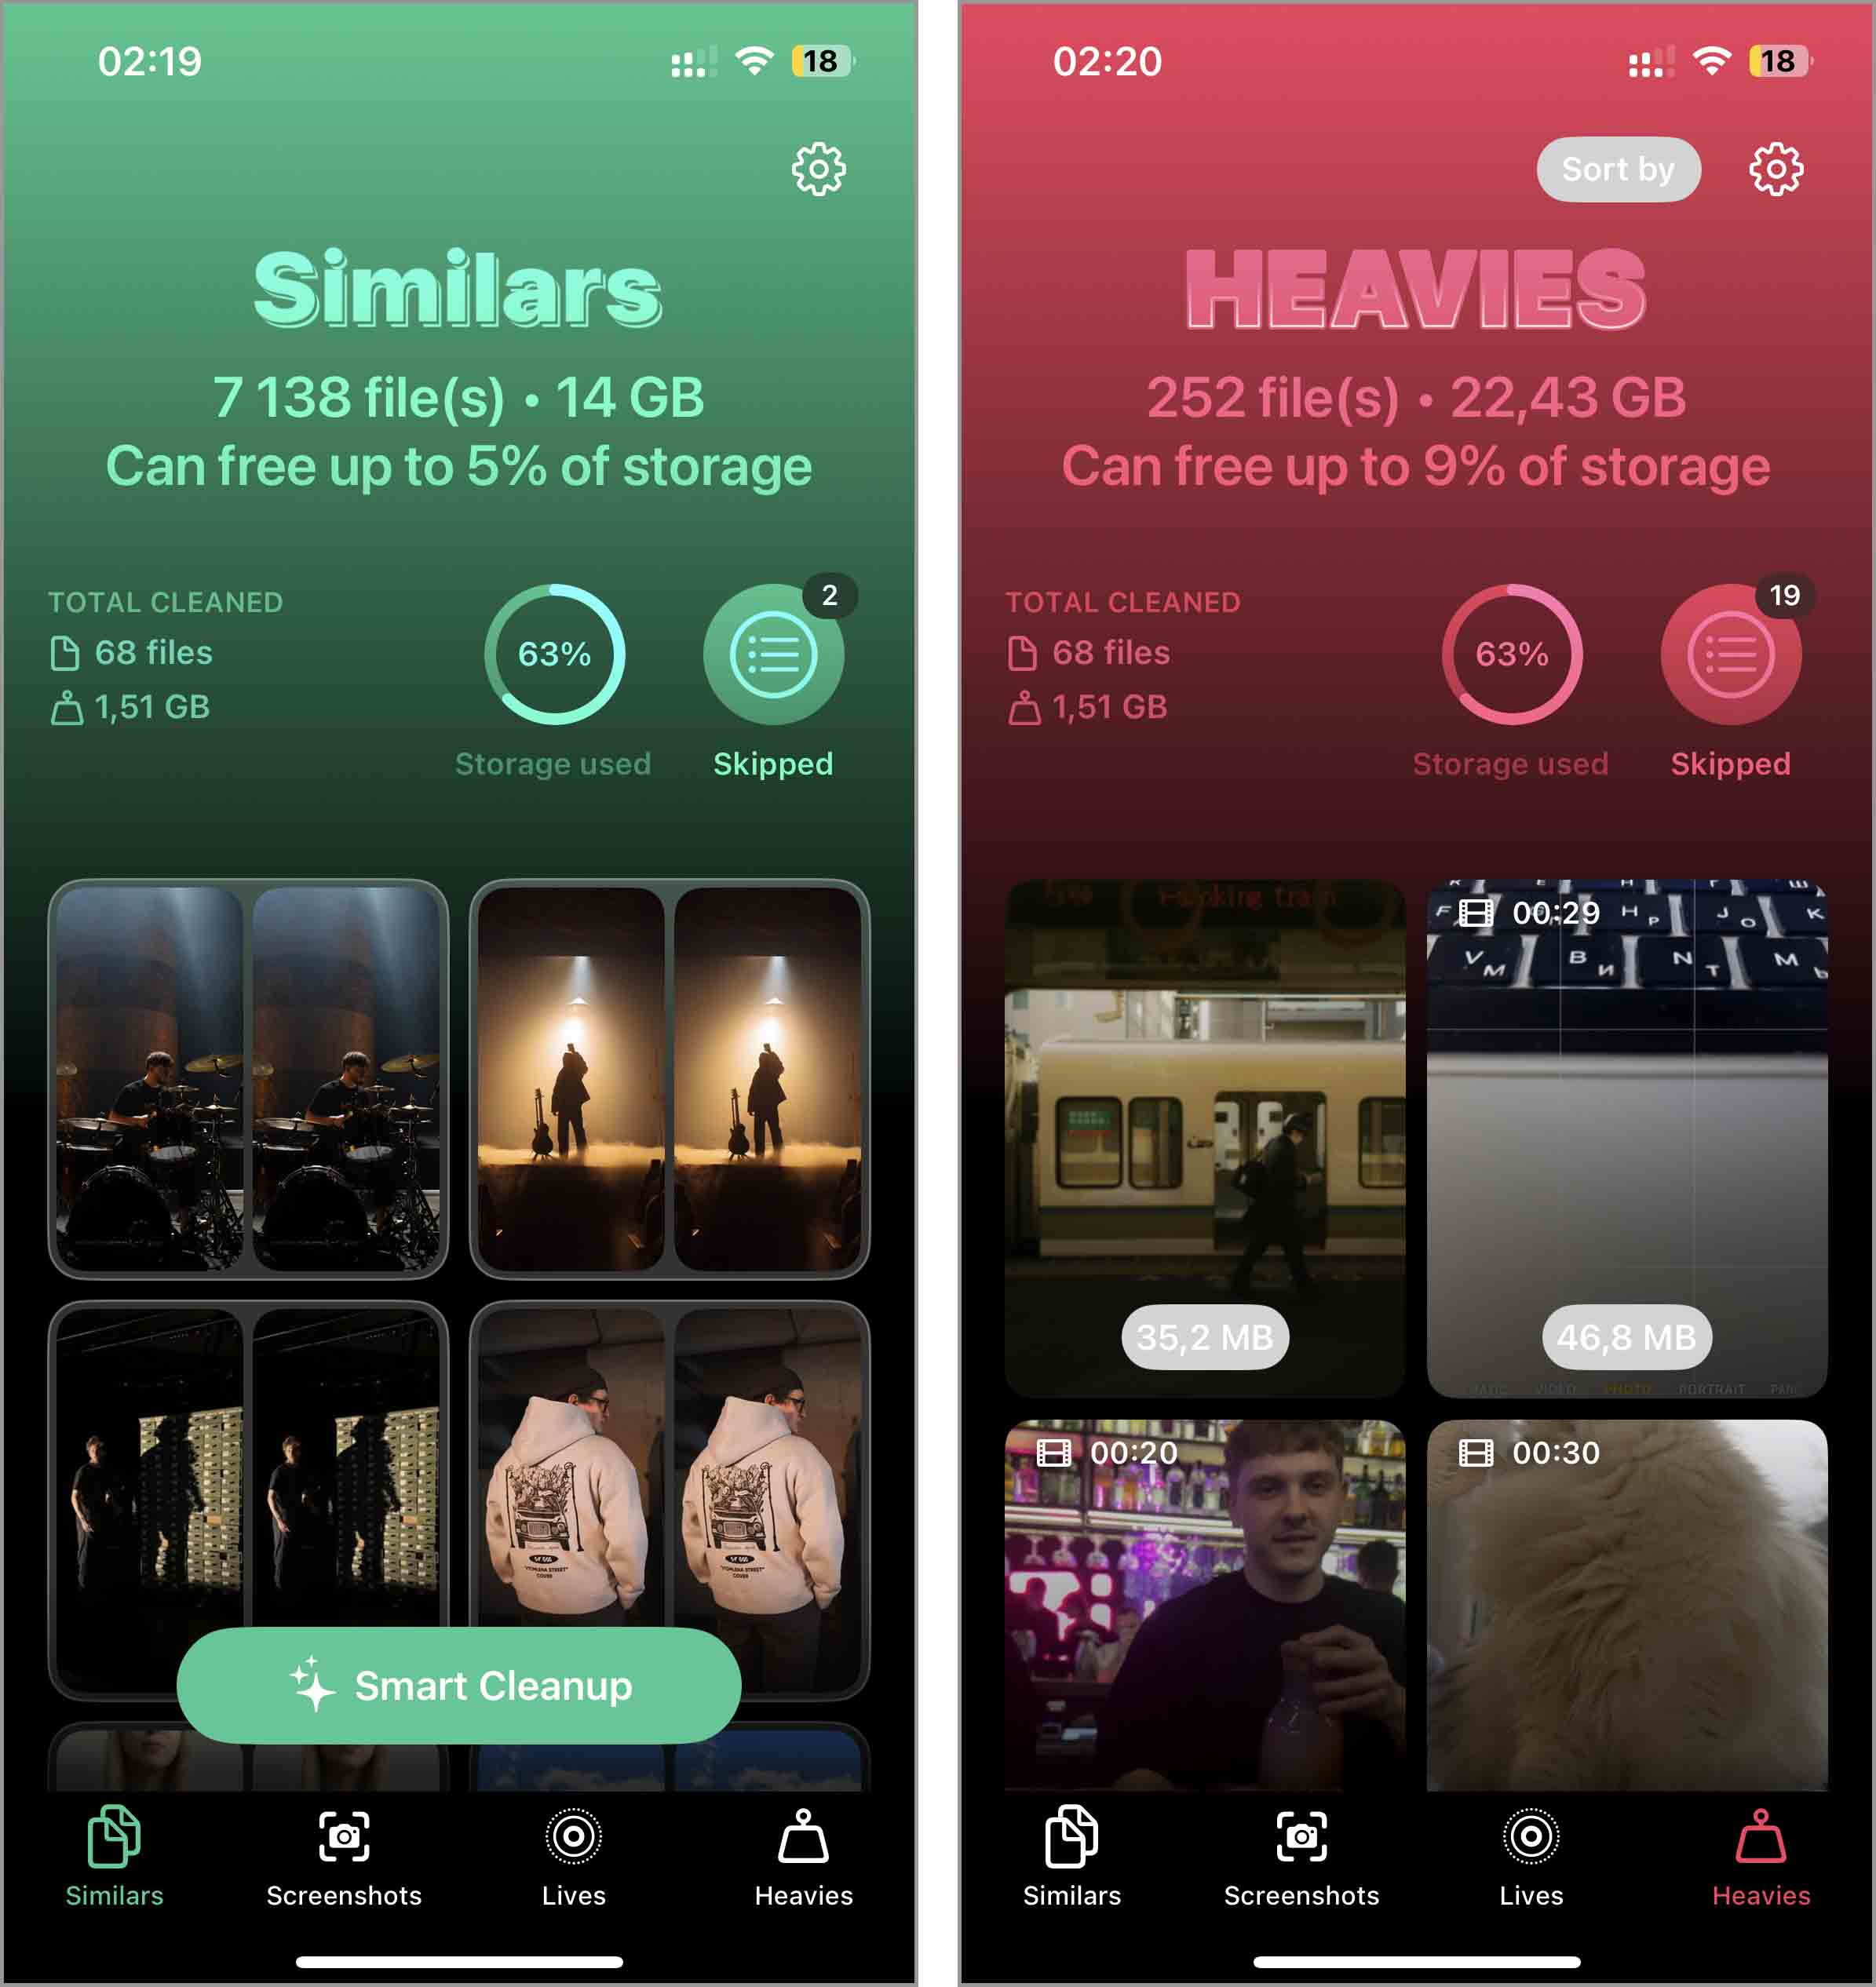
Why do we recommend it? For a few key reasons. First, it’s completely free – there are no hidden subscriptions or annoying third-party ads to deal with. Second, the app actually works. When we tested it, we could clear over 40GB of space in just a few taps, which is pretty impressive. It comes with four core features that make cleaning up your iPhone super efficient:
- Similars – works a lot like the built-in iOS duplicates feature, but better. It not only finds and deletes exact duplicates, it also spots similar-looking photos and helps you delete the extras. It uses AI to pick the best shot in each group, so you don’t have to.
- Heavies – quickly shows you the biggest videos and photos in your gallery so you can decide what to keep or delete. The value here is that it lets you sort files by size, something the Photos app can’t do, but Clever Cleaner makes it super easy.
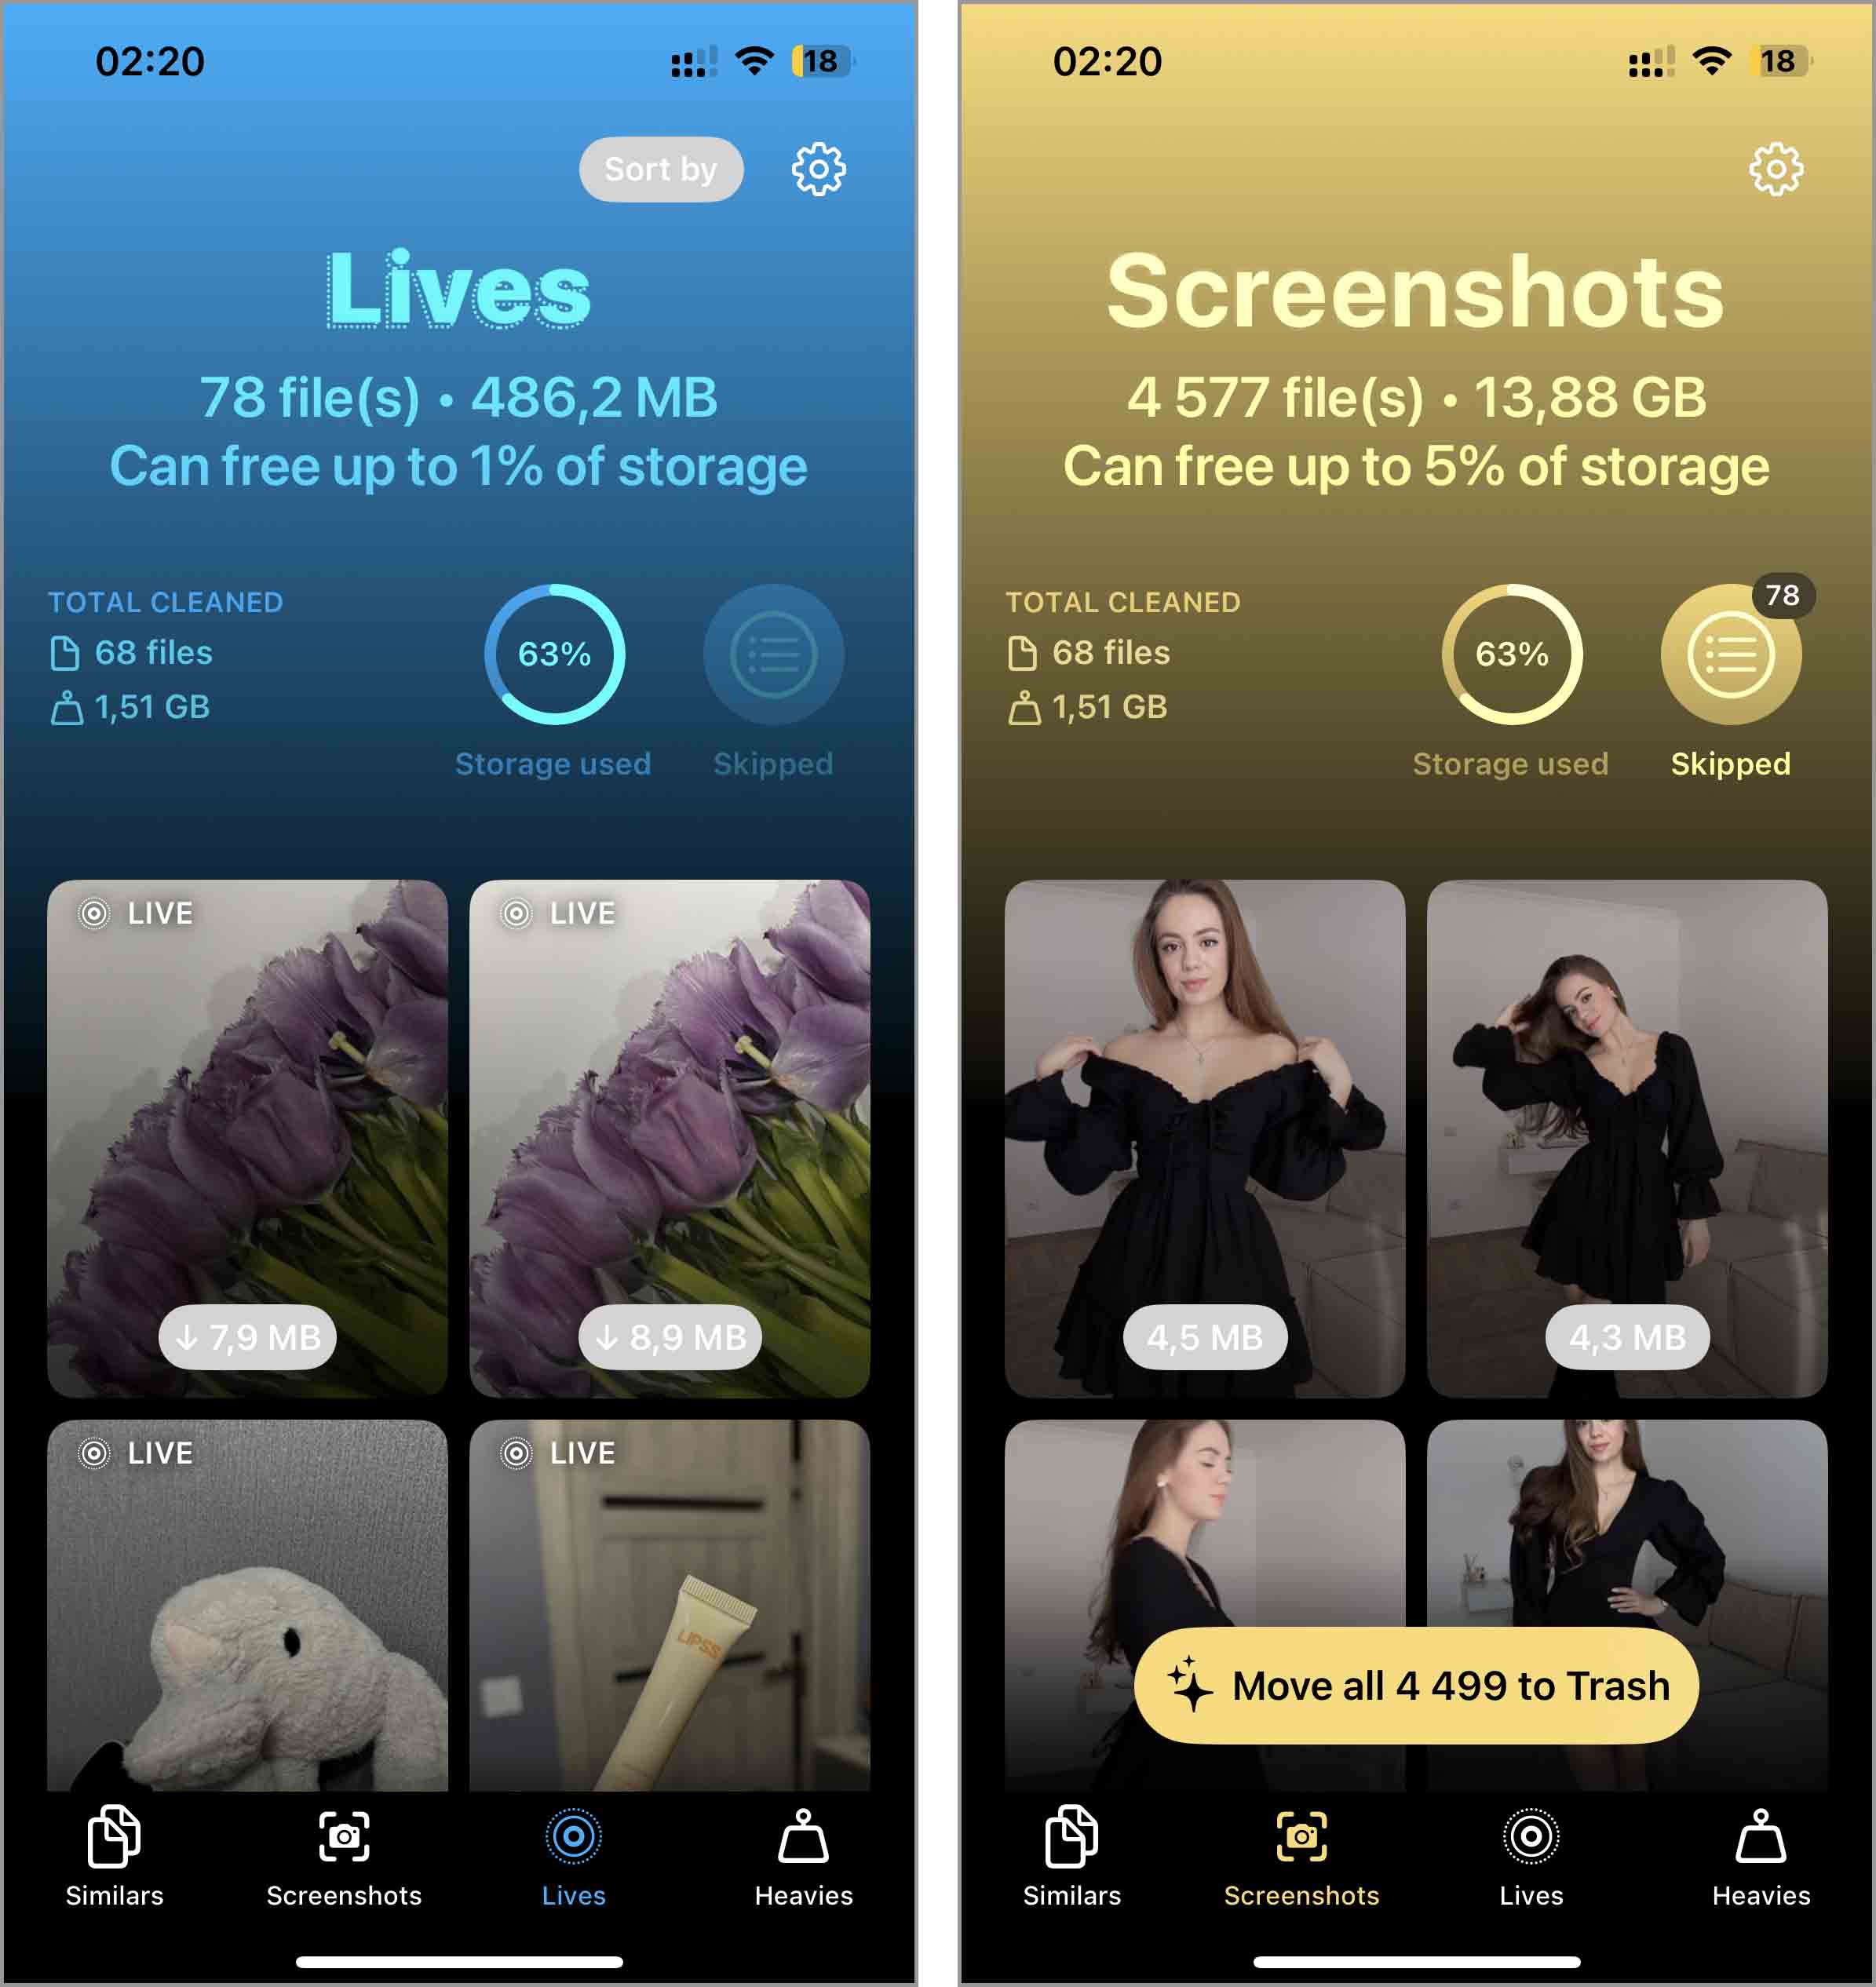
- Lives – an underrated feature that comes in handy if you often snap Live Photos by accident. It converts them into standard still images and deletes the originals on the spot. That way, you keep only the format you actually want, without Live Photos eating up space on your iPhone.
- Screenshots – mirrors the “Screenshots” album from your Photos app and lets you delete all your screenshots in just two taps. It doesn’t do anything the native iOS tools can’t, but we think it’s included so you can clean up everything in one place – no need to jump between the app and your albums.


For more details on these features, head over to the official Clever Cleaner website. We recommend trying them all to clear up as much storage as you can. They’re super easy to use – each one works pretty much the same, and the app walks you through every step. However, you also can check out this video for a quick walkthrough:
1.2 Delete Other Media
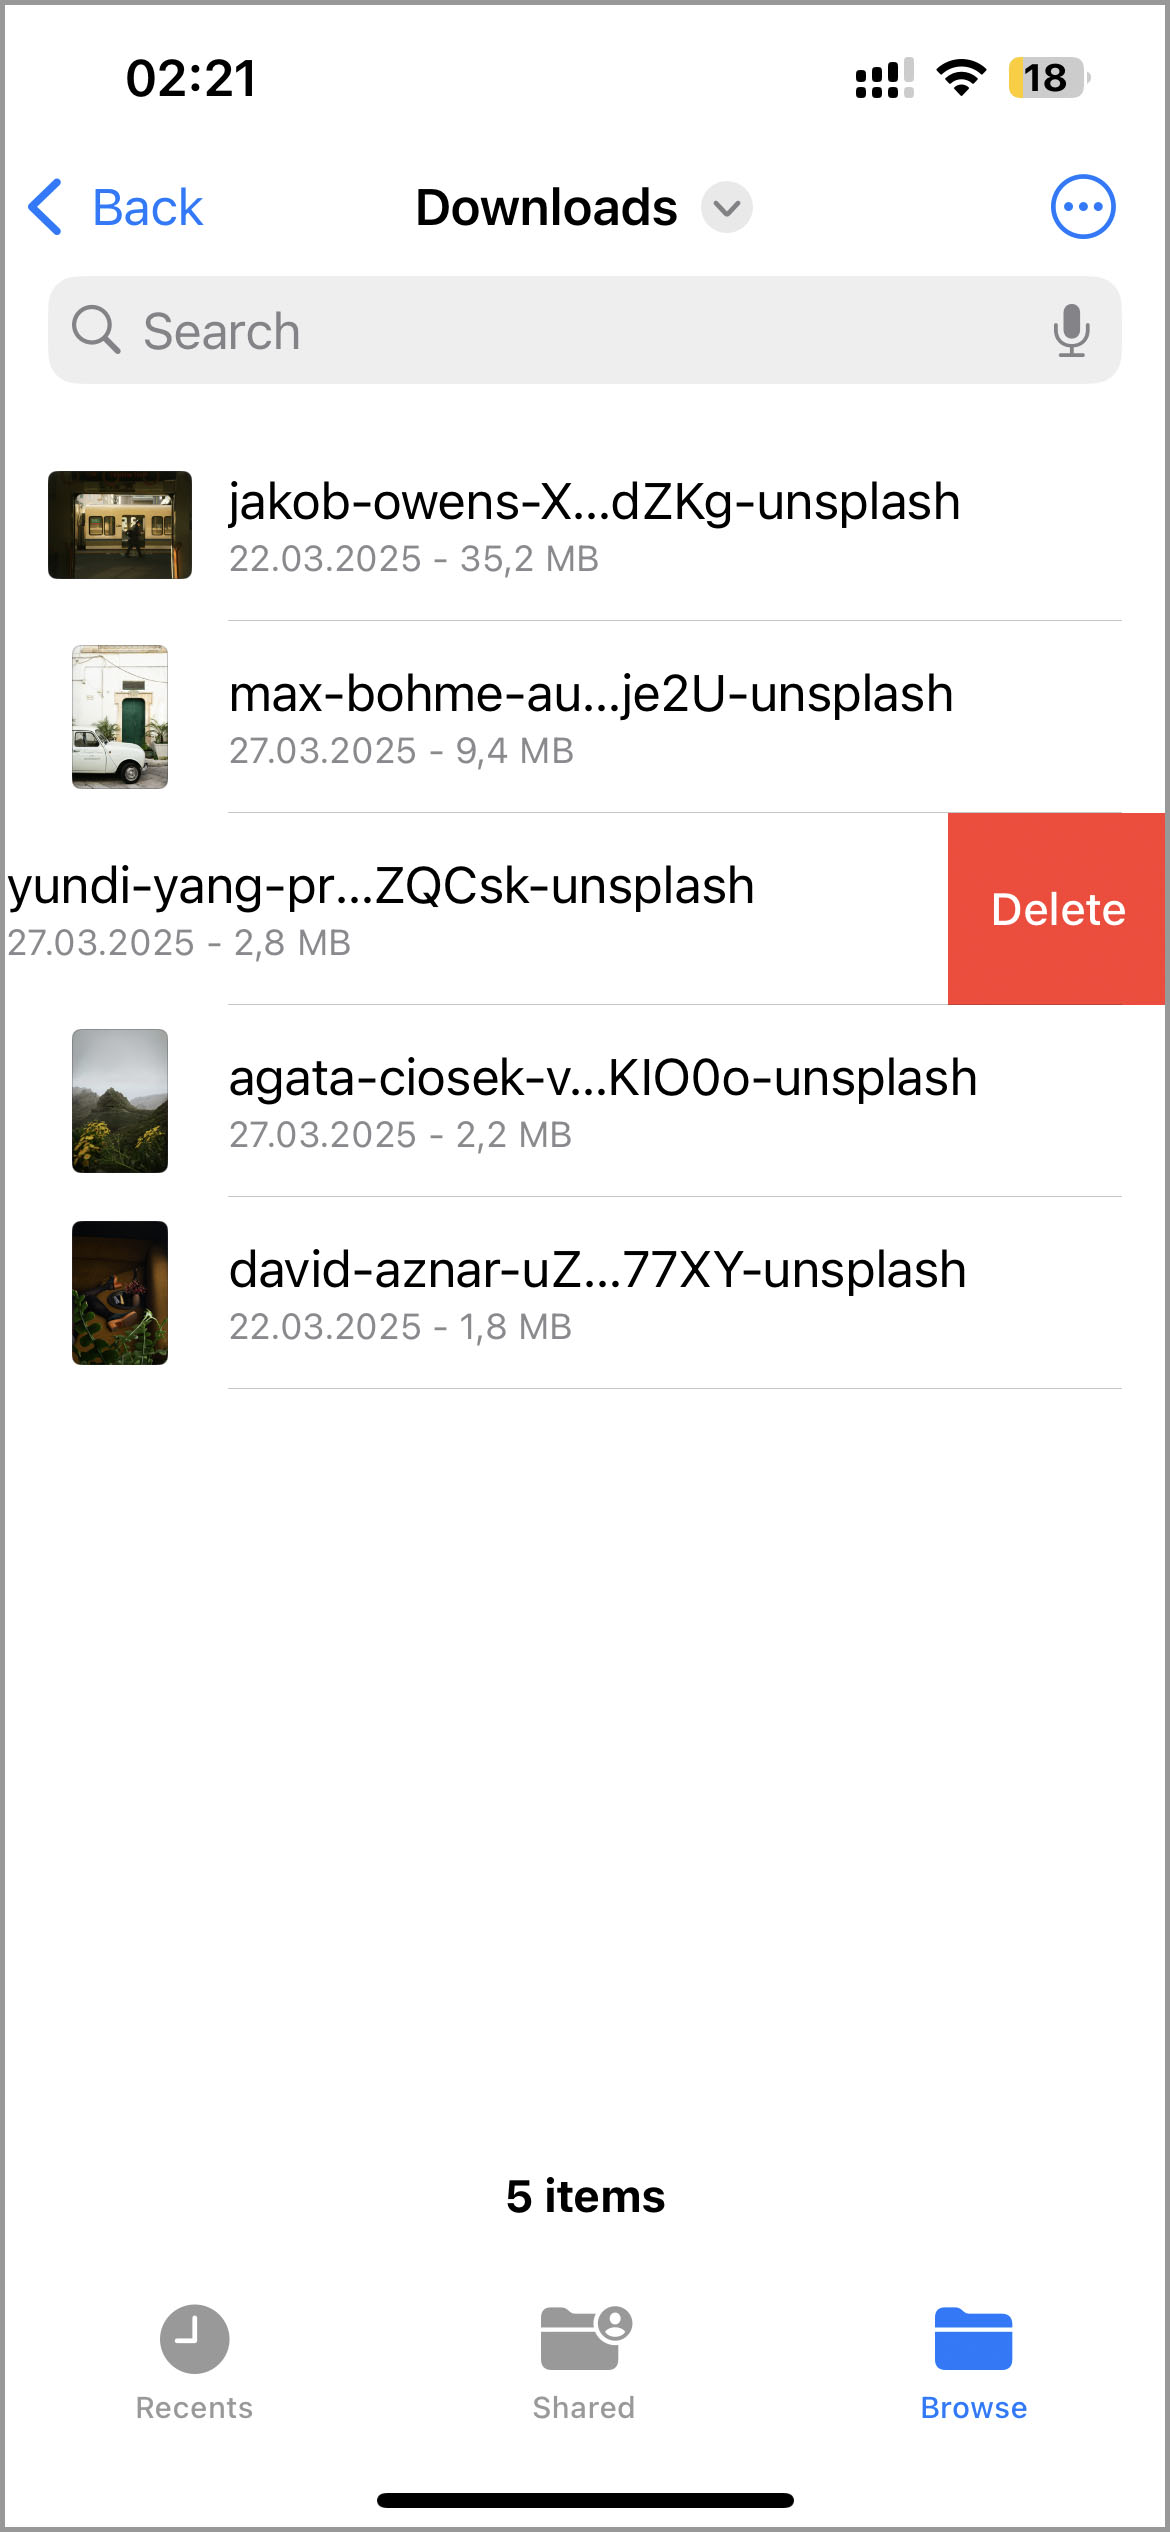
As you keep cleaning up your iPhone, you might find other random large files hiding in the Files app, like downloaded photos, videos, documents, etc. Unlike the Photos app, which has handy apps to help with cleanup, this area doesn’t. Apple limits third-party apps’ access to that folder, so you’ll need to search for and delete these files manually. Here’s how to do it:
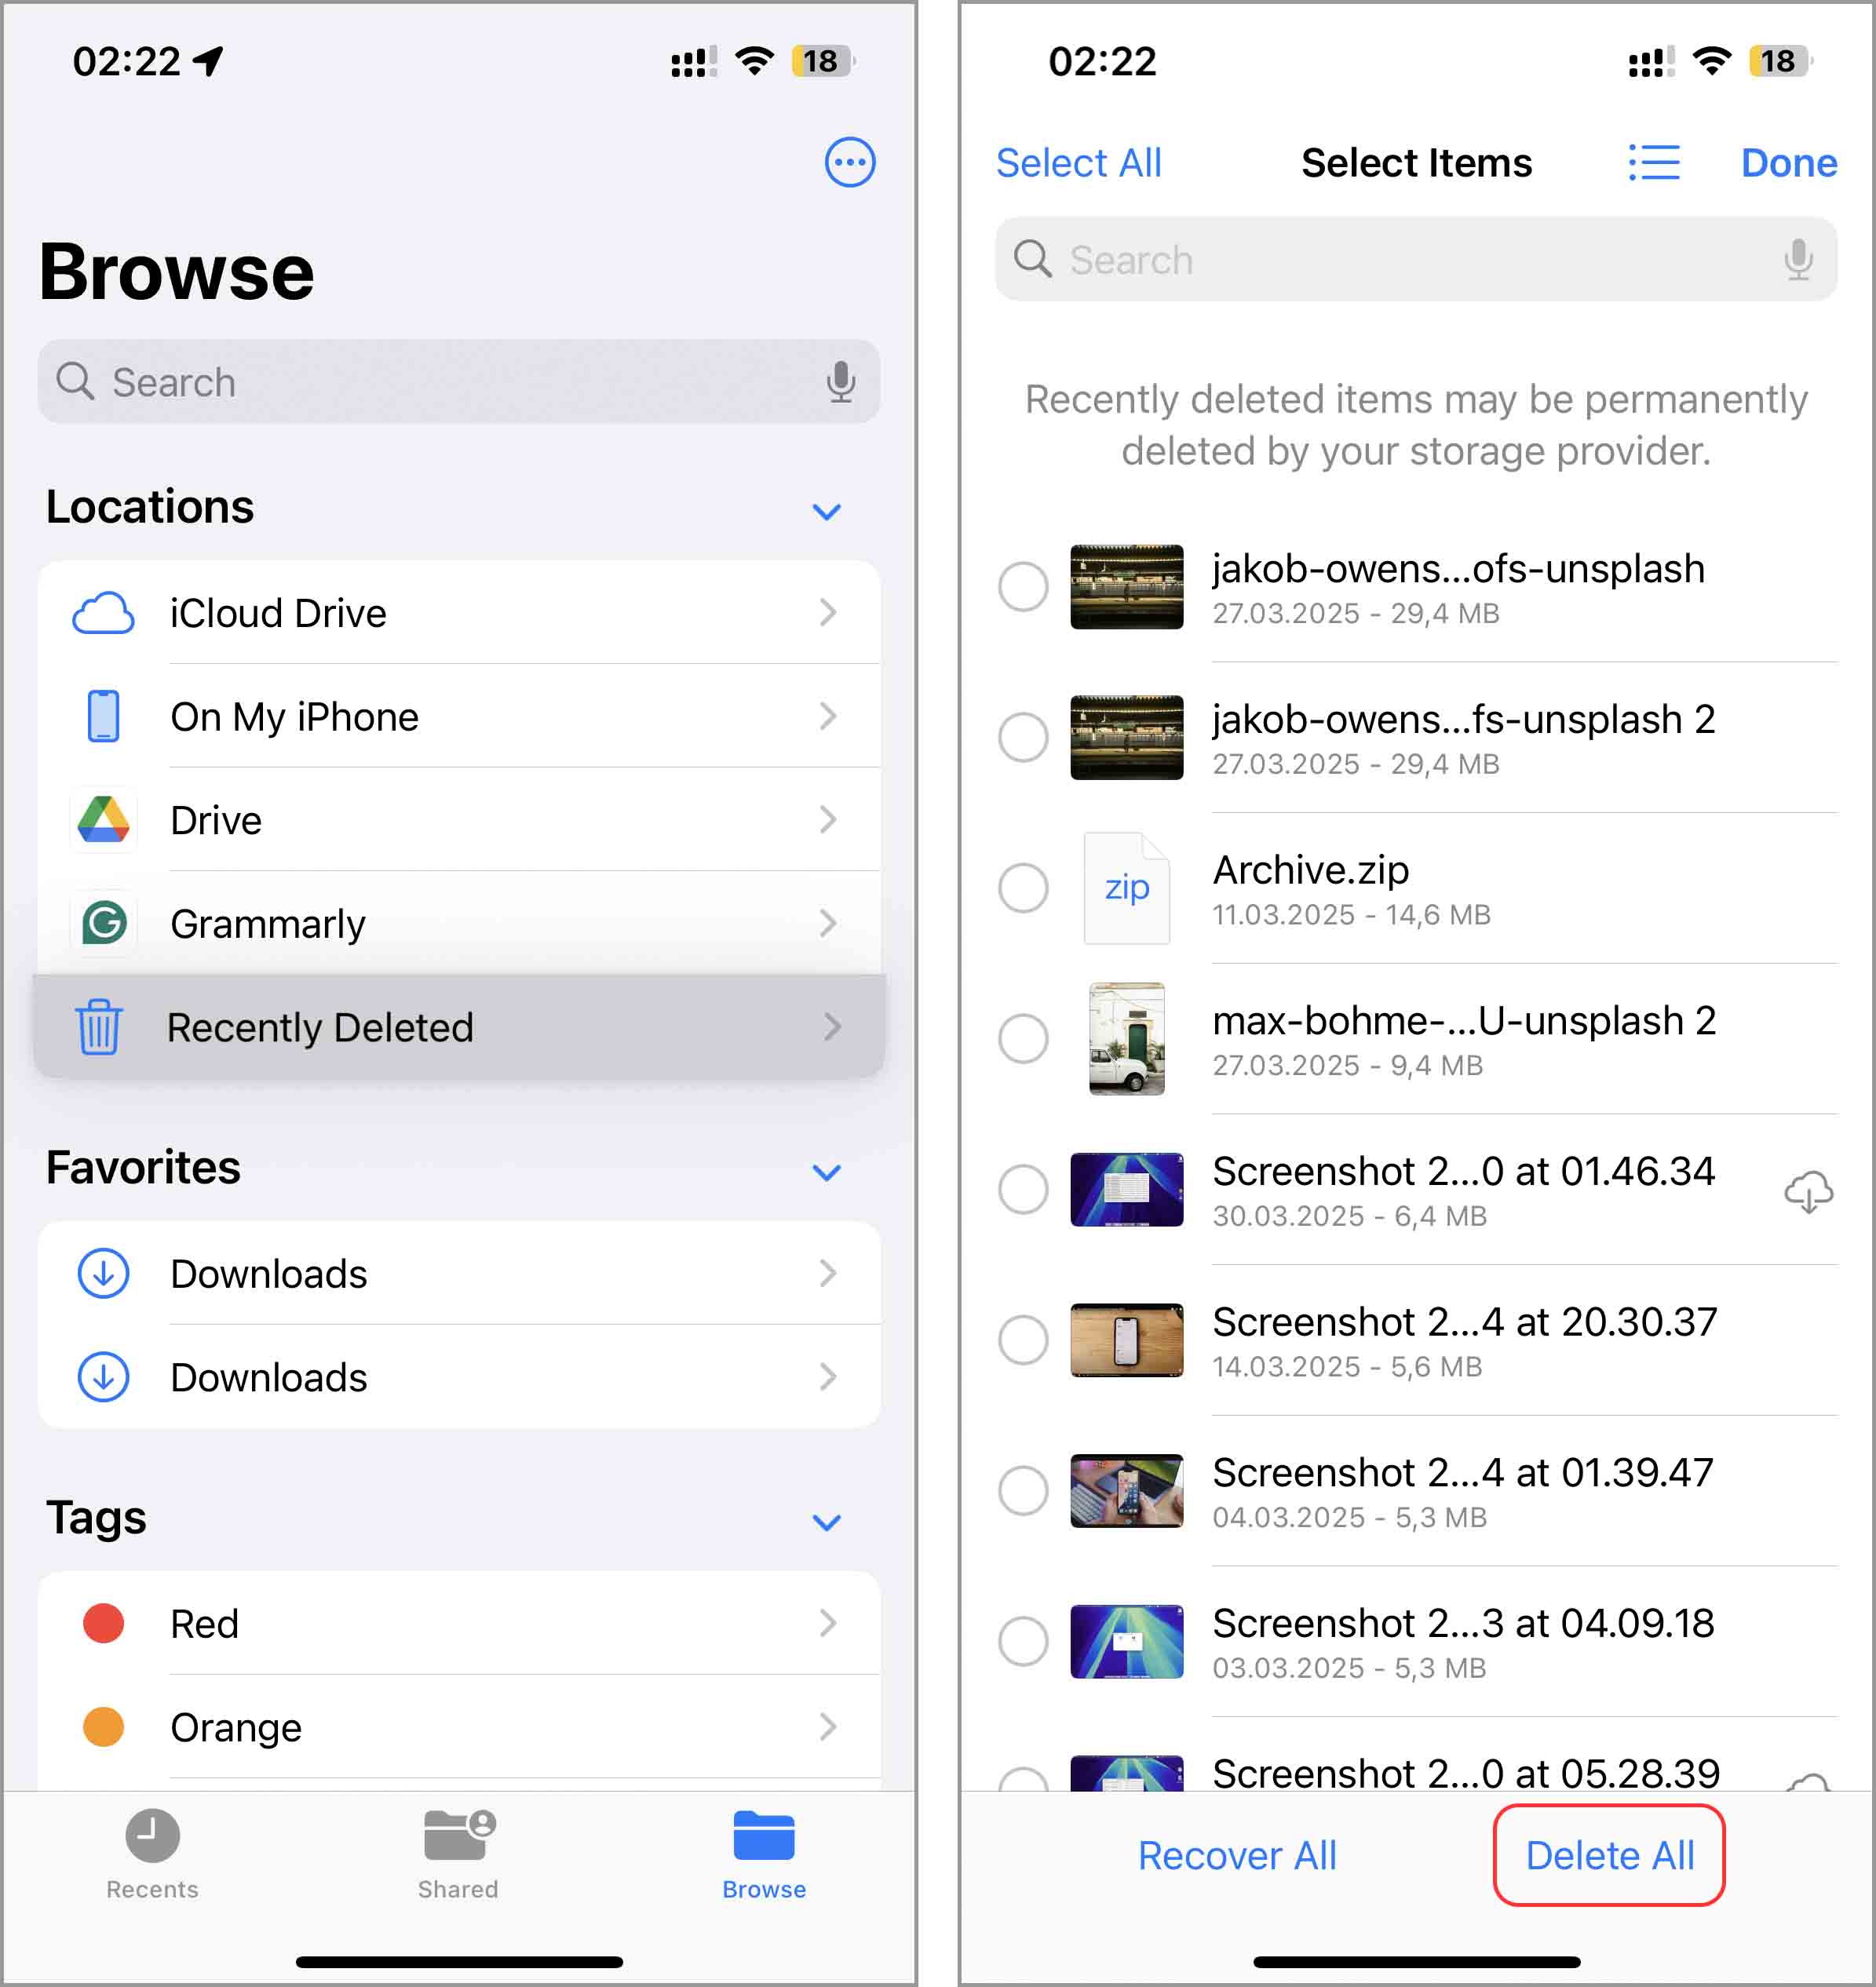
- Launch the Files app.
- Select the Browse tab.
- Navigate to the On My iPhone location or iCloud Drive, depending on what you use as the main storage on your iPhone.

- Browse through the various folders, keeping an eye out for files that are large or no longer needed.
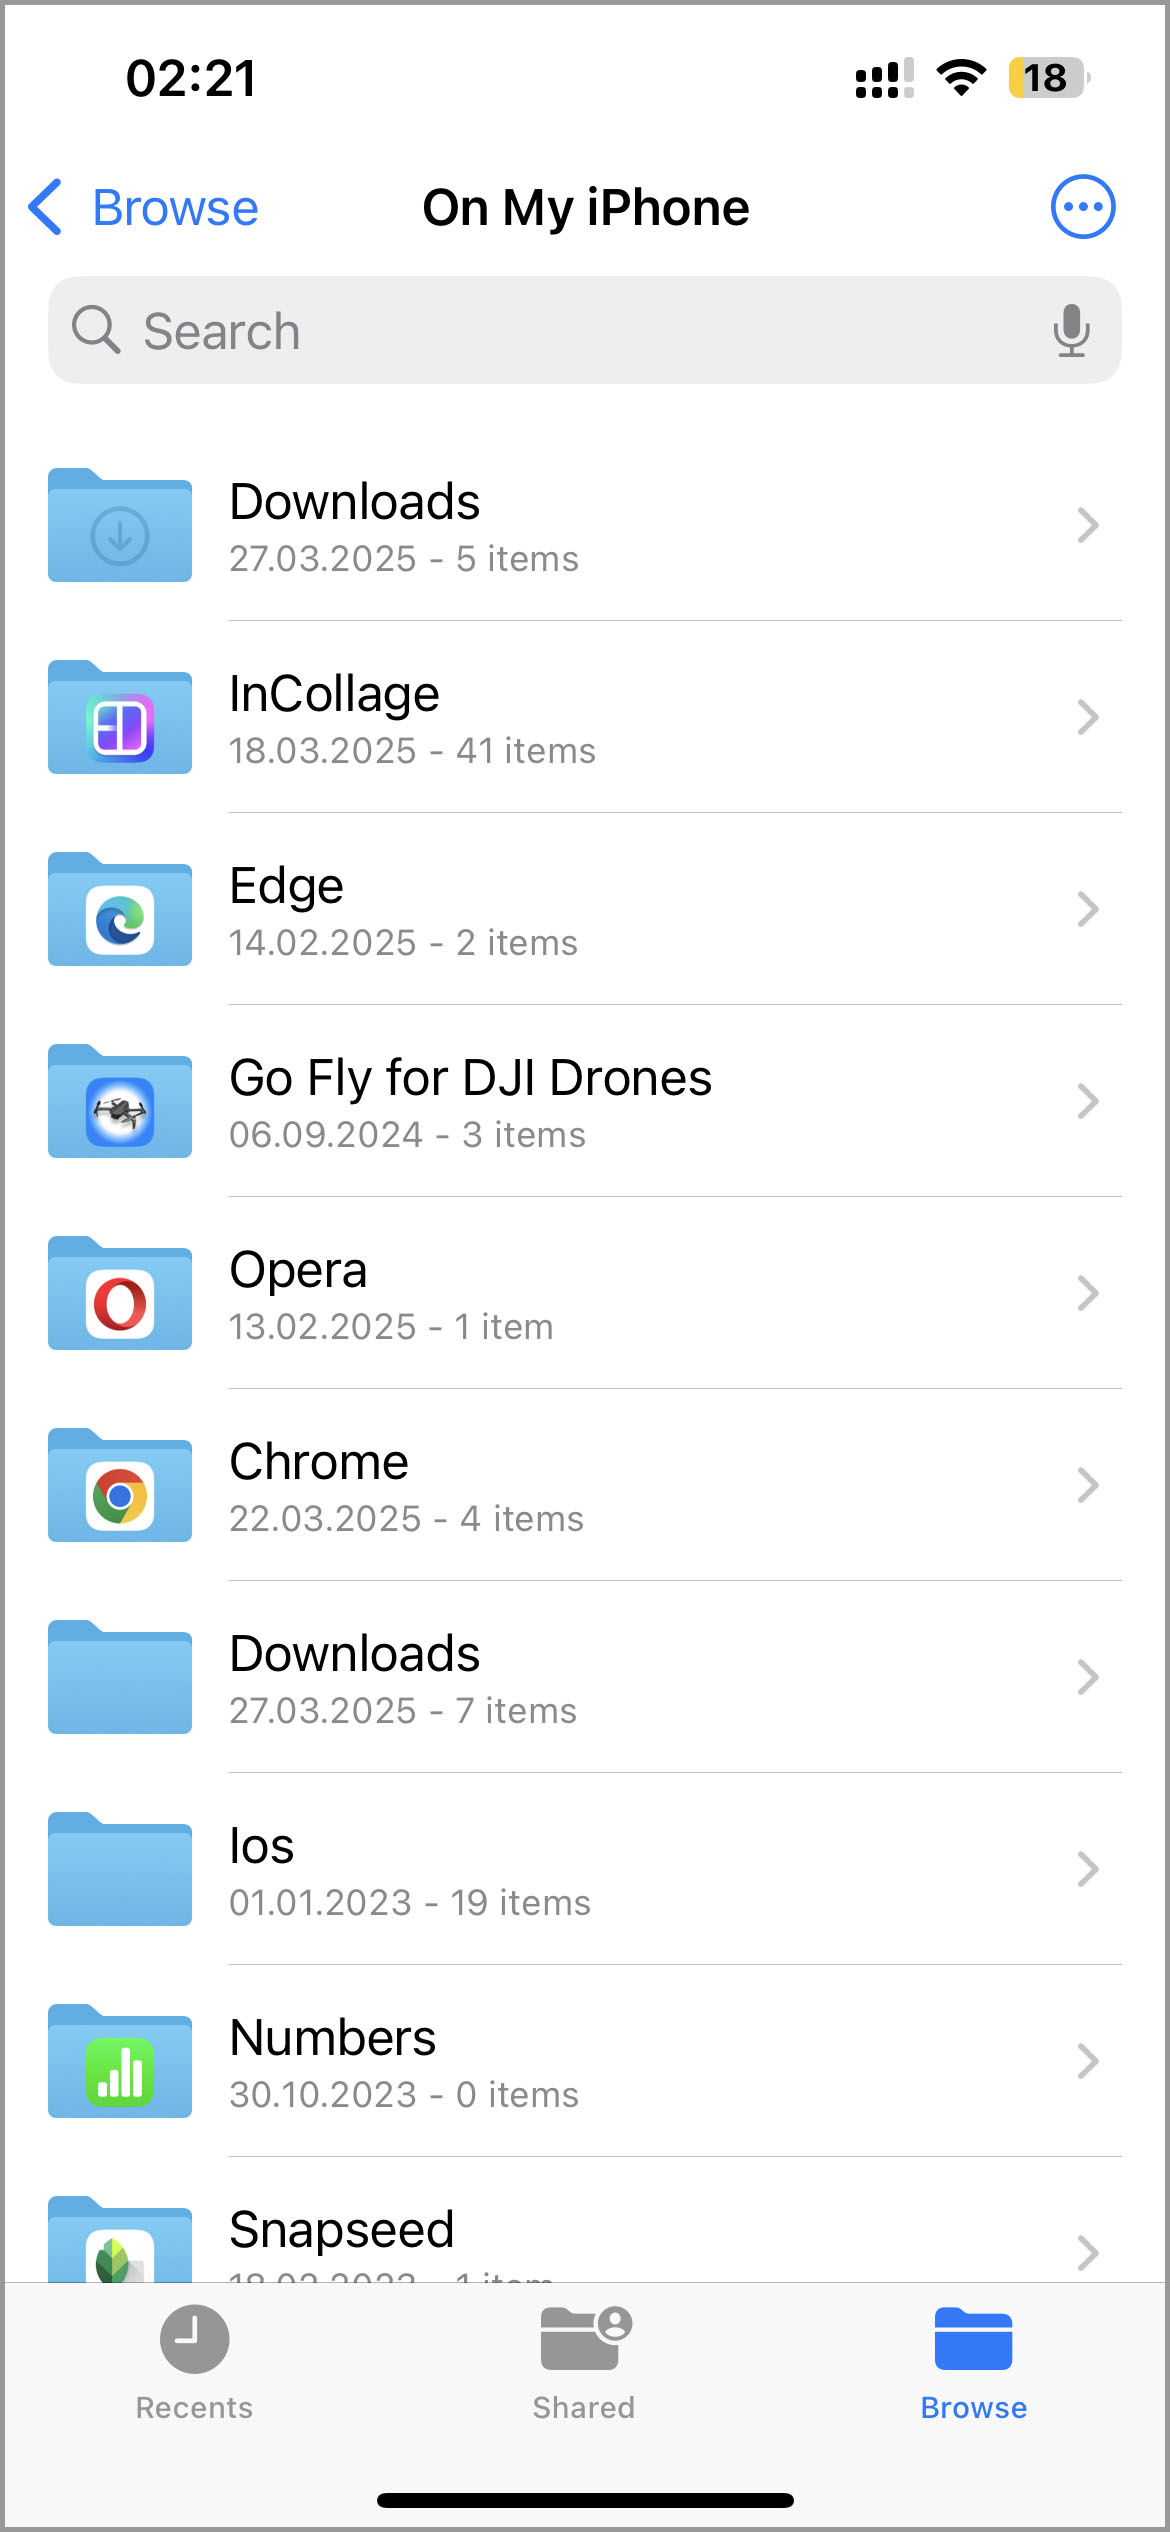
- Delete all unnecessary files. Pro tip: Hold your finger on a file that does not have a cloud icon next to it (such files are stored both in the cloud and locally), and tap Remove Download.


For example, we freed up about 2 GB of storage by deleting files in the Edge folder. They were old downloads we forgot about, but they were still taking up valuable space on the iPhone.
Other forms of media, like downloaded documents, music, podcasts, or movies, can also be significant storage hogs. The best way to manage these files is to go directly to the apps you used to download or consume them (the Music app for songs, the Podcasts app for podcasts, and so on).
1.3 Remove Large Attachments
Large attachments in your Messages app can also take up an excessive amount of storage. That’s because modern high-res photos and videos, not to mention GIFs and other media, can quickly balloon in file size. While these attachments may have been important when received, chances are you don’t need them on your device any longer. Unlike files stored in the Photos or Files app, you manage these files differently.
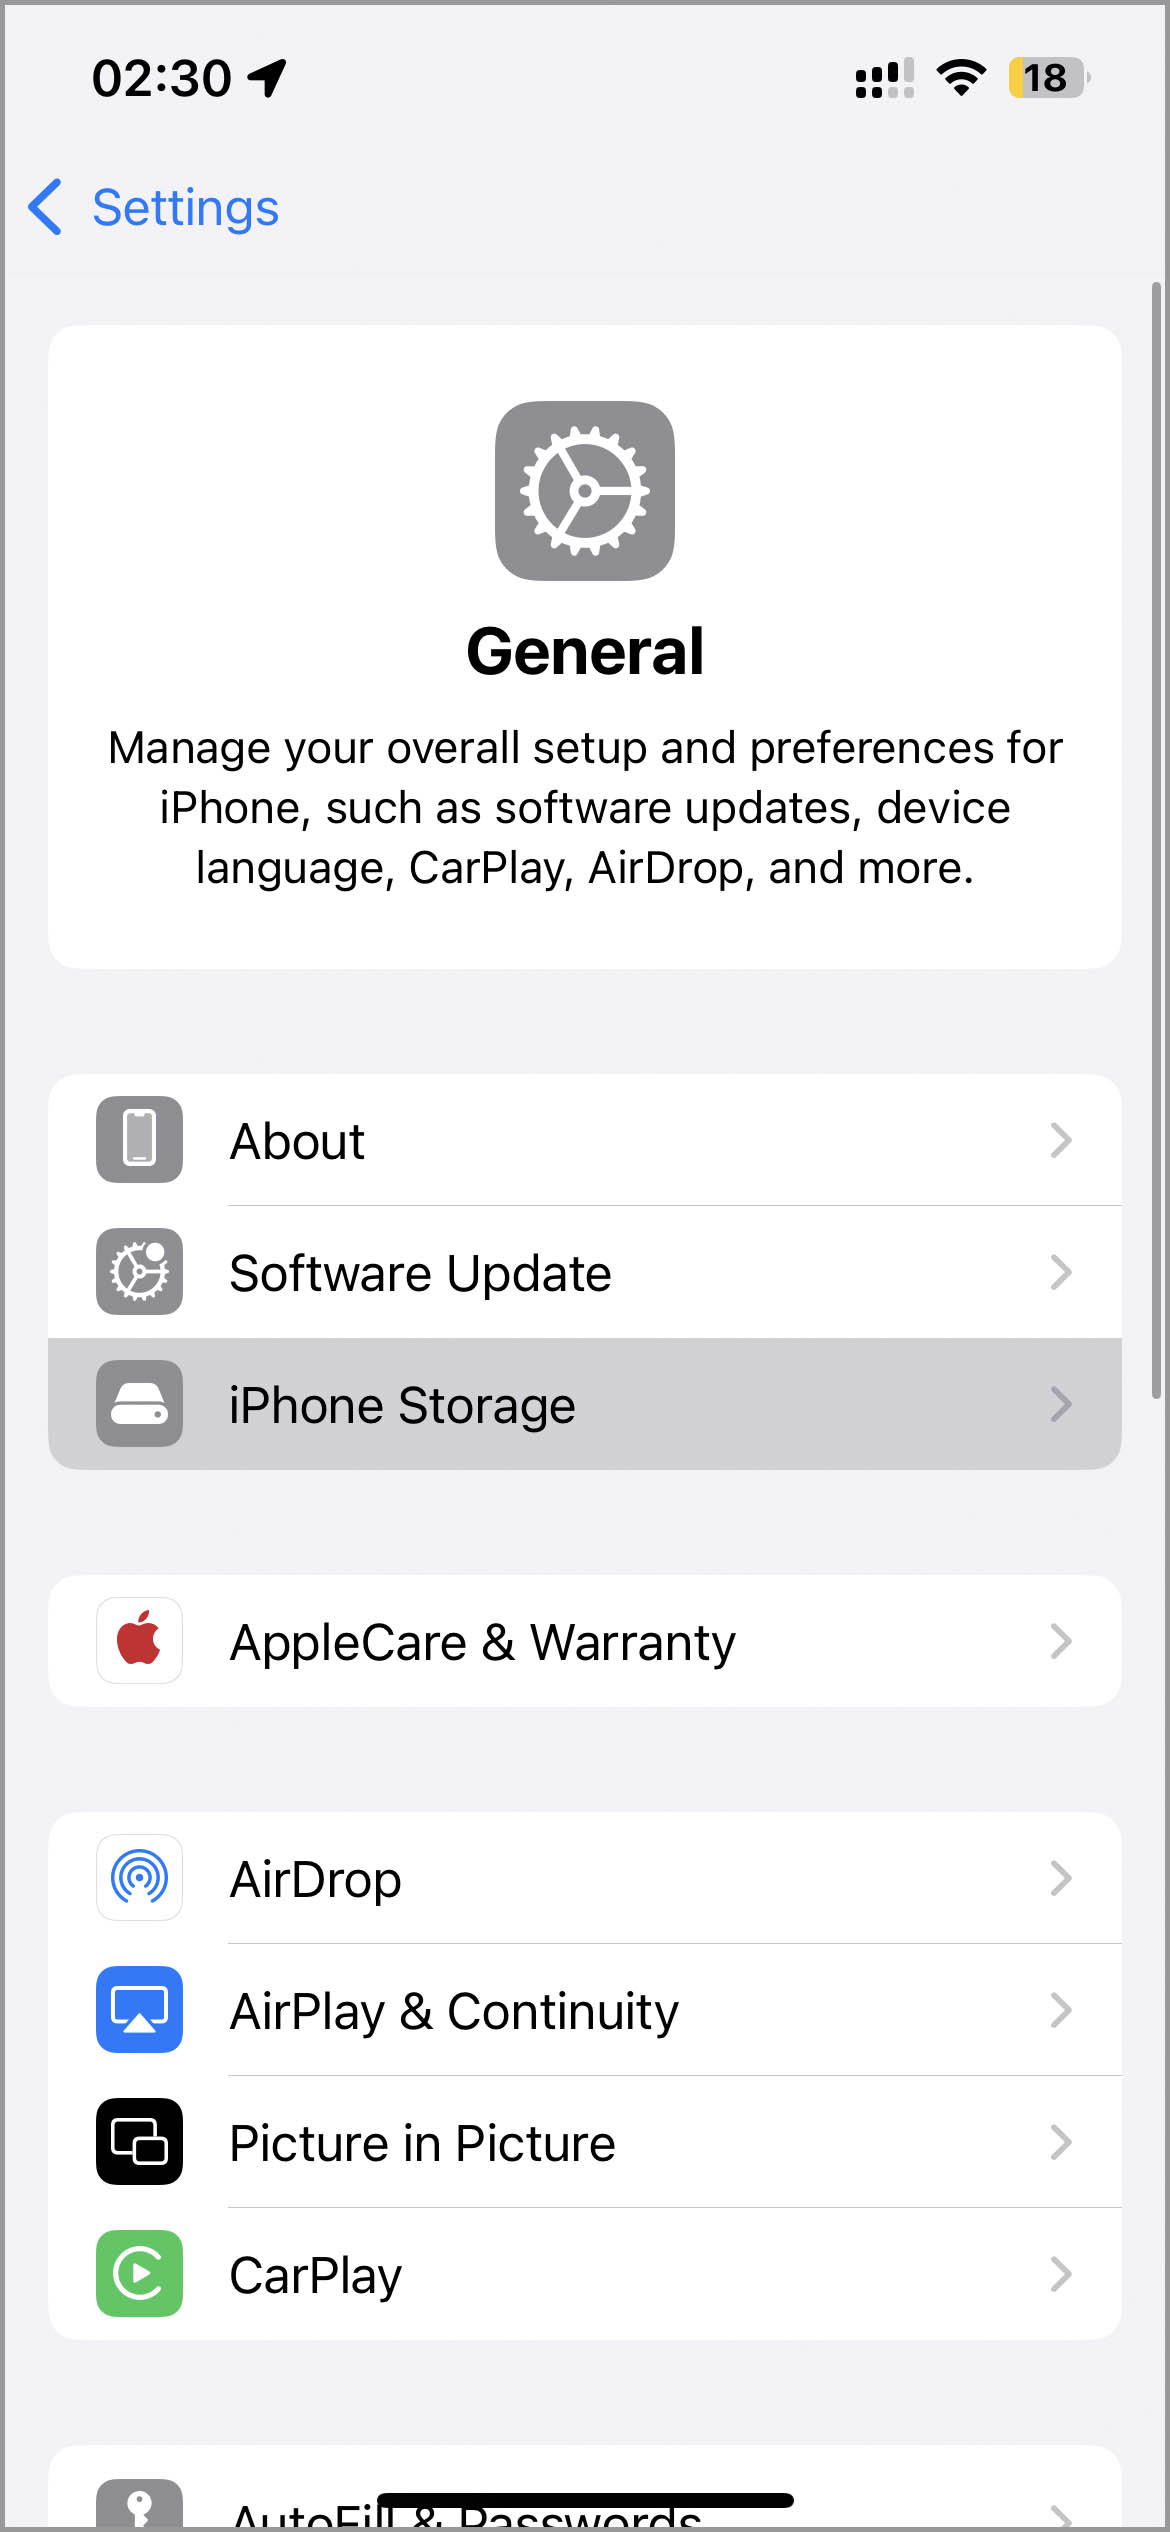
- First, navigate to Settings > General > iPhone Storage.
- Then, scroll through the list of apps and tap Messages.

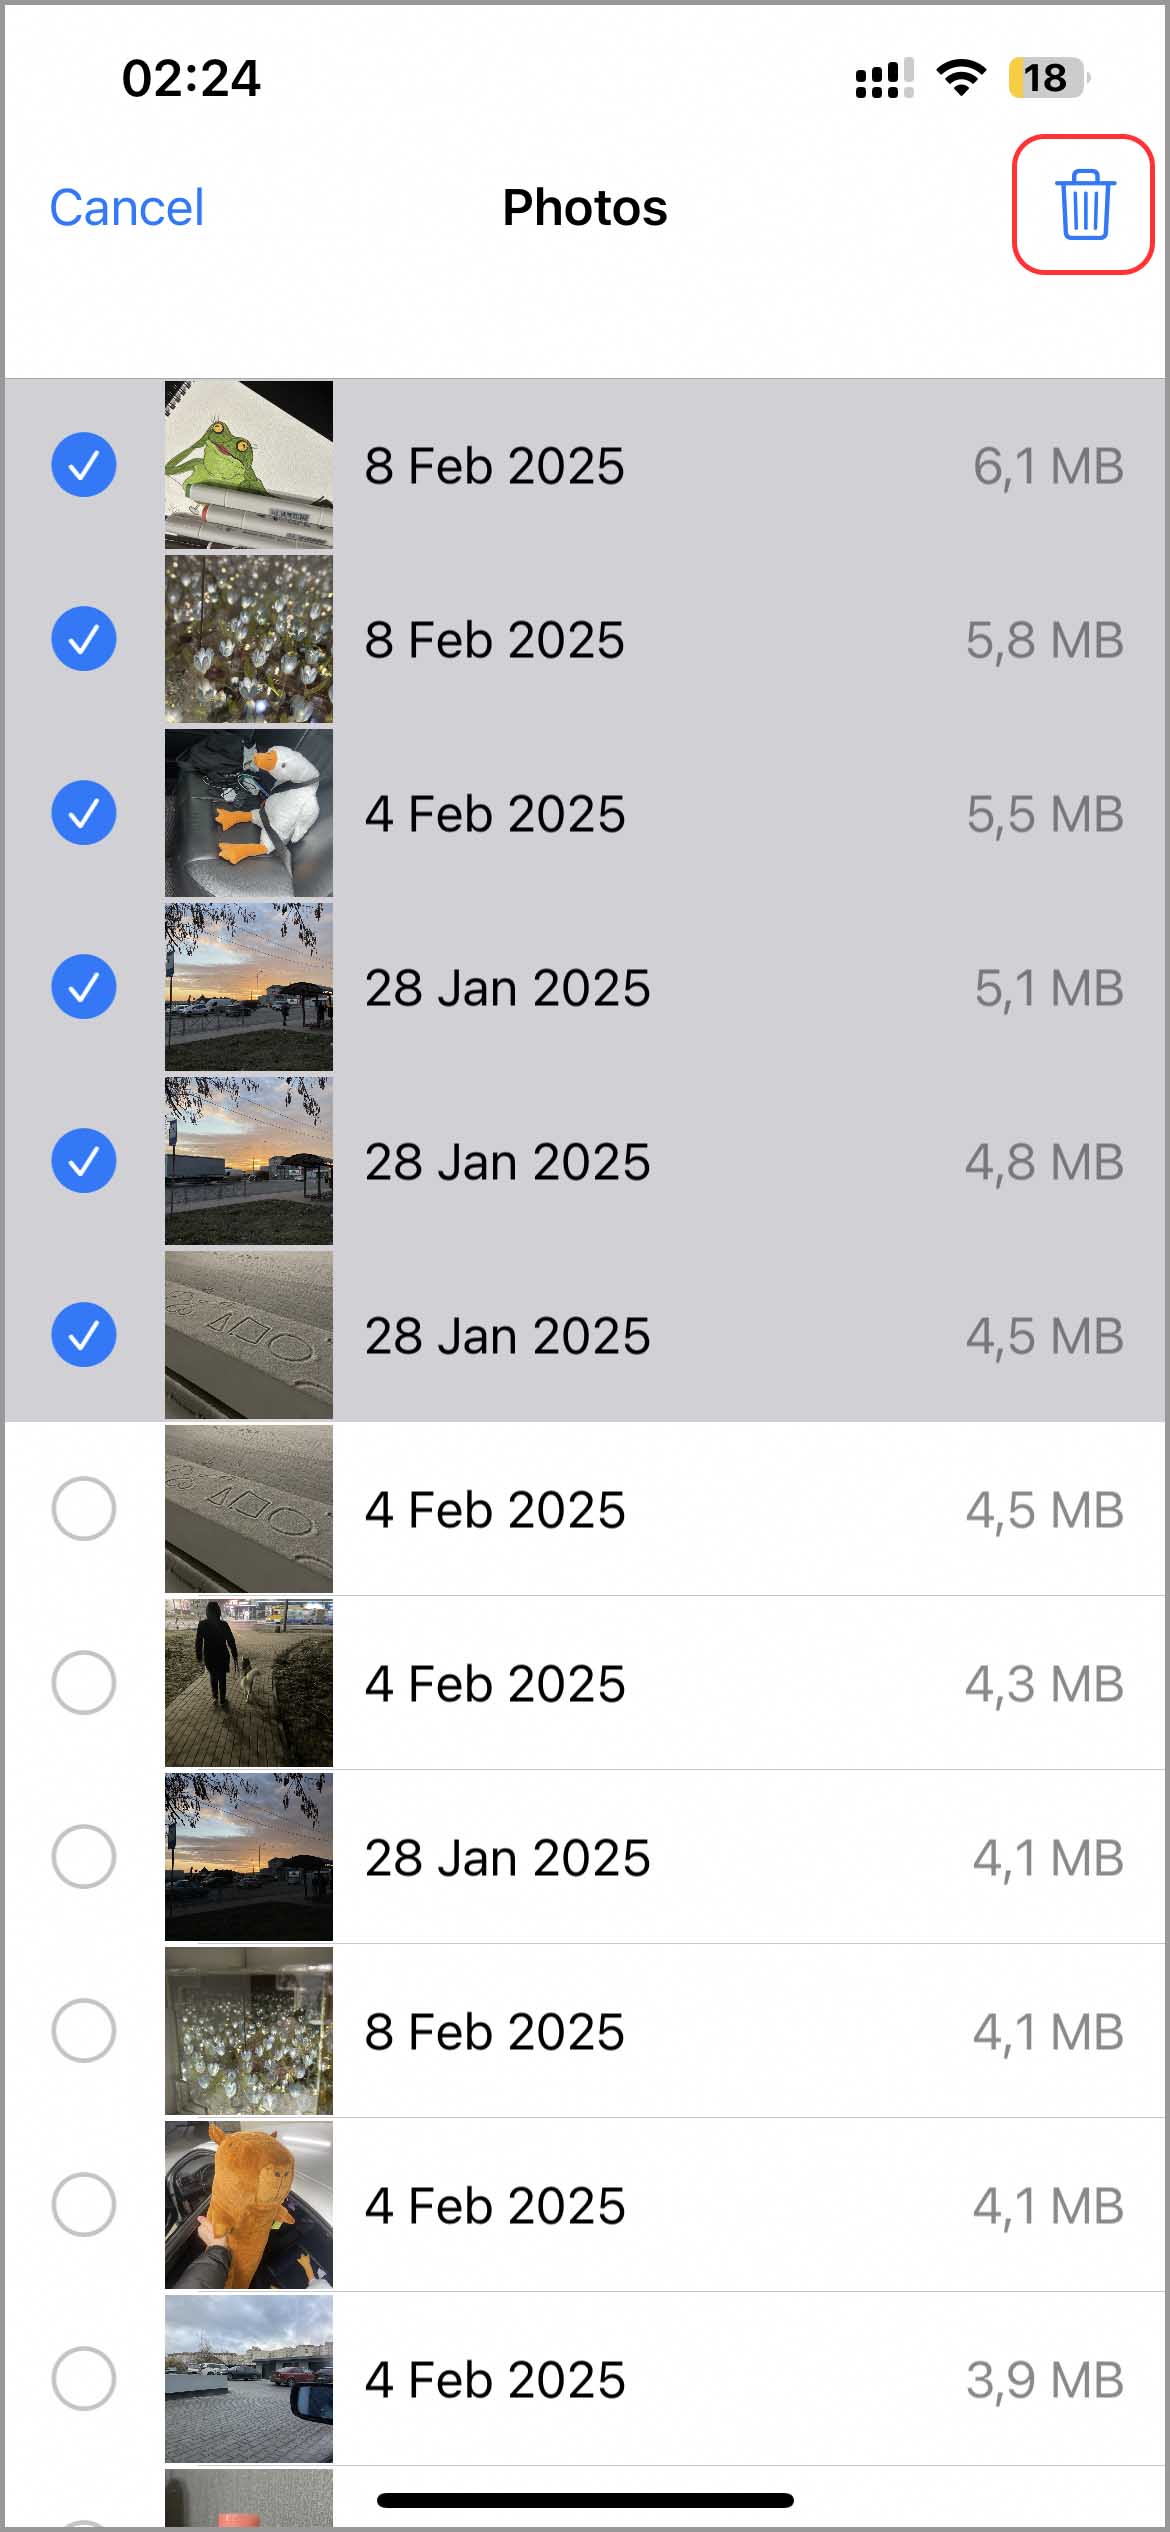
- Head down to the Documents section. Here, you will find several categories, such as photos, videos, GIFs and stickers. Select one category, and you will see a cumulative list of attachments from all contacts that fall under that category.

- Tap the Edit button in the top-right corner. This action will allow you to mark files for deletion.
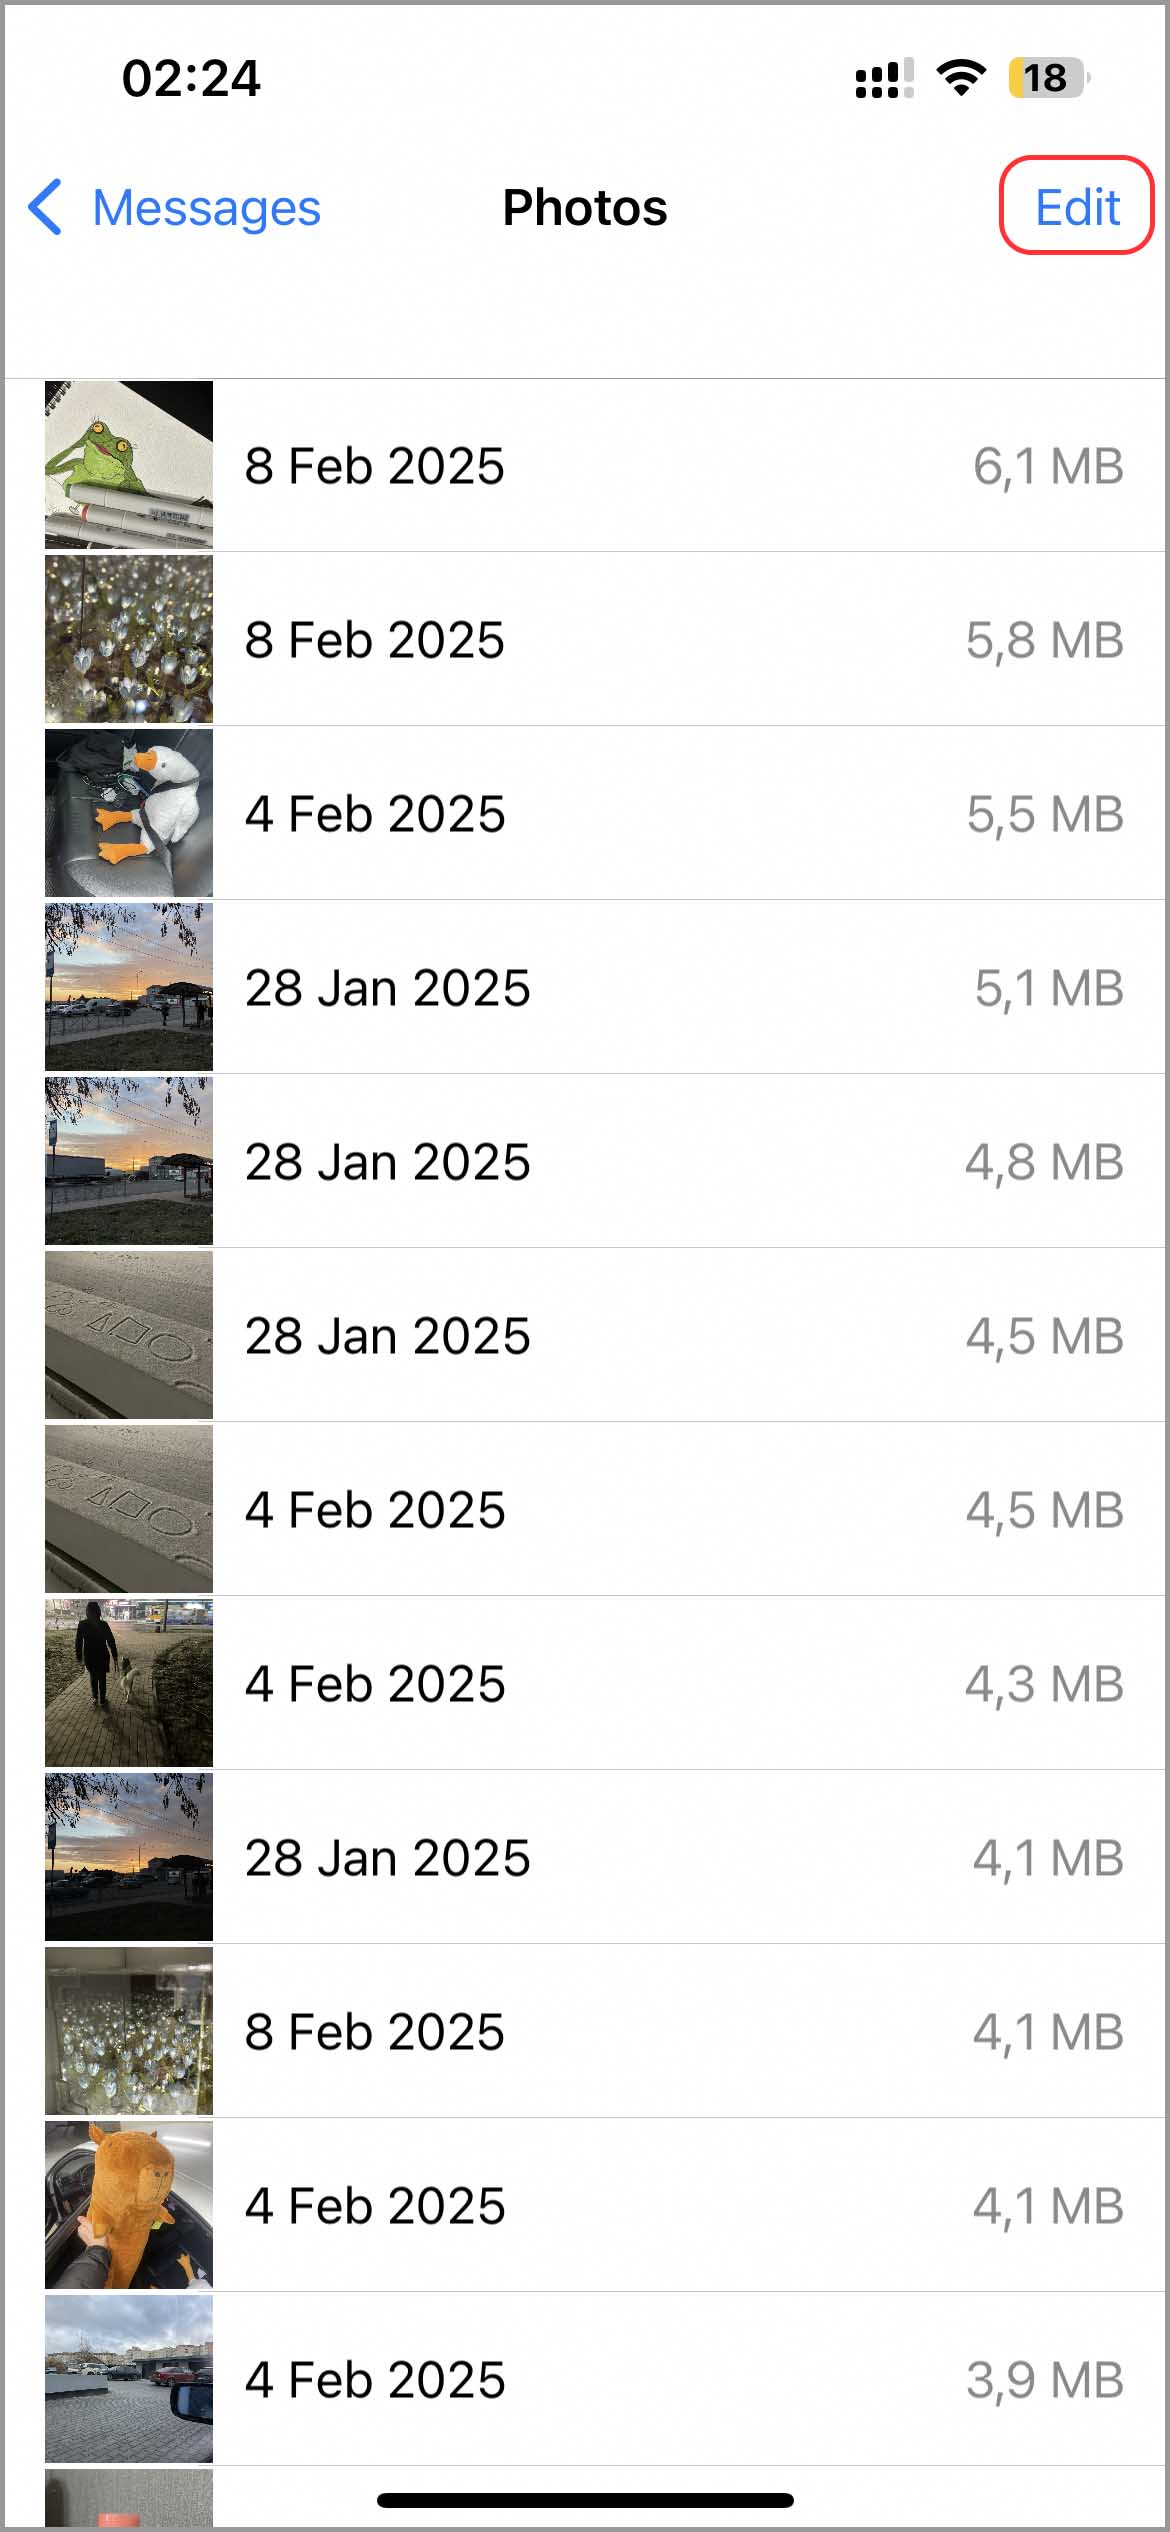
- Check the boxes next to the files you want to remove and click the trash icon to delete them.


Method 2: Get Rid of the Cache
| Ease of Implementation | Time Required | Potential Storage Savings |
| Fairly Easy | Fairly Quick | Moderate |
One of the quickest ways to free up space is by clearing your cached data, which are legitimate files stored to speed up tasks. Over time, these files can accumulate and stop being useful, doing nothing besides gobbling up your valuable storage space.
2.1 Clear Browser Cache
Your web browser is very likely the biggest generator of cache files among all the apps on your phone. And it’s worth noting that all iOS web browsers are built on Safari’s engine. So, taking care of Safari first is an excellent decision. Here’s what you need to do:
- Launch the Settings app on your iPhone.
- Scroll down and select the Apps item to open a list of all applications. Find Safari to open its settings.
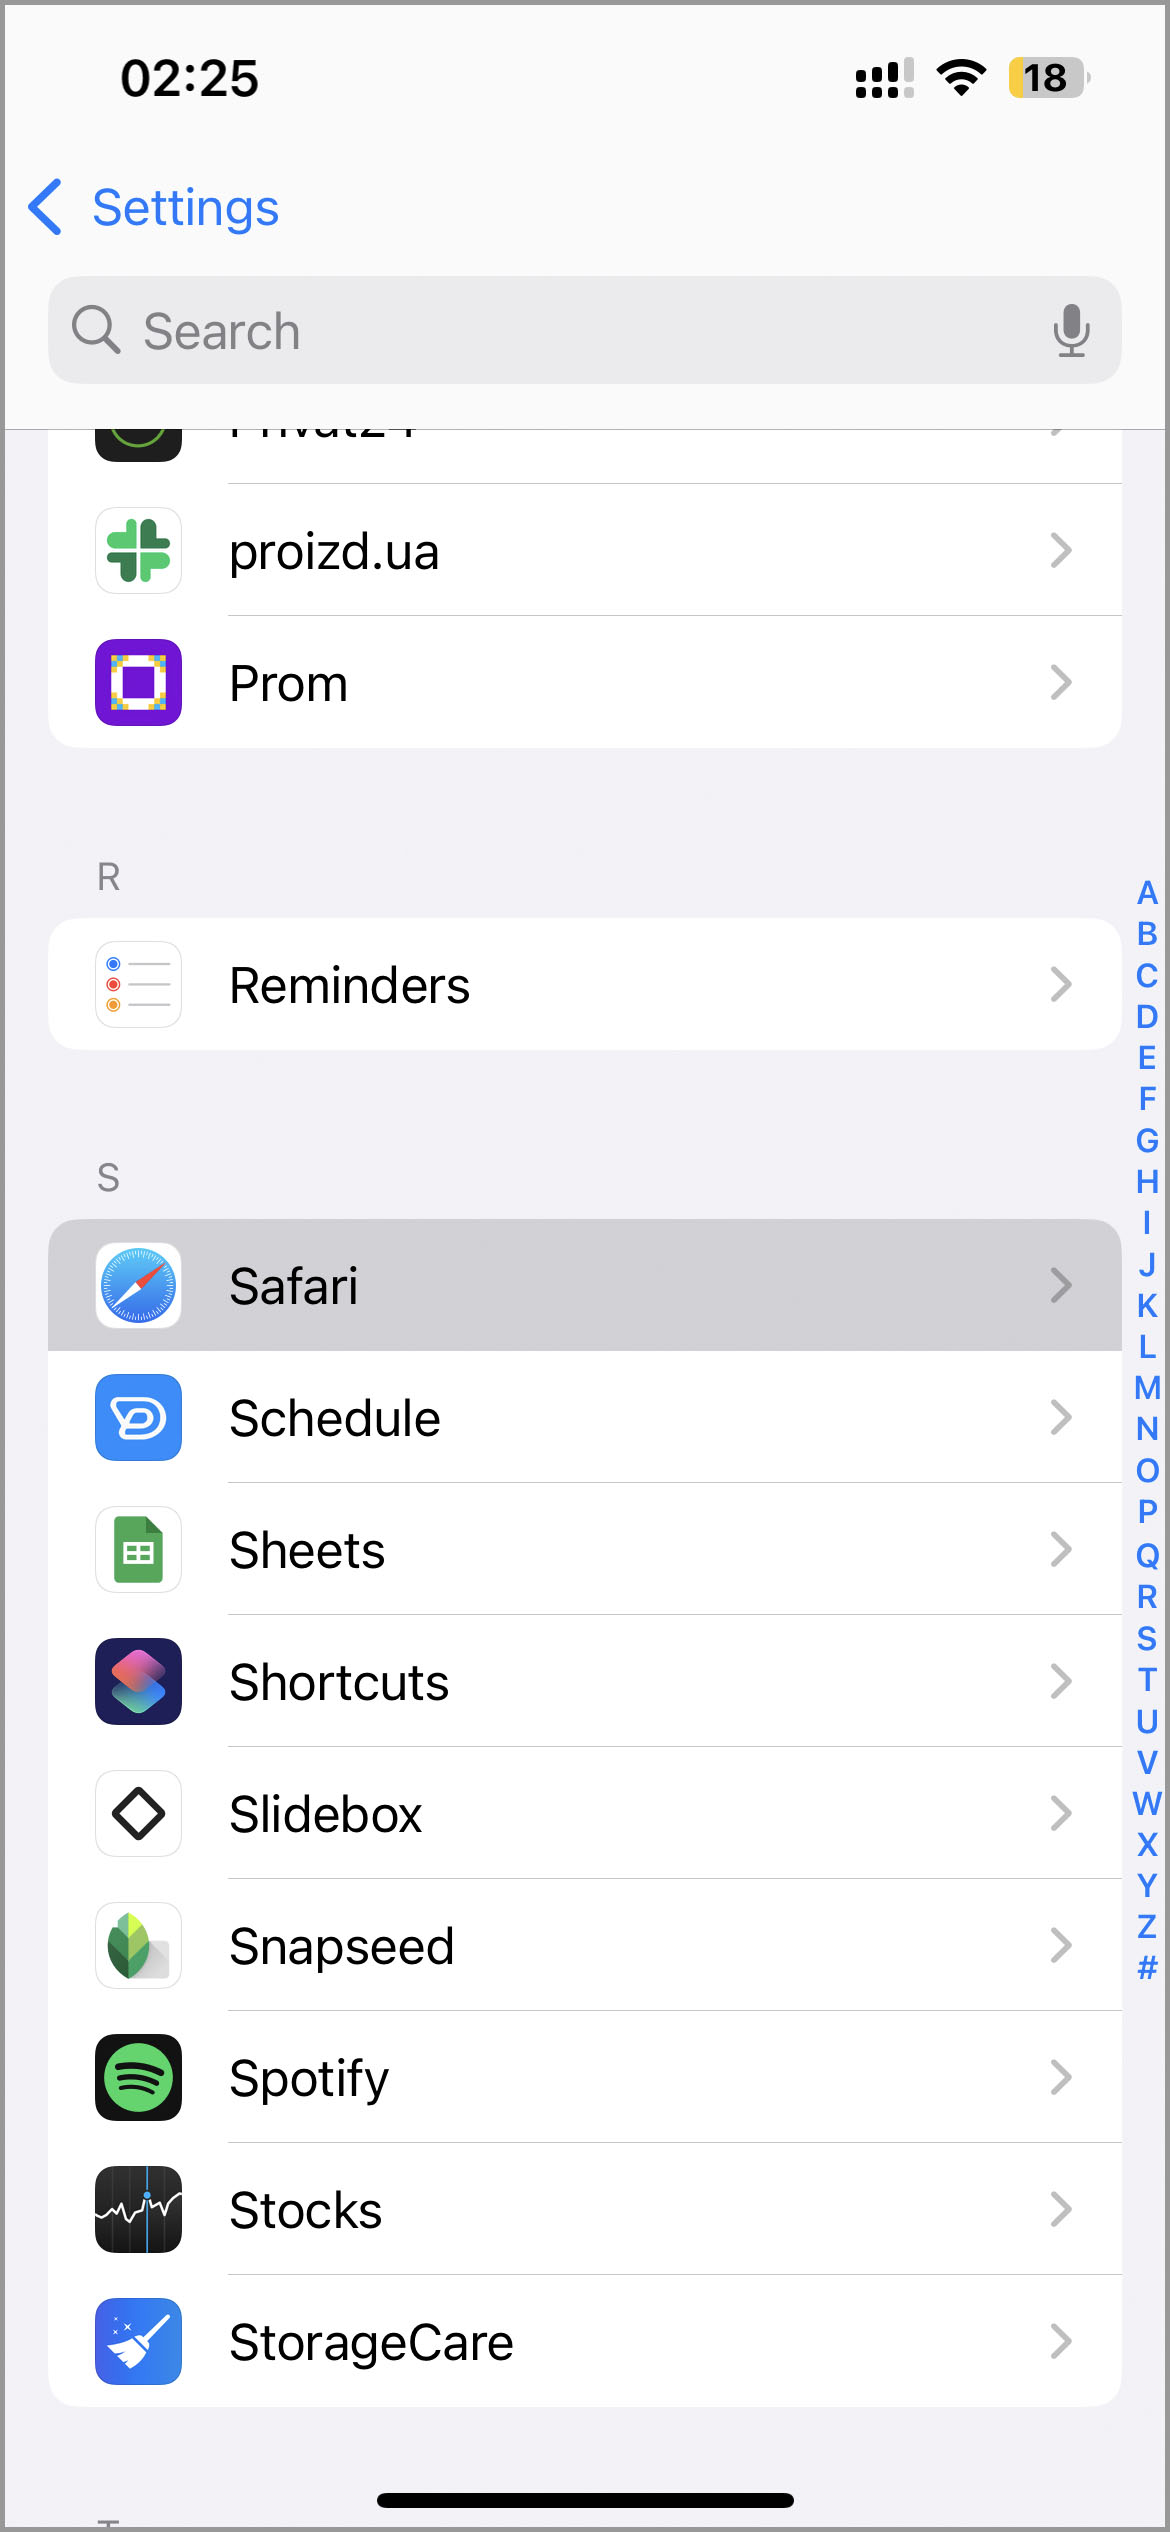
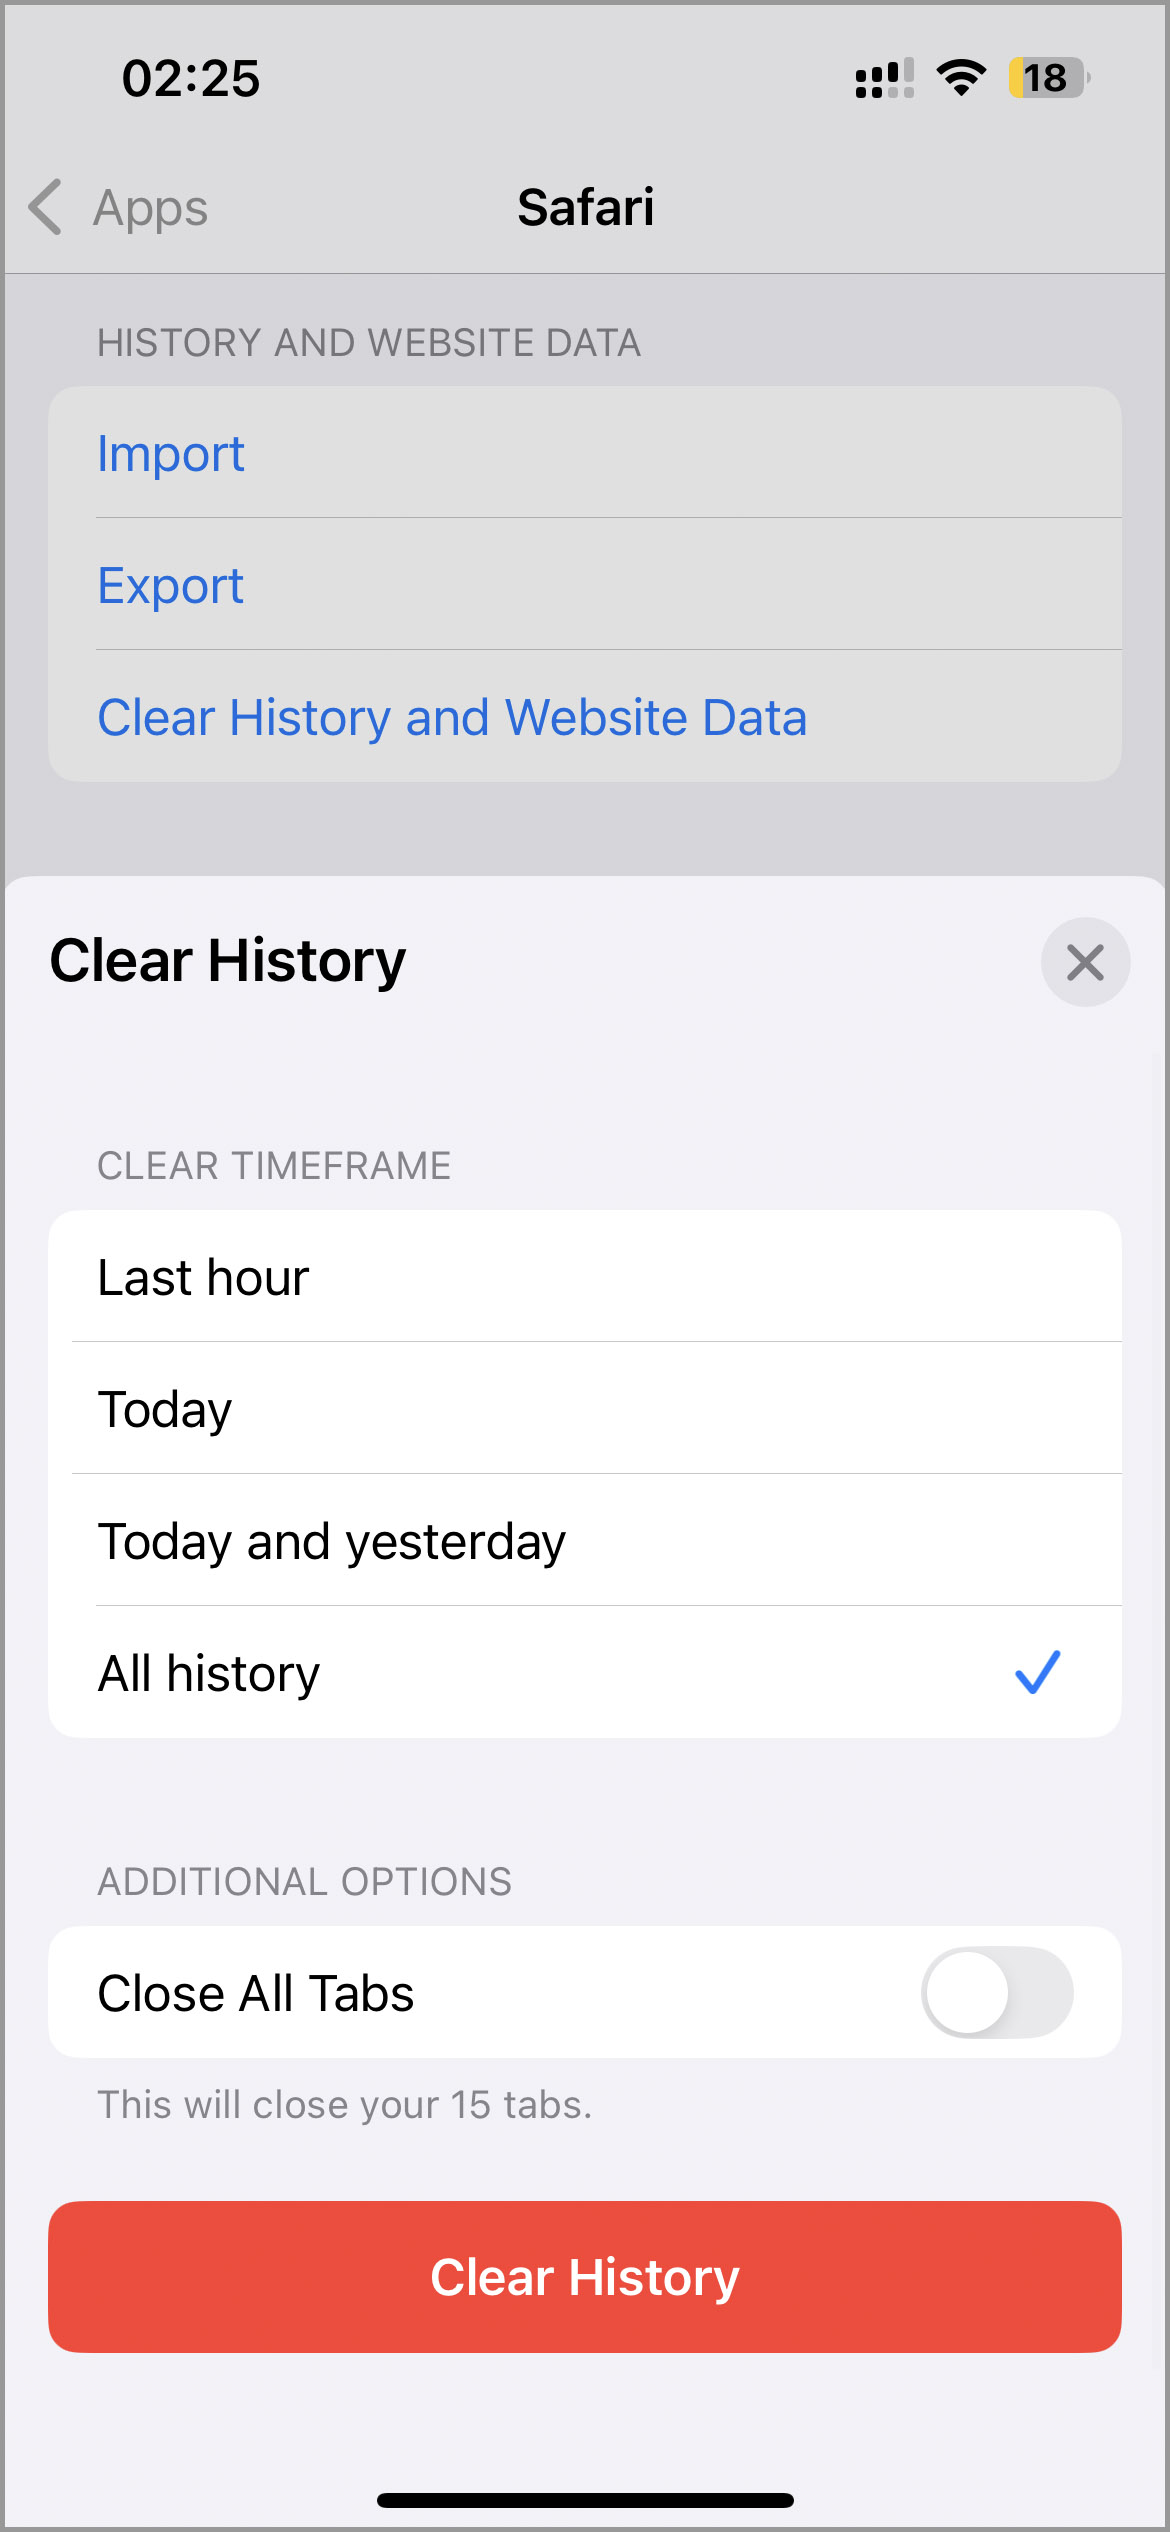
- Scroll down and select the Clear History and Website Data option.

- Choose to clear all history and tap the Clear History button.


If you use other browsers like Chrome, Opera, or others, you can clear their cache, too, but not through your iPhone’s main settings. You’ll need to go into each app’s settings and look for an option like “Clear browser cache,” “Delete cache,” or something along those lines. It’s usually easy to find.
2.2 Clear Apps Cache
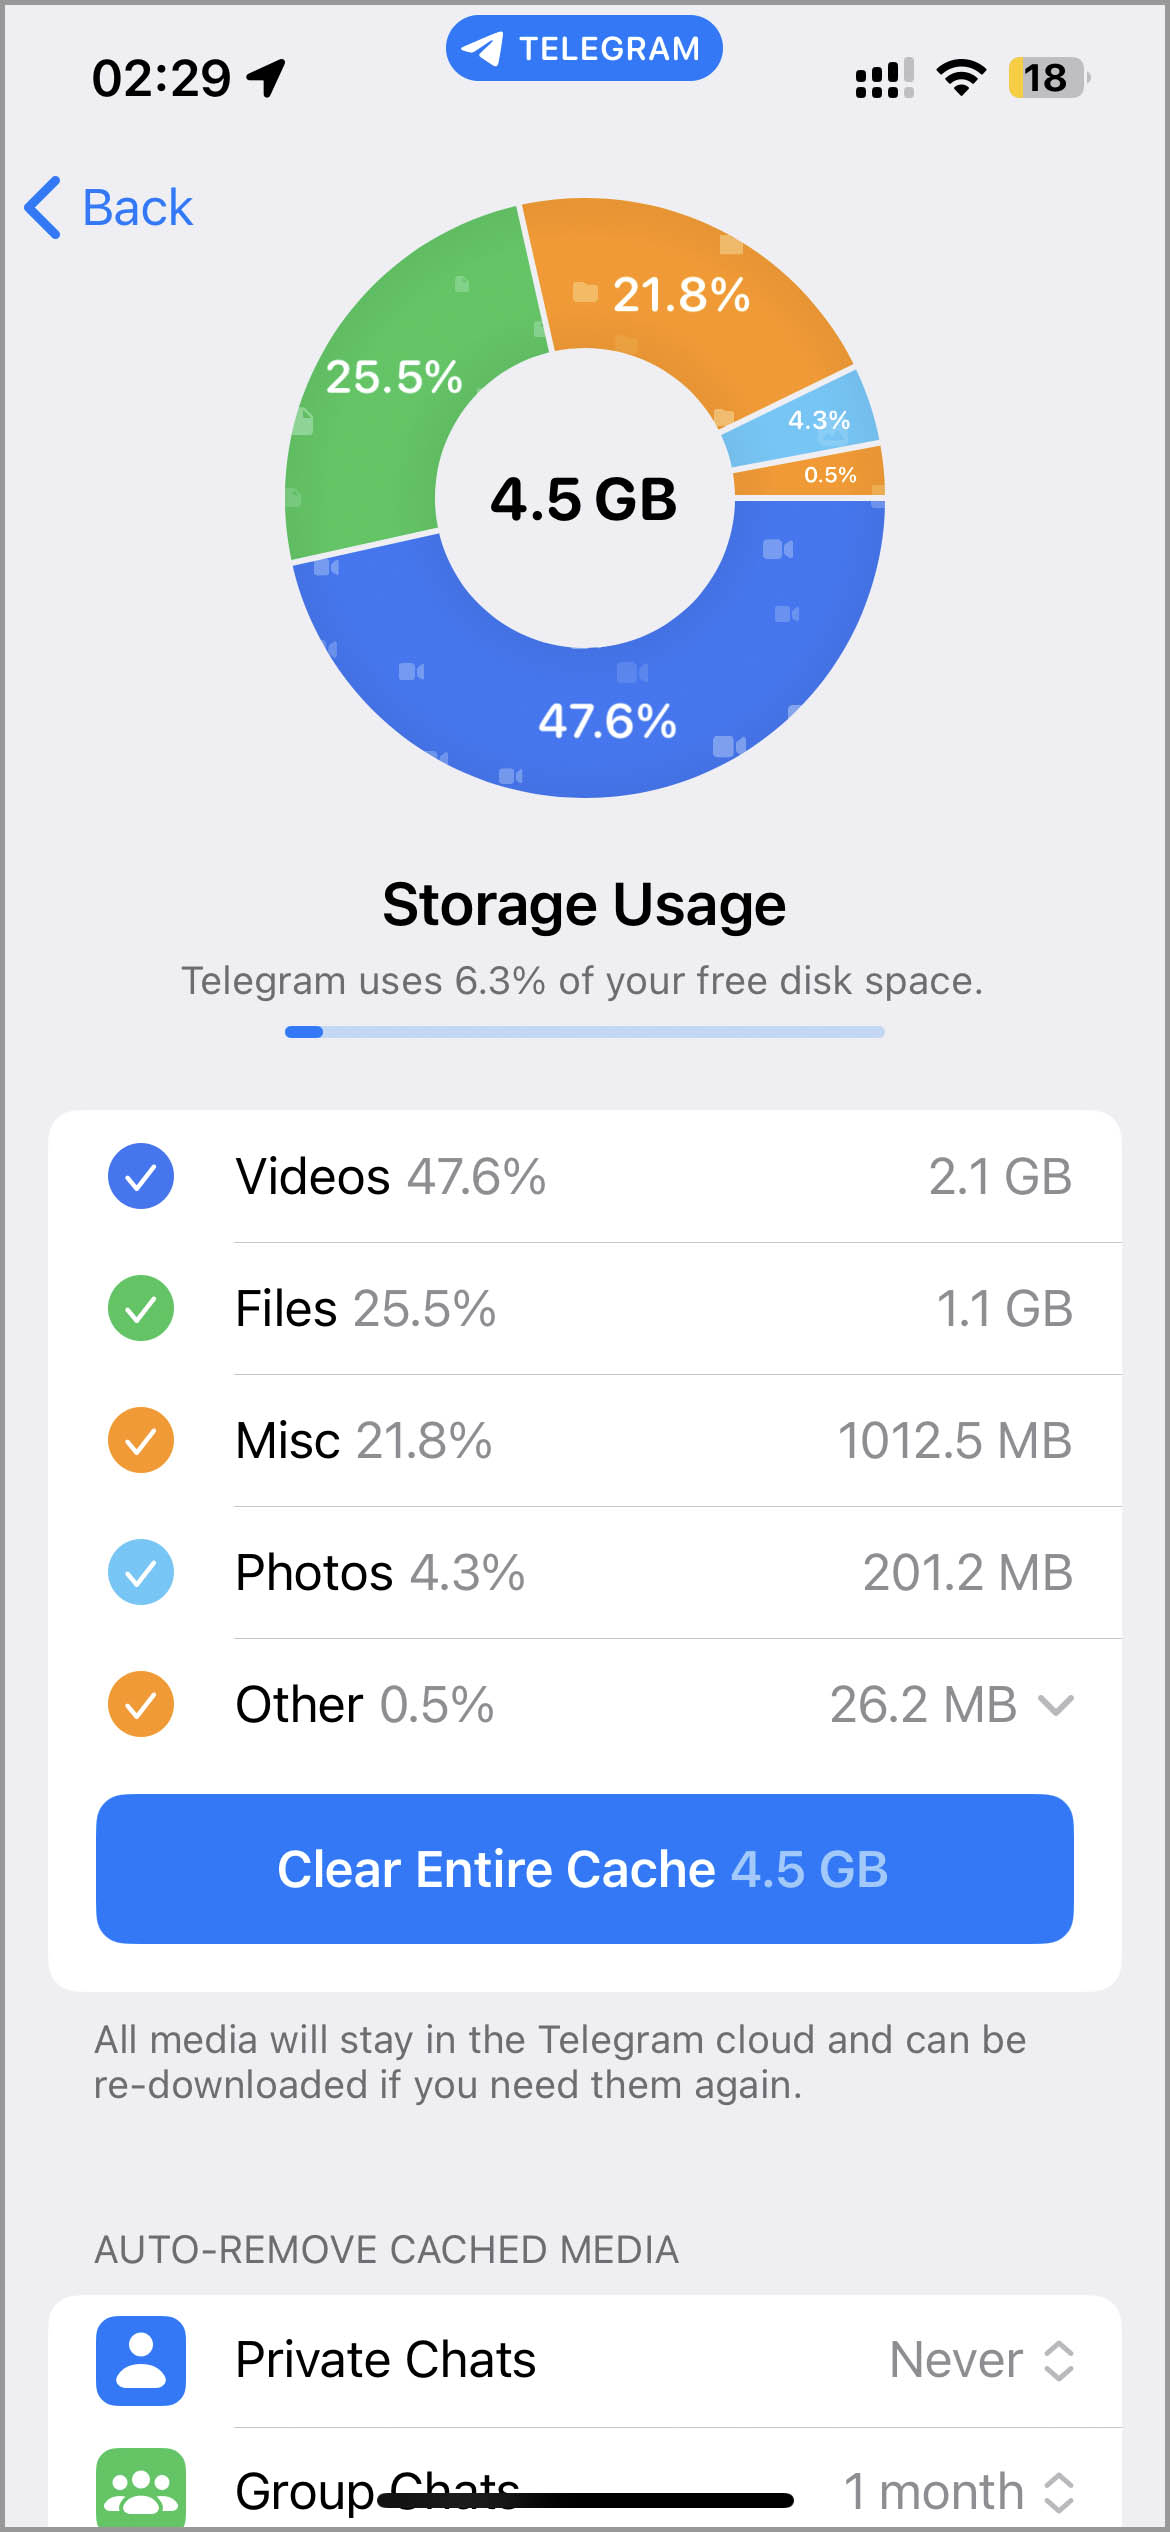
Certain apps aren’t far behind Safari when it comes to cache accumulation. Social media apps like Facebook or messaging apps like Telegram can be particularly cache-hungry because of all the shared media and files. The good news is that they almost always provide an option to clear this cache – exactly like Telegram does:
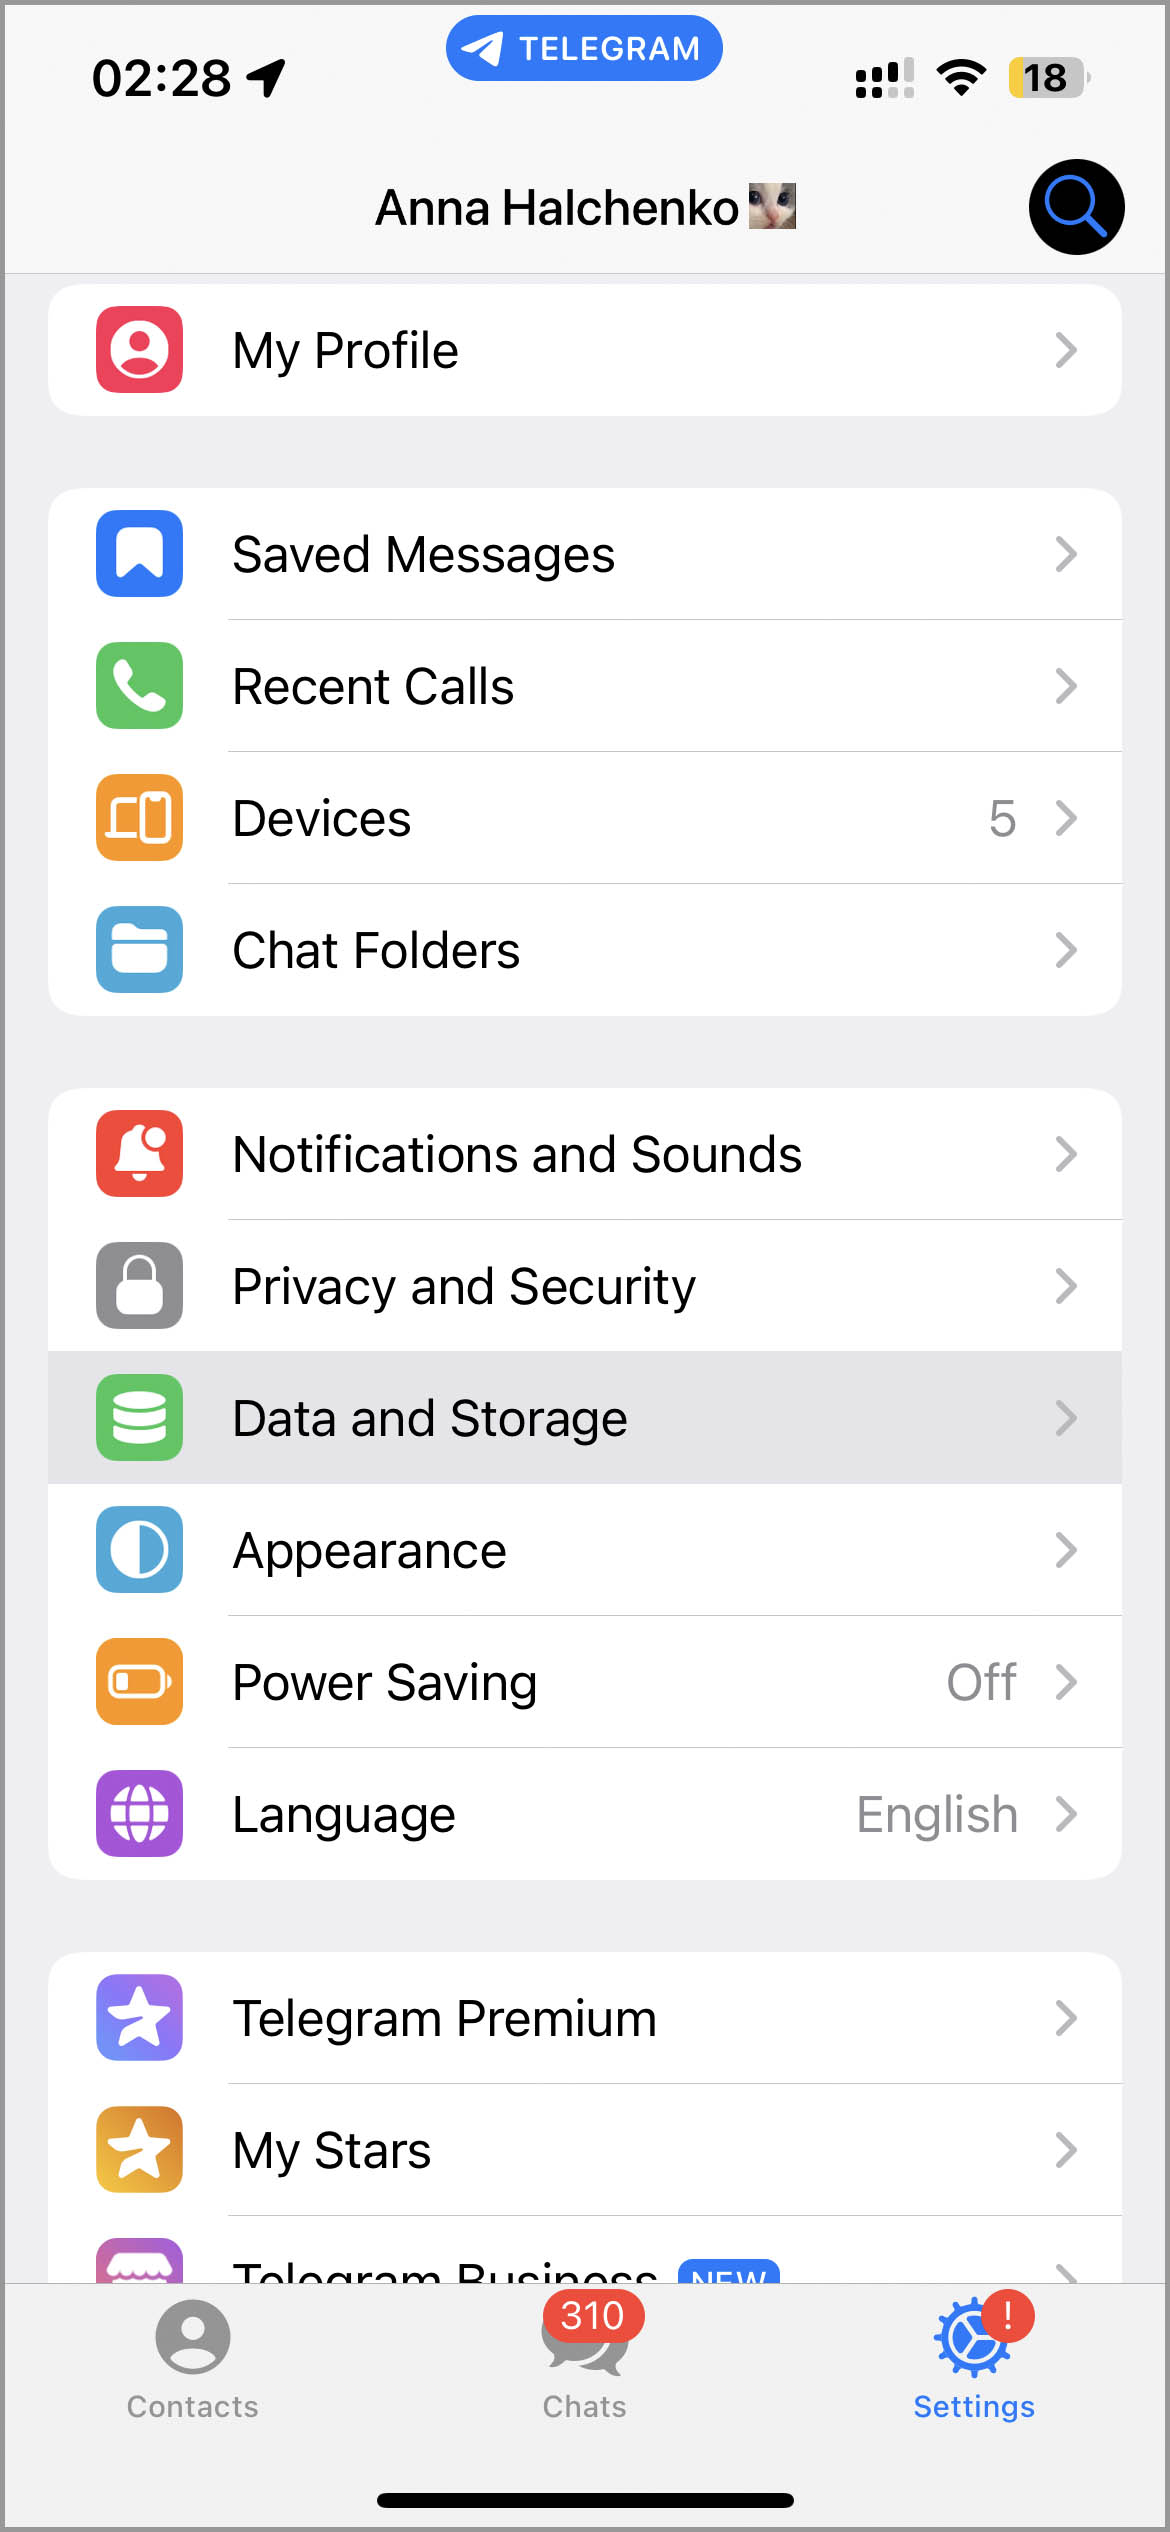
- Launch the Telegram app.
- Go to the Settings tab.
- Navigate to the Data and Storage section.
- Select the Storage Usage category at the top.

- Tap the Clear Entire Cache button and then tap Clear Entire Cache again to confirm.


Method 3: Remove Unused Apps
| Ease of Implementation |
Time Required | Potential Storage Savings |
| Moderate | Moderate | Significant |
We all have a lot of different apps, be it a game we downloaded in a moment of boredom or a lifestyle app that seemed necessary at the time. The truth is apps can eat up a ton of your phone’s internal memory, so removing those you no longer need is a great way to add more space on your iPhone.
For example, Pinterest takes up nearly 300 MB, VN chews through 900 MB, and heavy-duty games like League of Legends can demand a whopping 3.3 GB or more!
3.1 Offload Apps
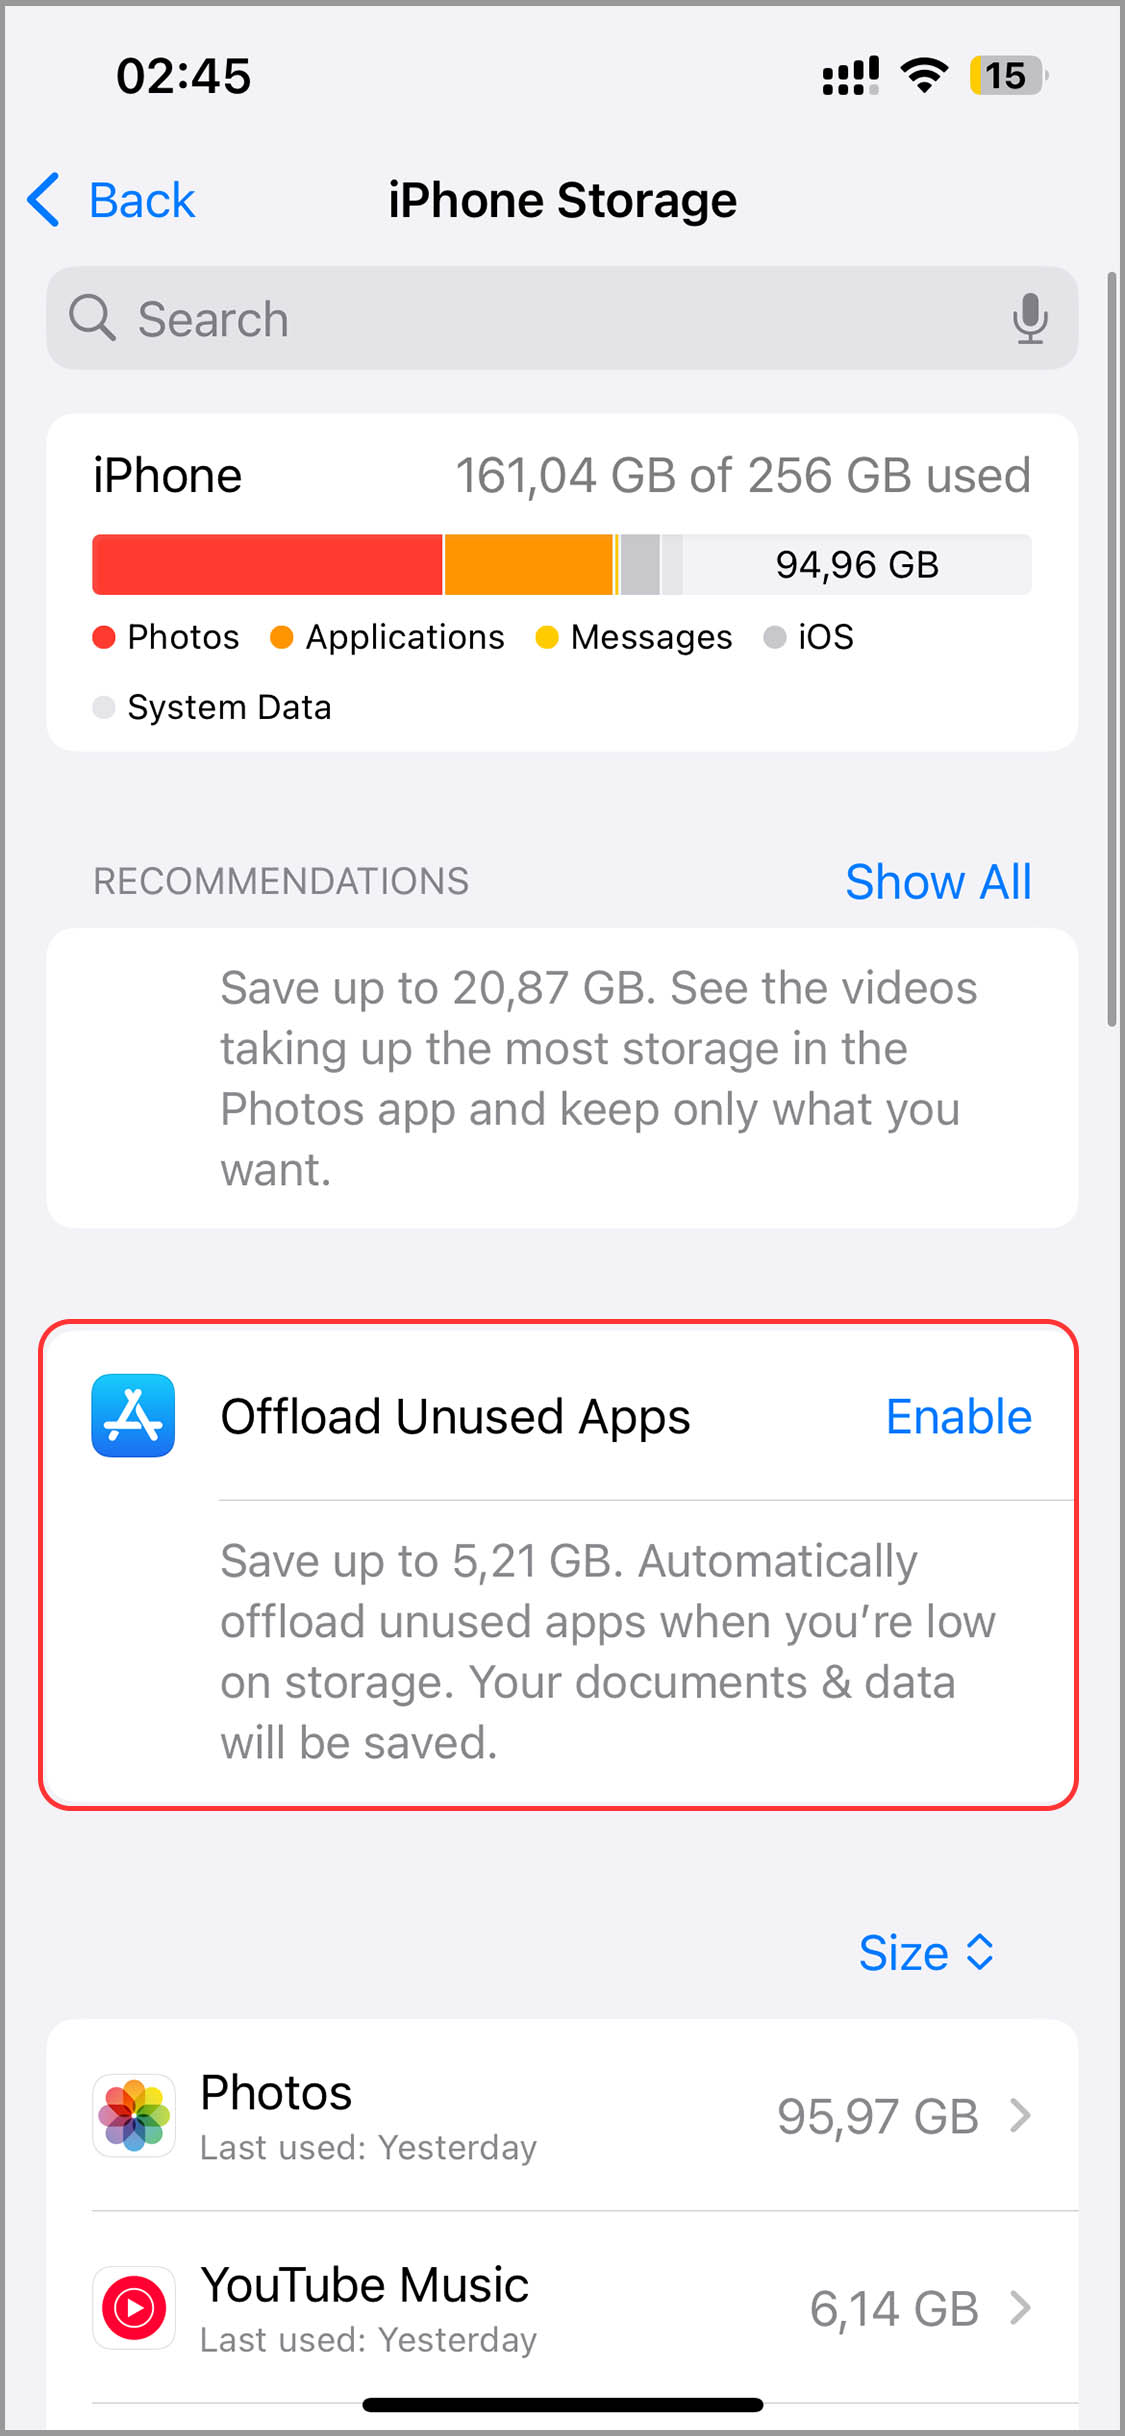
The iOS operating system gives you the option to offload rarely used apps so that they do not take up so much storage capacity. This feature works by deleting the app itself but saves its data, which will be restored after you download the app again, allowing you to continue where you left off. We recommend you take advantage of this feature before you start deleting your beloved apps. This is how you can do so:
- Launch the Settings app on your iPhone.
- Navigate to the General section and go to iPhone Storage.
- Tap Enable next to the Offload Unused Apps recommendation.

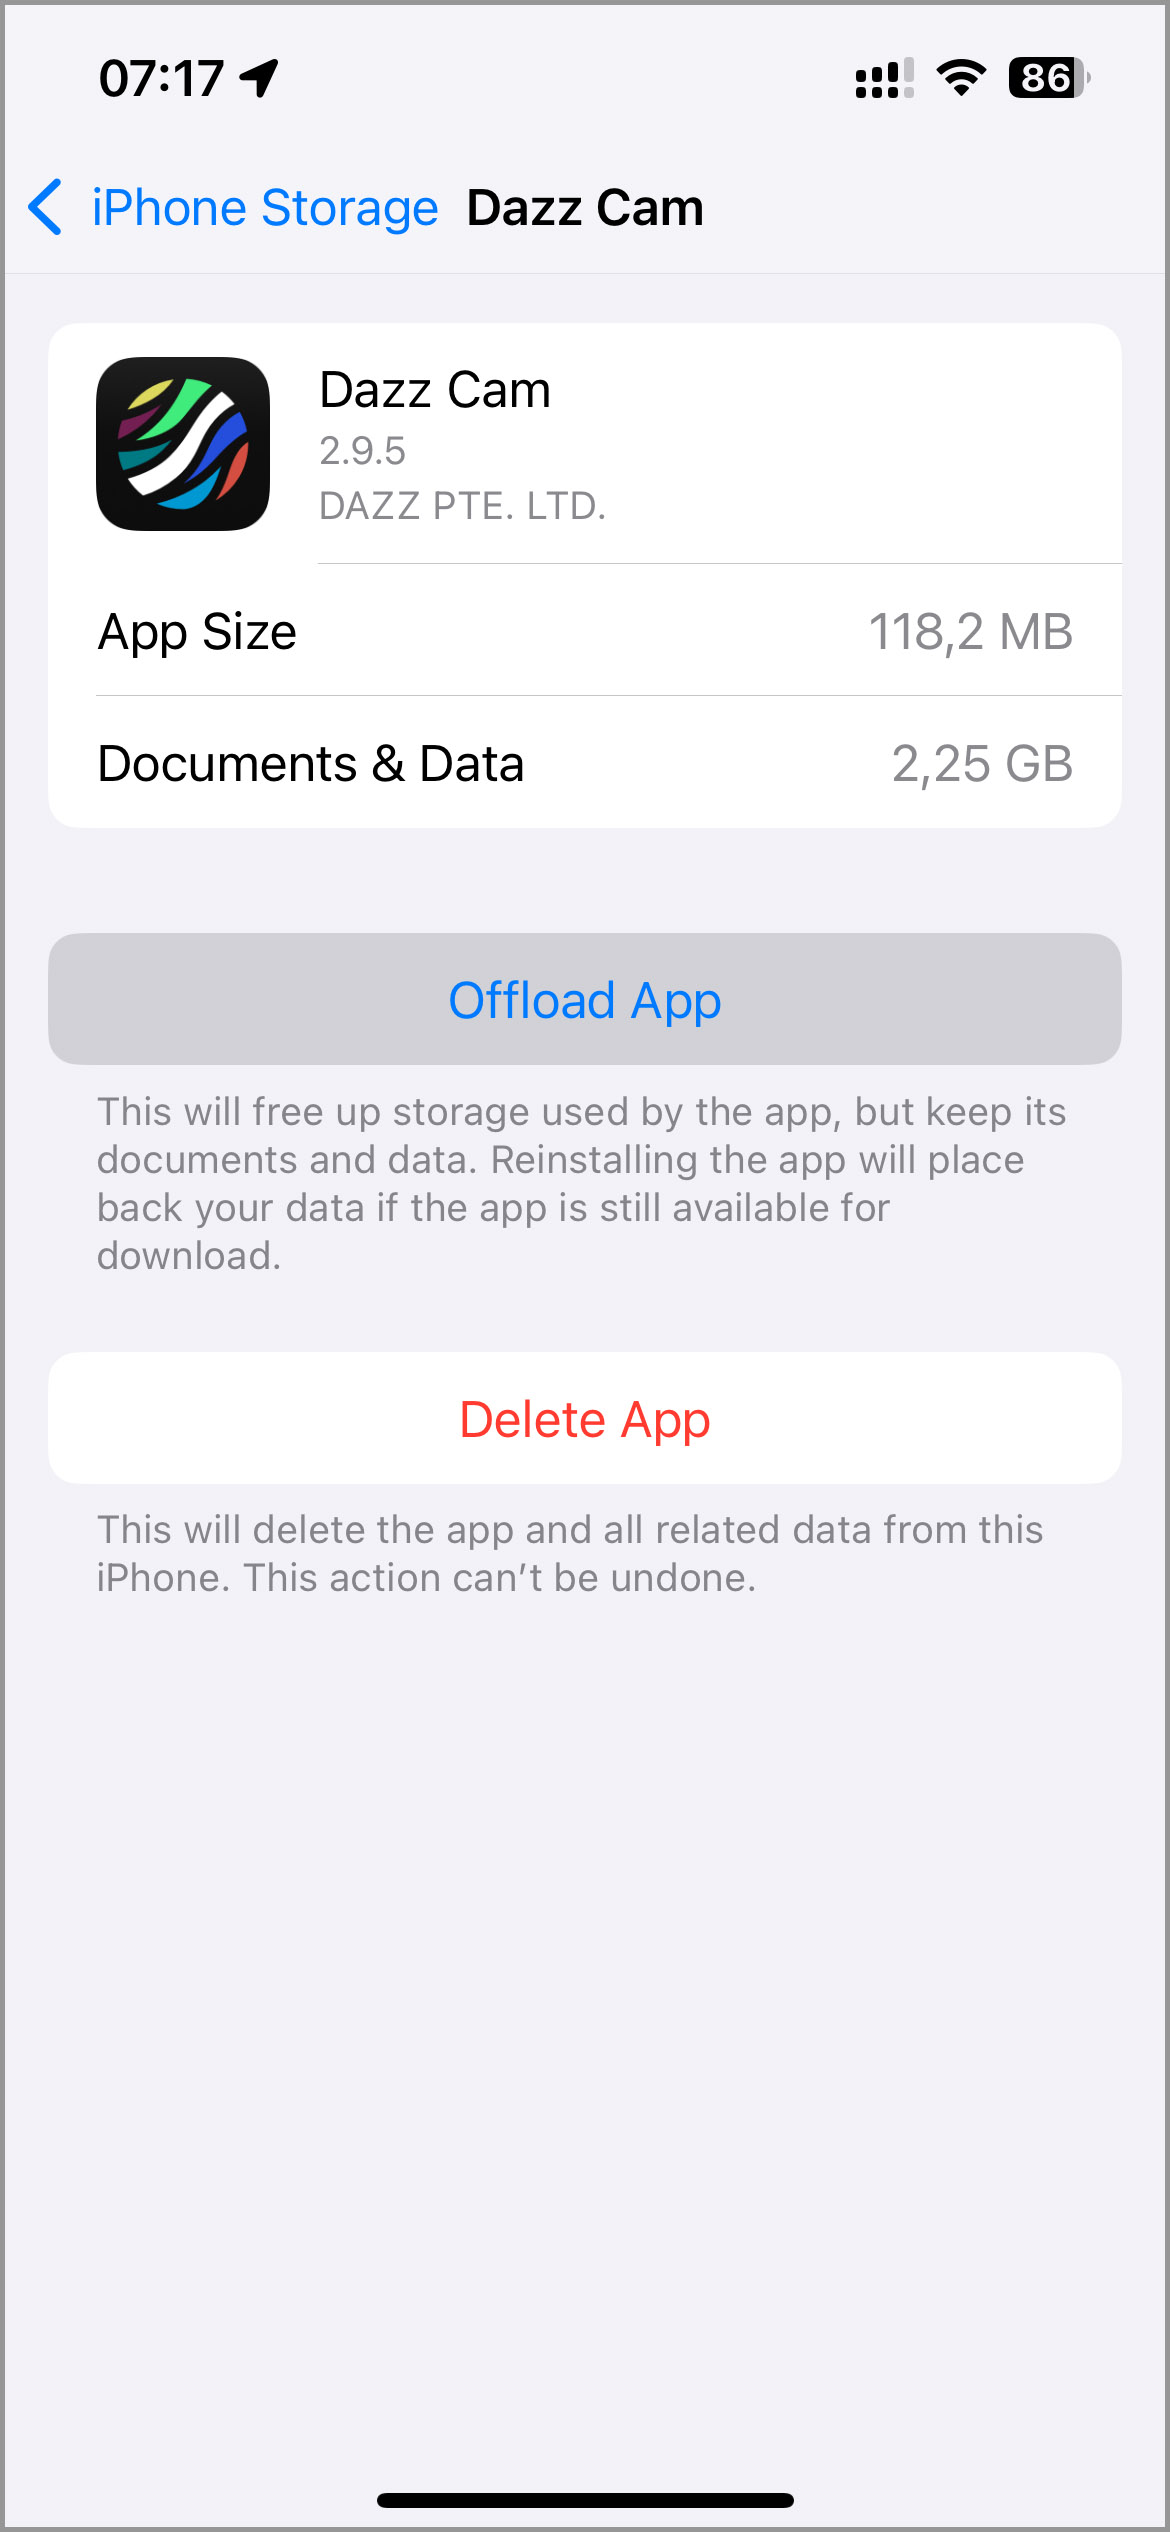
Your iPhone will now automatically offload unused apps when you’re low on storage. If you want to offload an app manually, then you need to:
- Select the app in the iPhone Storage section.
- Tap the Offload App button.

3.2 Delete Apps Entirely
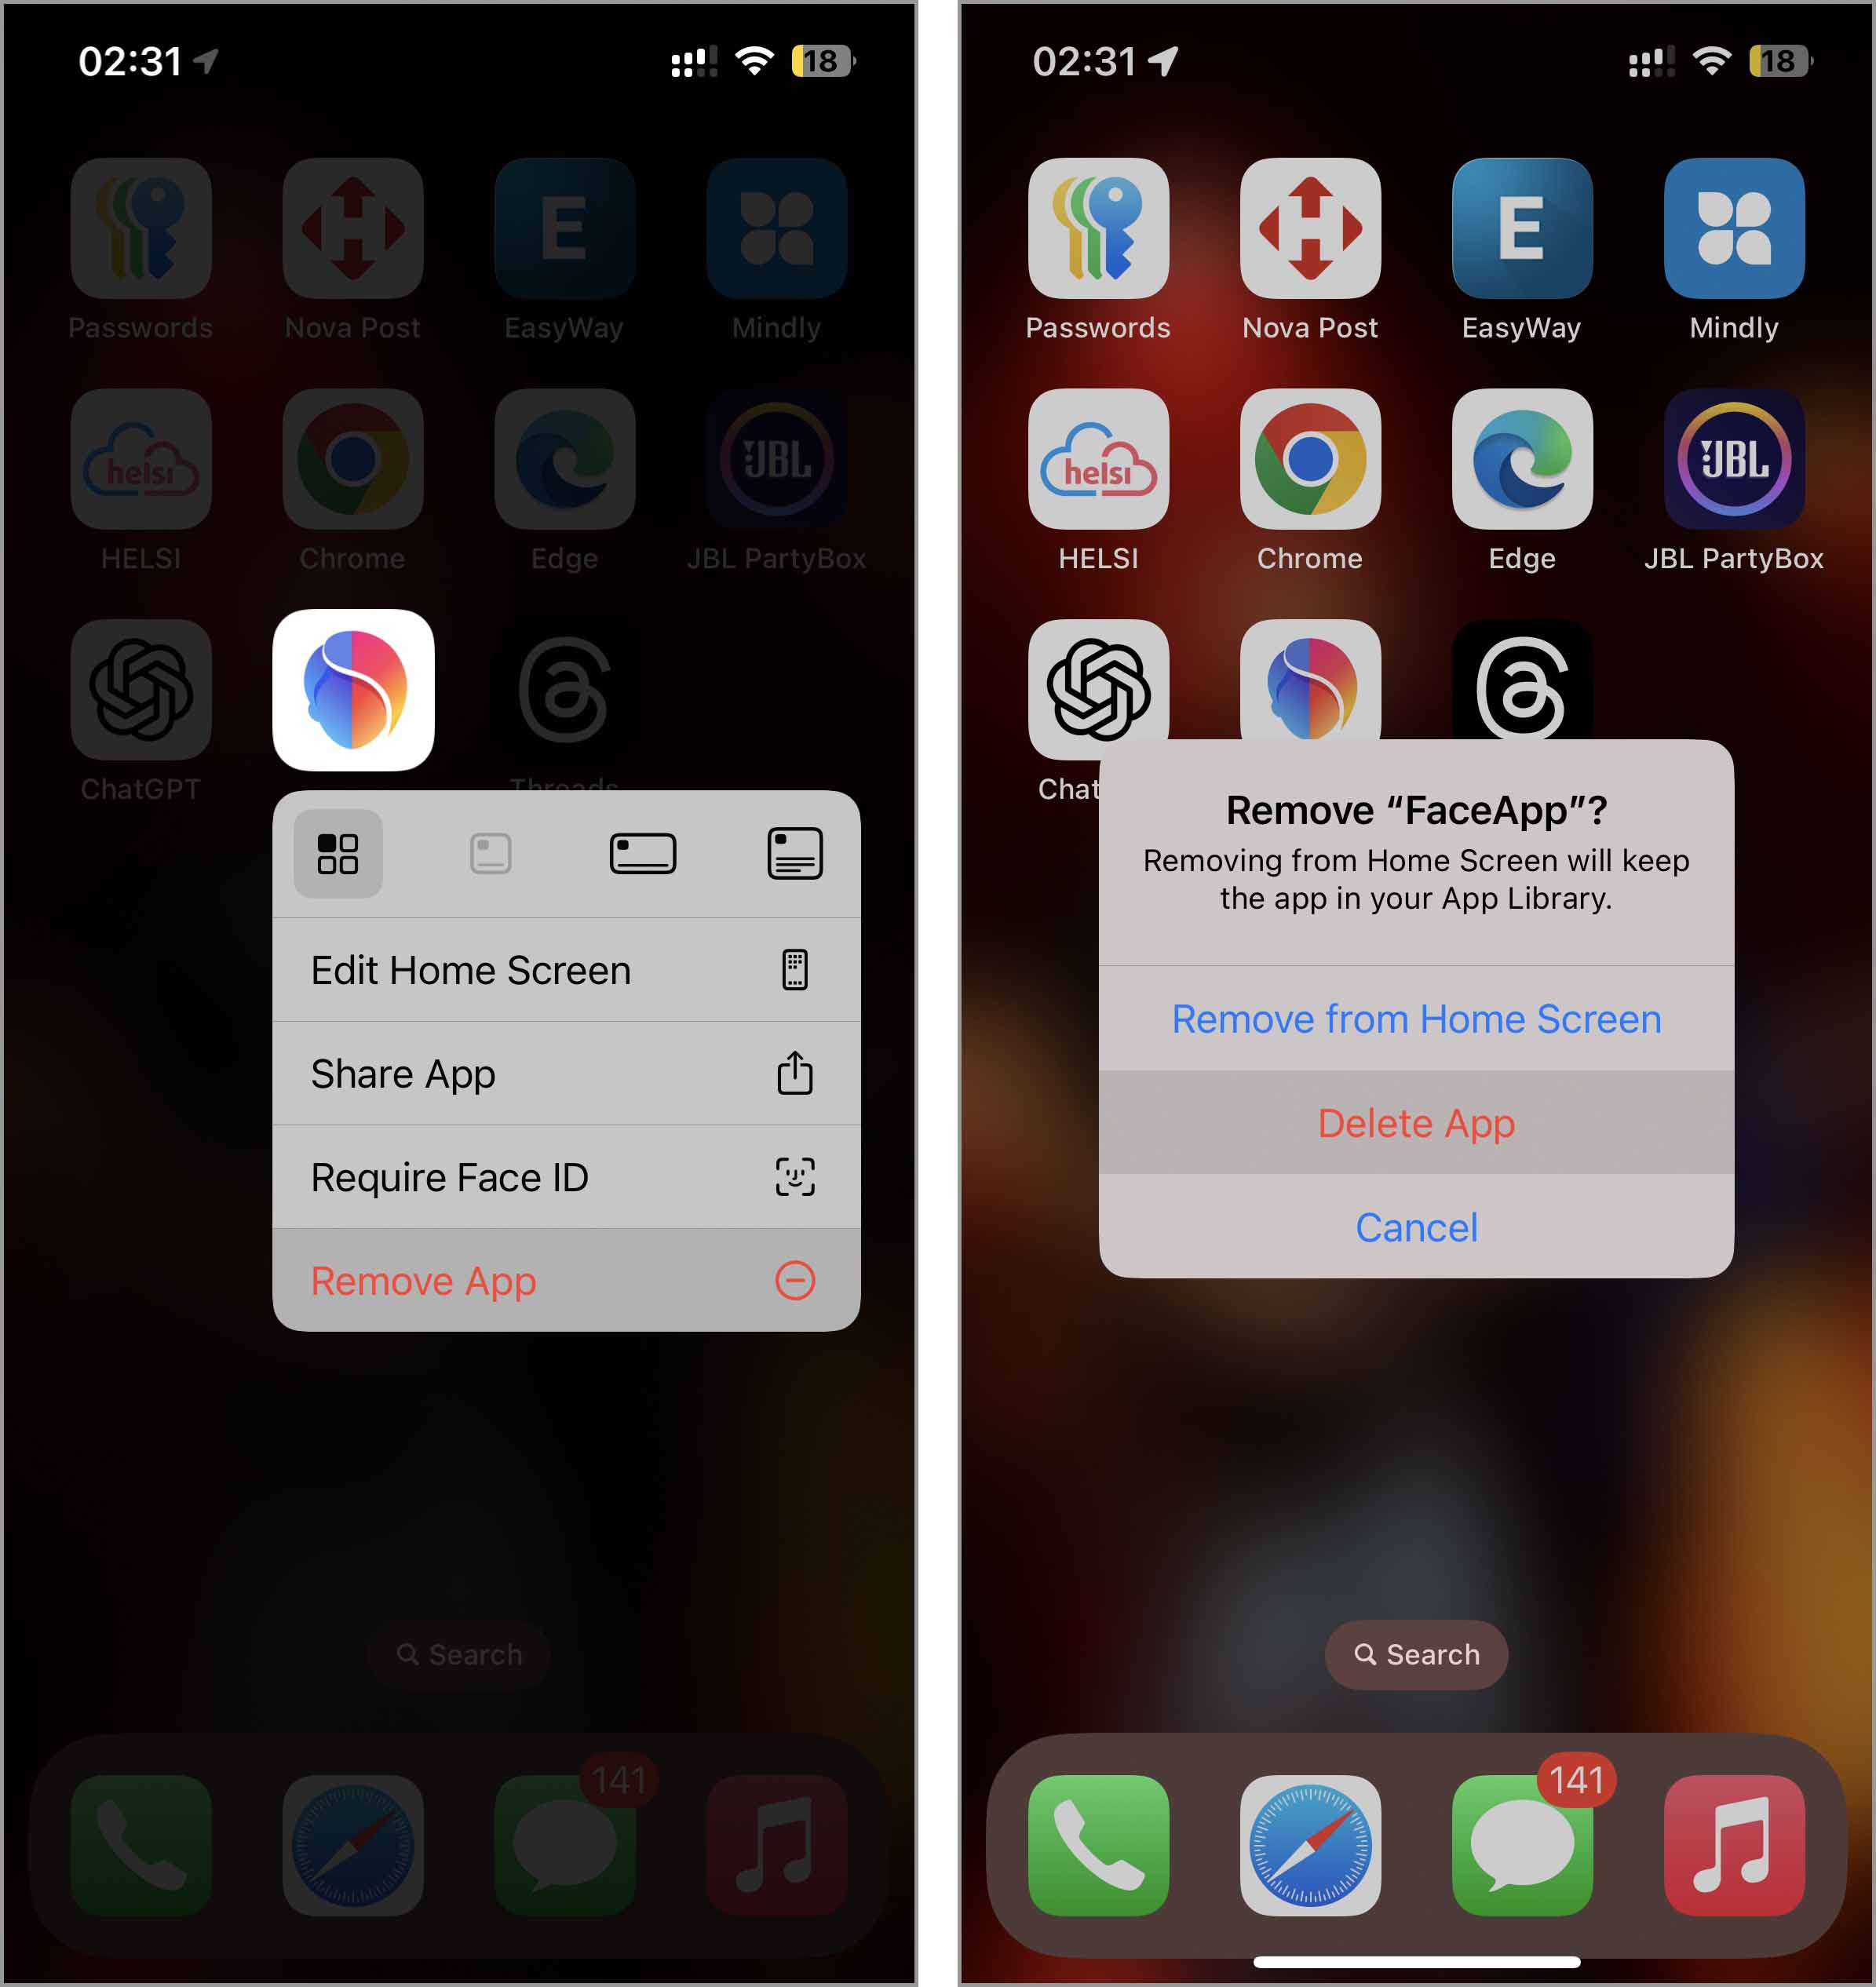
Unlike offloading, deleting an app also removes any associated data, which can free up more space but makes it impossible to recover the app’s data unless you’ve backed it up. This is the option to choose when you’re certain you won’t need that app or its data again. Here’s one way to delete an app to get extra storage on an iPhone:
- Locate the app you want to delete on your home screen.
- Press and hold the app icon until a menu appears.
- Select the Remove App option.
- Tap Delete App to confirm.

When you try to add more storage space on your iPhone, it makes the most sense to delete the biggest apps (or the ones you haven’t used in a while). The easiest way to do that is through your settings, where you can sort apps by size or when you last used them. Just go to Settings > General > iPhone Storage, then at the top of the app list, choose to sort by Size or Last Used Date. Tap on any app you want to delete and hit Delete App.
How to Buy More iPhone Storage
If you don’t want to spend time manually deleting files from different spots, there are a few quicker alternatives. These options save time but come at a cost – anywhere from a buck to a few hundred dollars, depending on how much extra storage you need.
Method 1: Utilize iCloud Features
| Ease of Implementation | Time Required | Potential Storage Savings |
| Fairly Easy | Fairly Quick | Very significant |
If you haven’t taken full advantage of iCloud, then you’re missing out on one of the best ways to get more storage space on your iPhone. iCloud is Apple’s cloud-based storage solution that seamlessly integrates with your iPhone, allowing you to offload data from your device’s internal storage to remote servers. It’s the perfect solution to manage your phone’s capacity without too much effort.
1.1 Optimize Photo Storage
We already mentioned above that one of the largest files on iPhone storage is high-resolution photos and videos, which we all take or download every day using our iPhones. For these files, iCloud offers the Optimize iPhone Storage feature.
This option allows you to replace the large, full-resolution photos and videos stored on your iPhone with smaller, optimized versions. The original, full-size versions are uploaded to iCloud. That way, you don’t lose any quality and can easily download them whenever needed. To enable this feature:
- Open the Settings app on your iPhone.
- Tap on your name at the top and then go to the iCloud section.
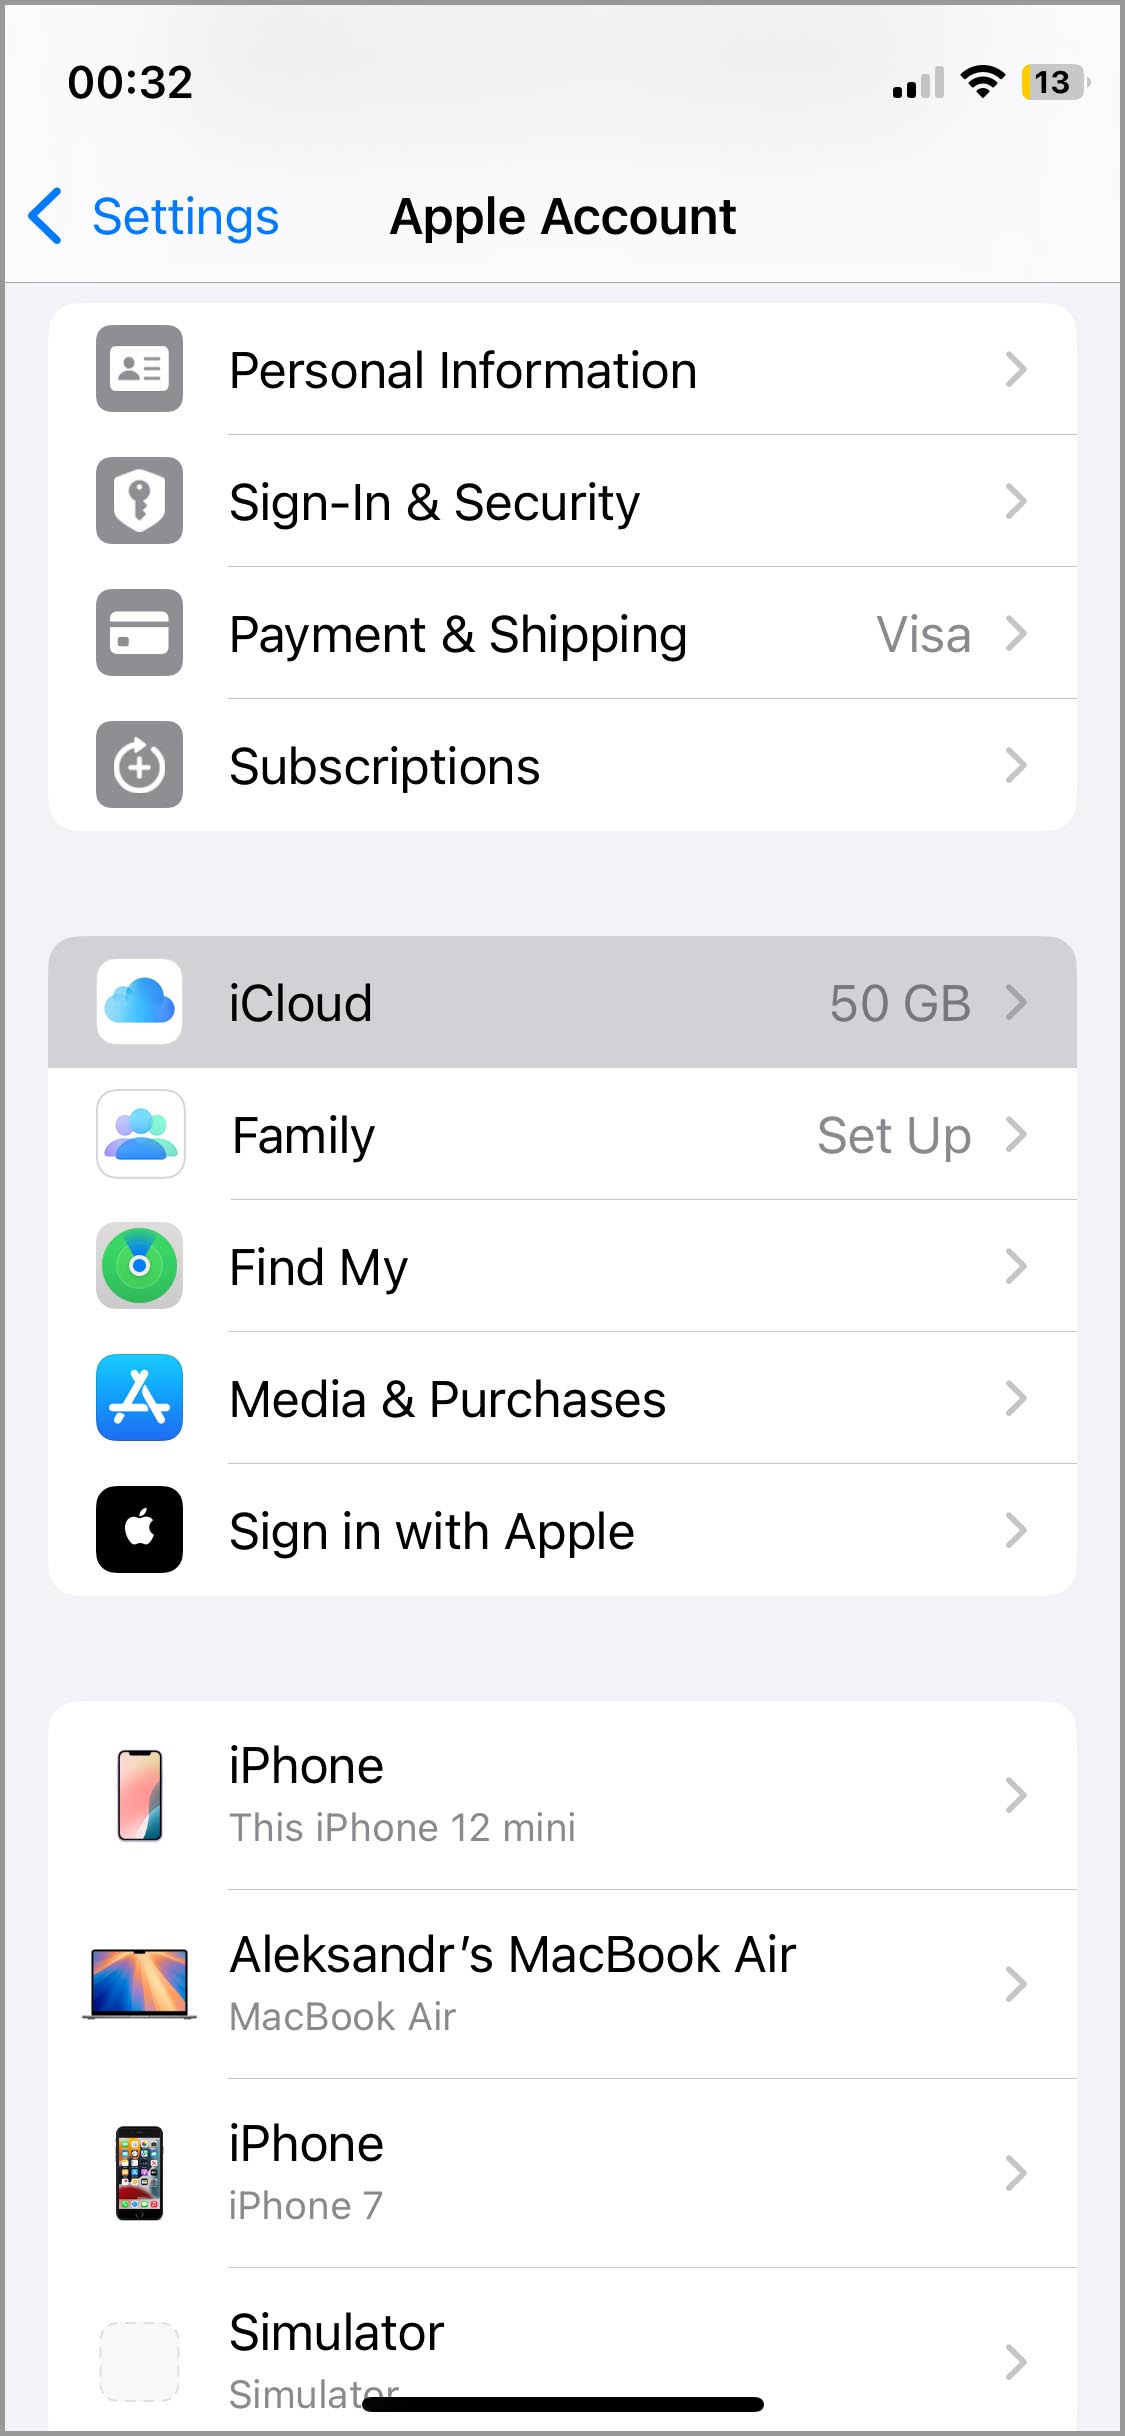
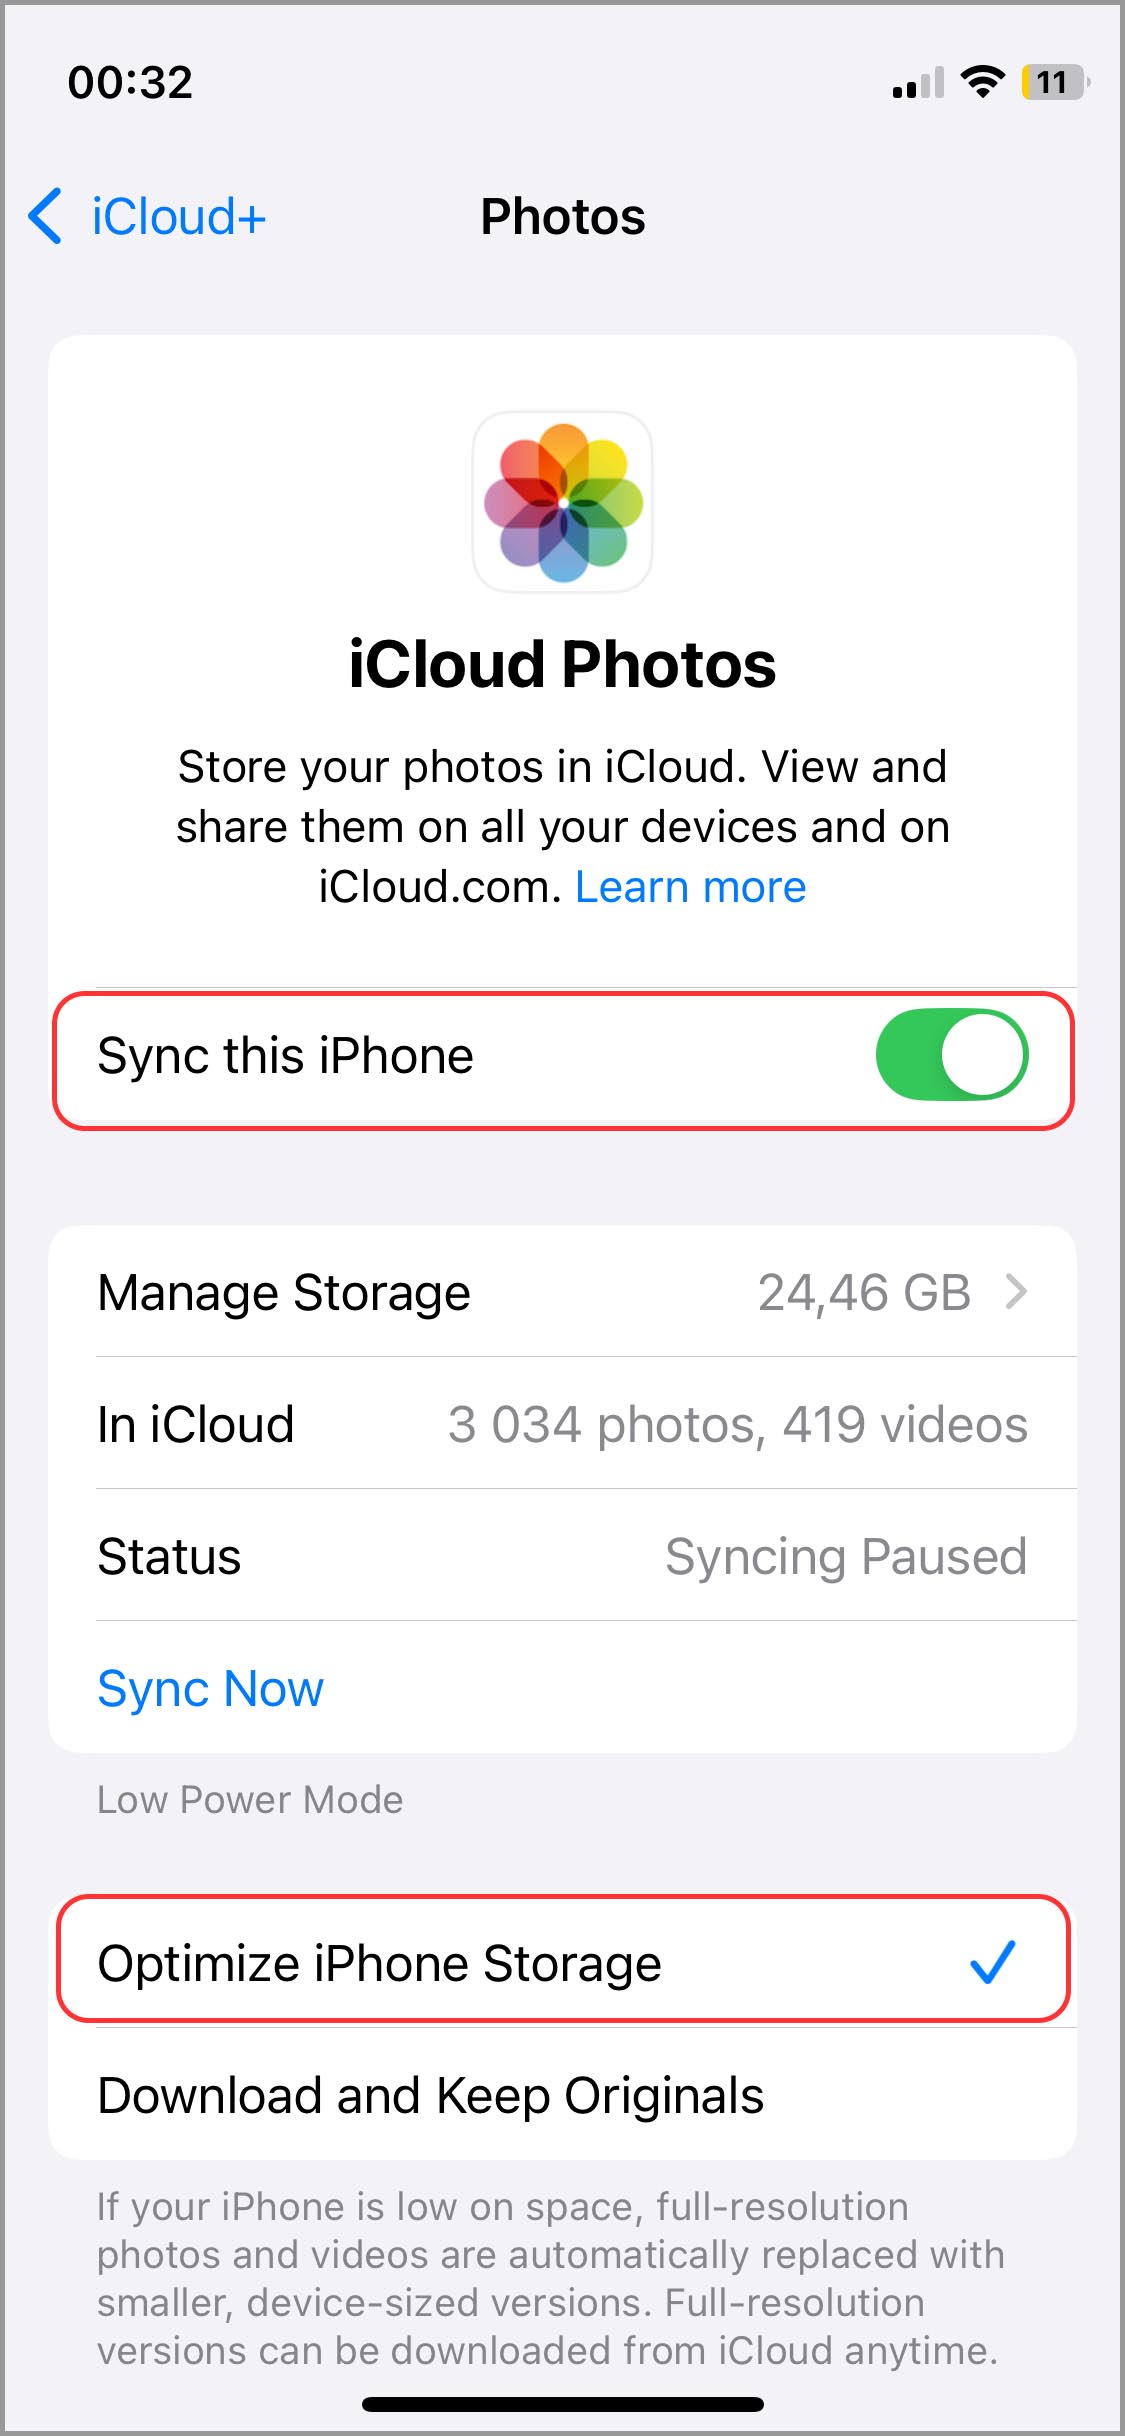
- Select Photos and make sure the Sync this iPhone option is enabled.
- Tap the Optimise iPhone Storage feature to enable it.
- Wait until all original full-size photos are stored in iCloud.


1.2 Move Your Data to iCloud
In addition to optimizing your photo library using the method above, you can also move a whole lot more to iCloud to get extra storage on your iPhone, such as all the items you store locally in the Files app – both photos and videos, as well as documents, presentations, etc. This is how you could move them to iCloud:
- Launch the Files app.
- Select the Browse tab.
- Navigate to the On My iPhone location.
- Navigate to the location where the document is stored.
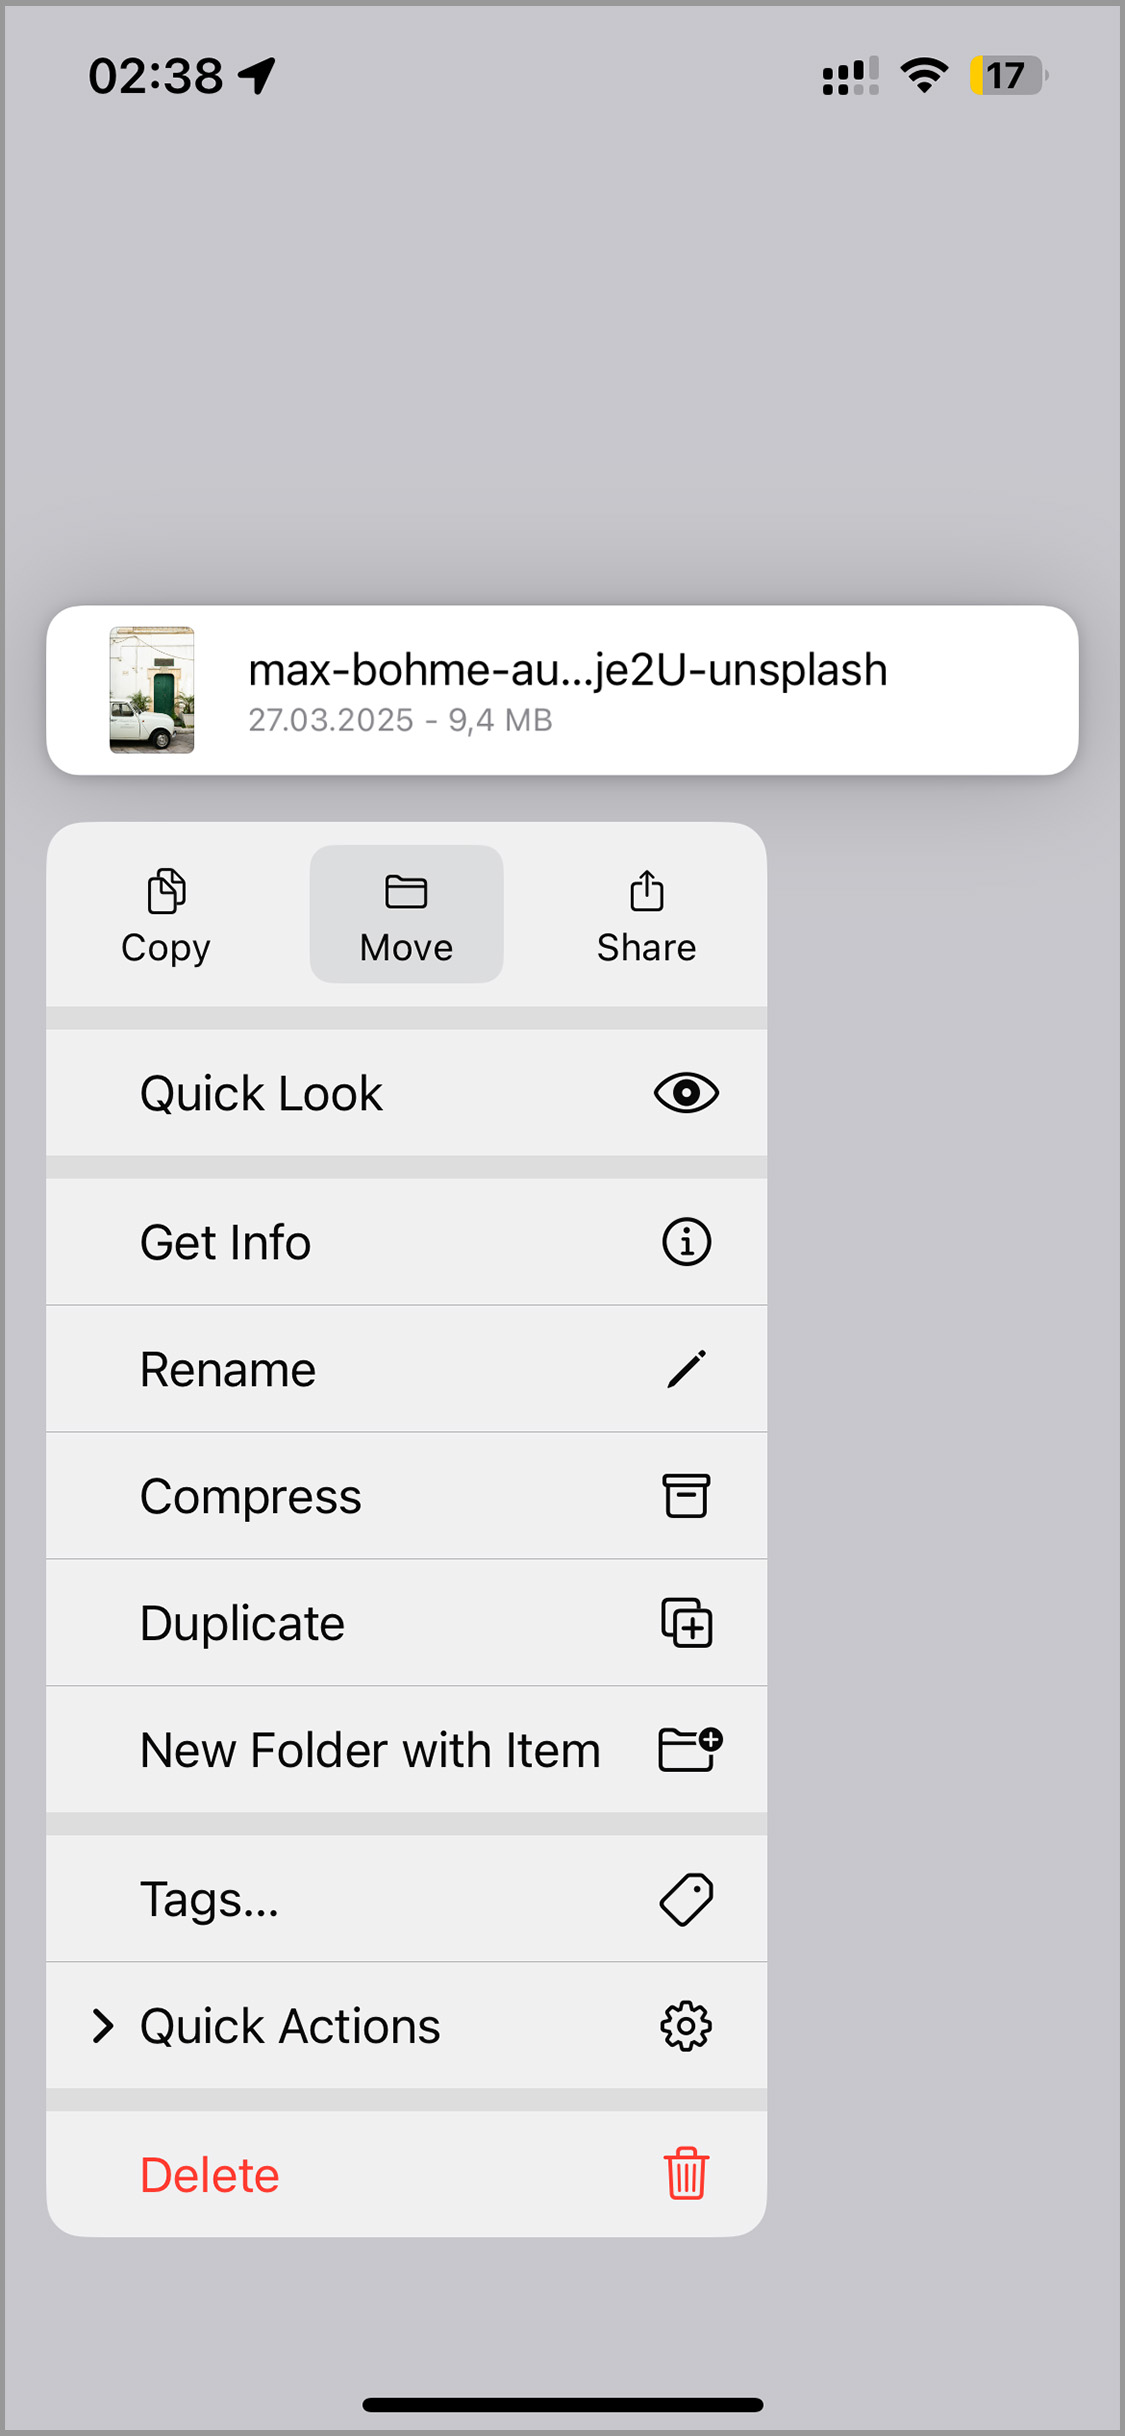
- Long-press the document and select the Move option.
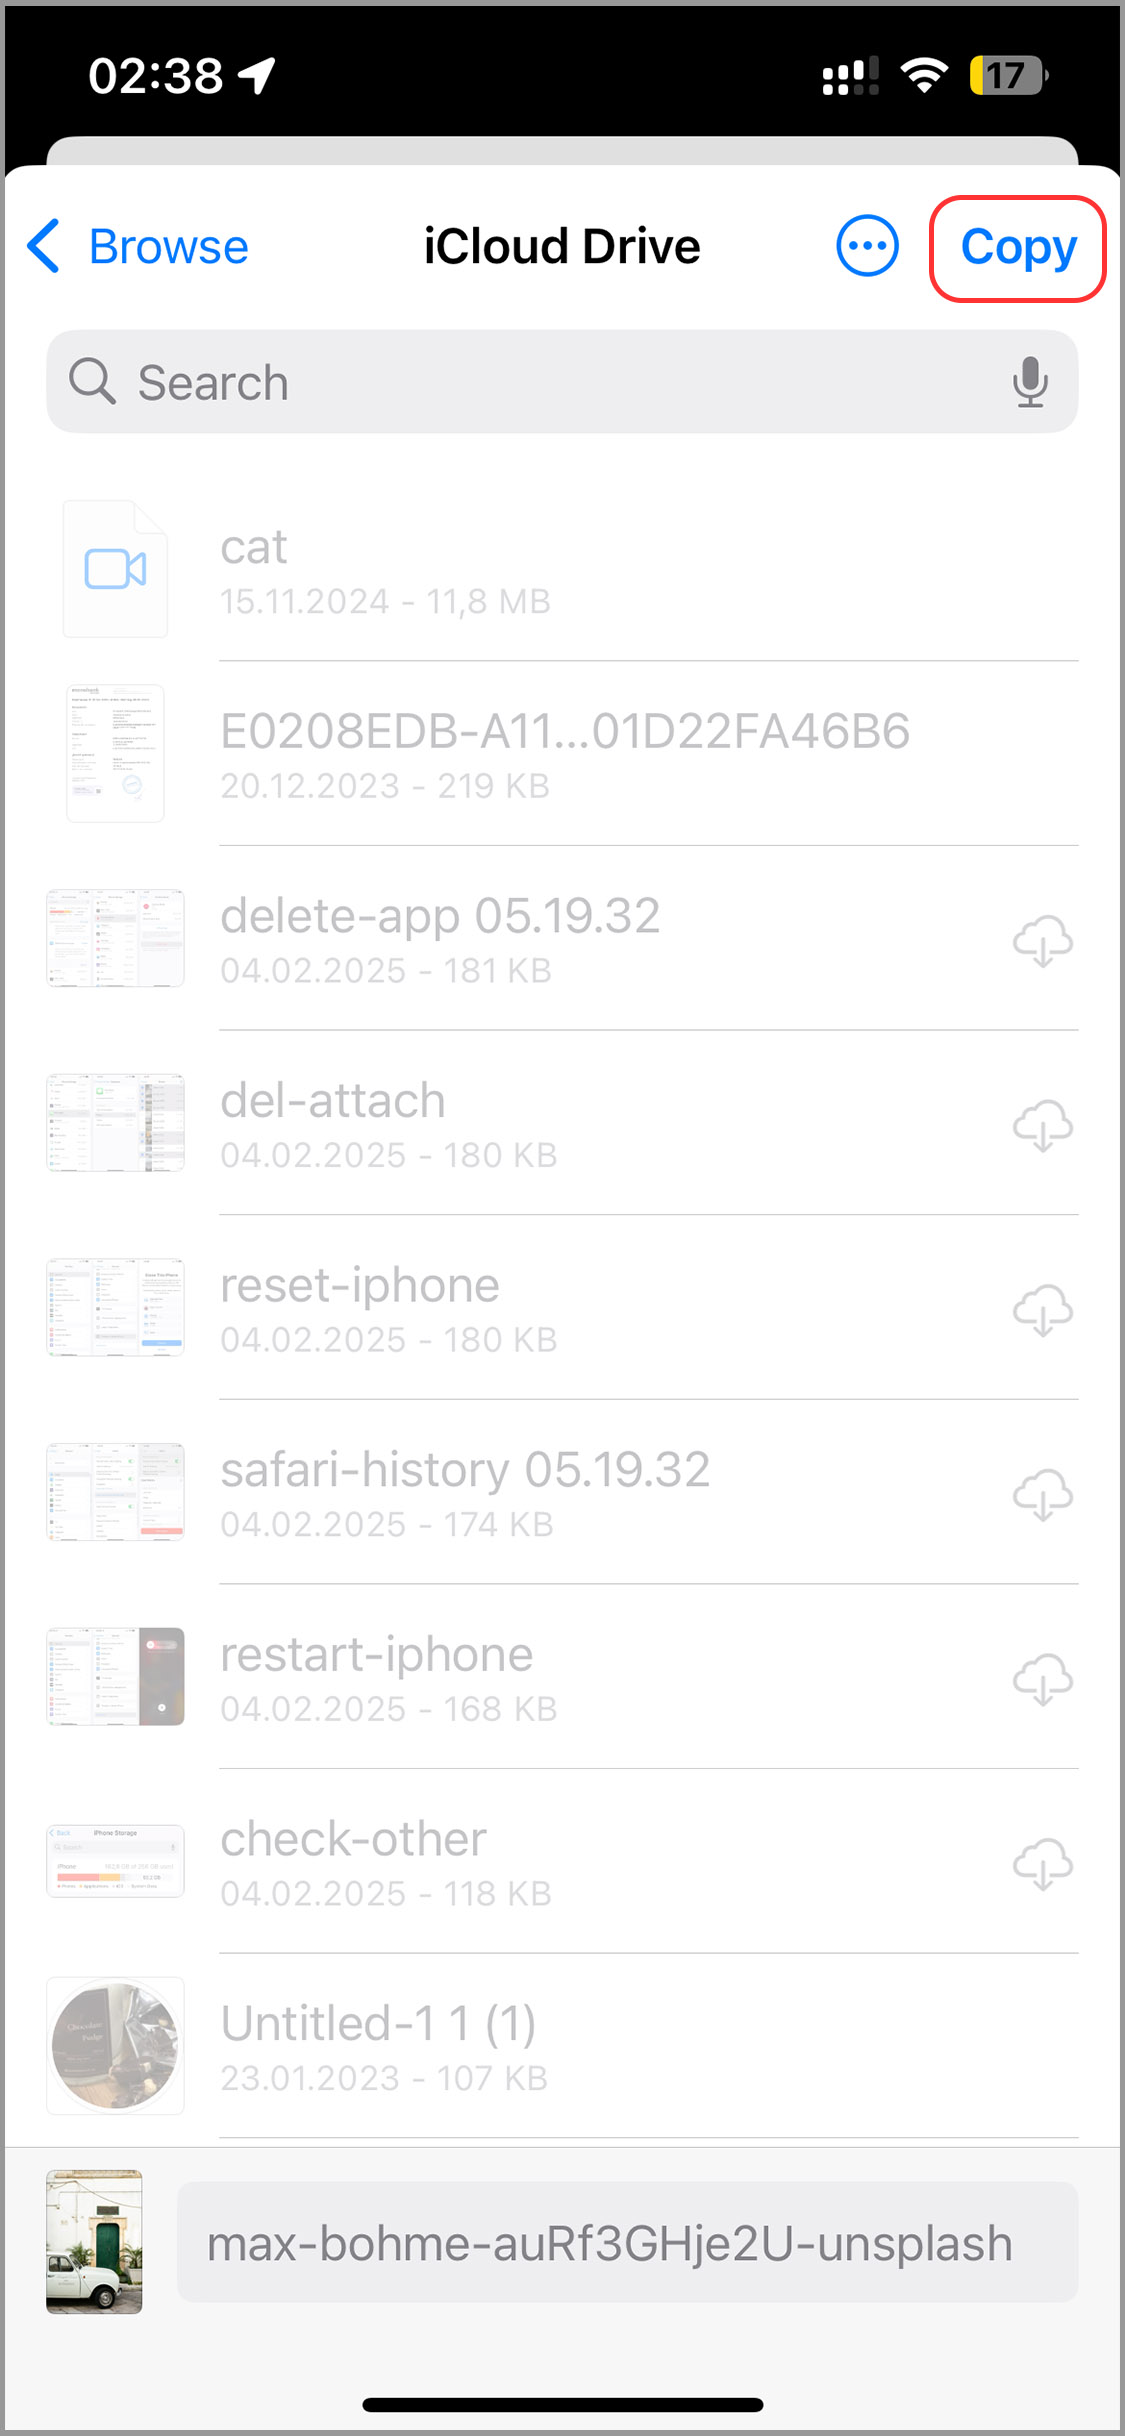
- Navigate to iCloud Drive (you can choose any sub-folder you want) and press Copy in the top-left corner.


As a nice bonus, once the document is stored in iCloud Drive, it becomes available across all your Apple devices that are logged into the same iCloud account.
Method 2: Expand Your Storage With an External Device
| Ease of Implementation | Time Required | Potential Storage Savings |
| Moderate | Moderate | Very significant |
Alright, we’ve covered all the ways to clean up your phone and free up space on your iPhone. But what if you’ve done all that and still need more? That’s where external storage comes in. You can’t upgrade your iPhone’s internal storage, but you can add more space with the right accessory.
If you’ve got an iPhone 14 or earlier, look for a USB flash drive with a Lightning connector. iPhone 15 or newer? You’ll need one with a USB-C port. Some drives come with both Lightning and USB-C, so you can easily move files between different iPhone models, plus other devices like Macs, PCs, and tablets.
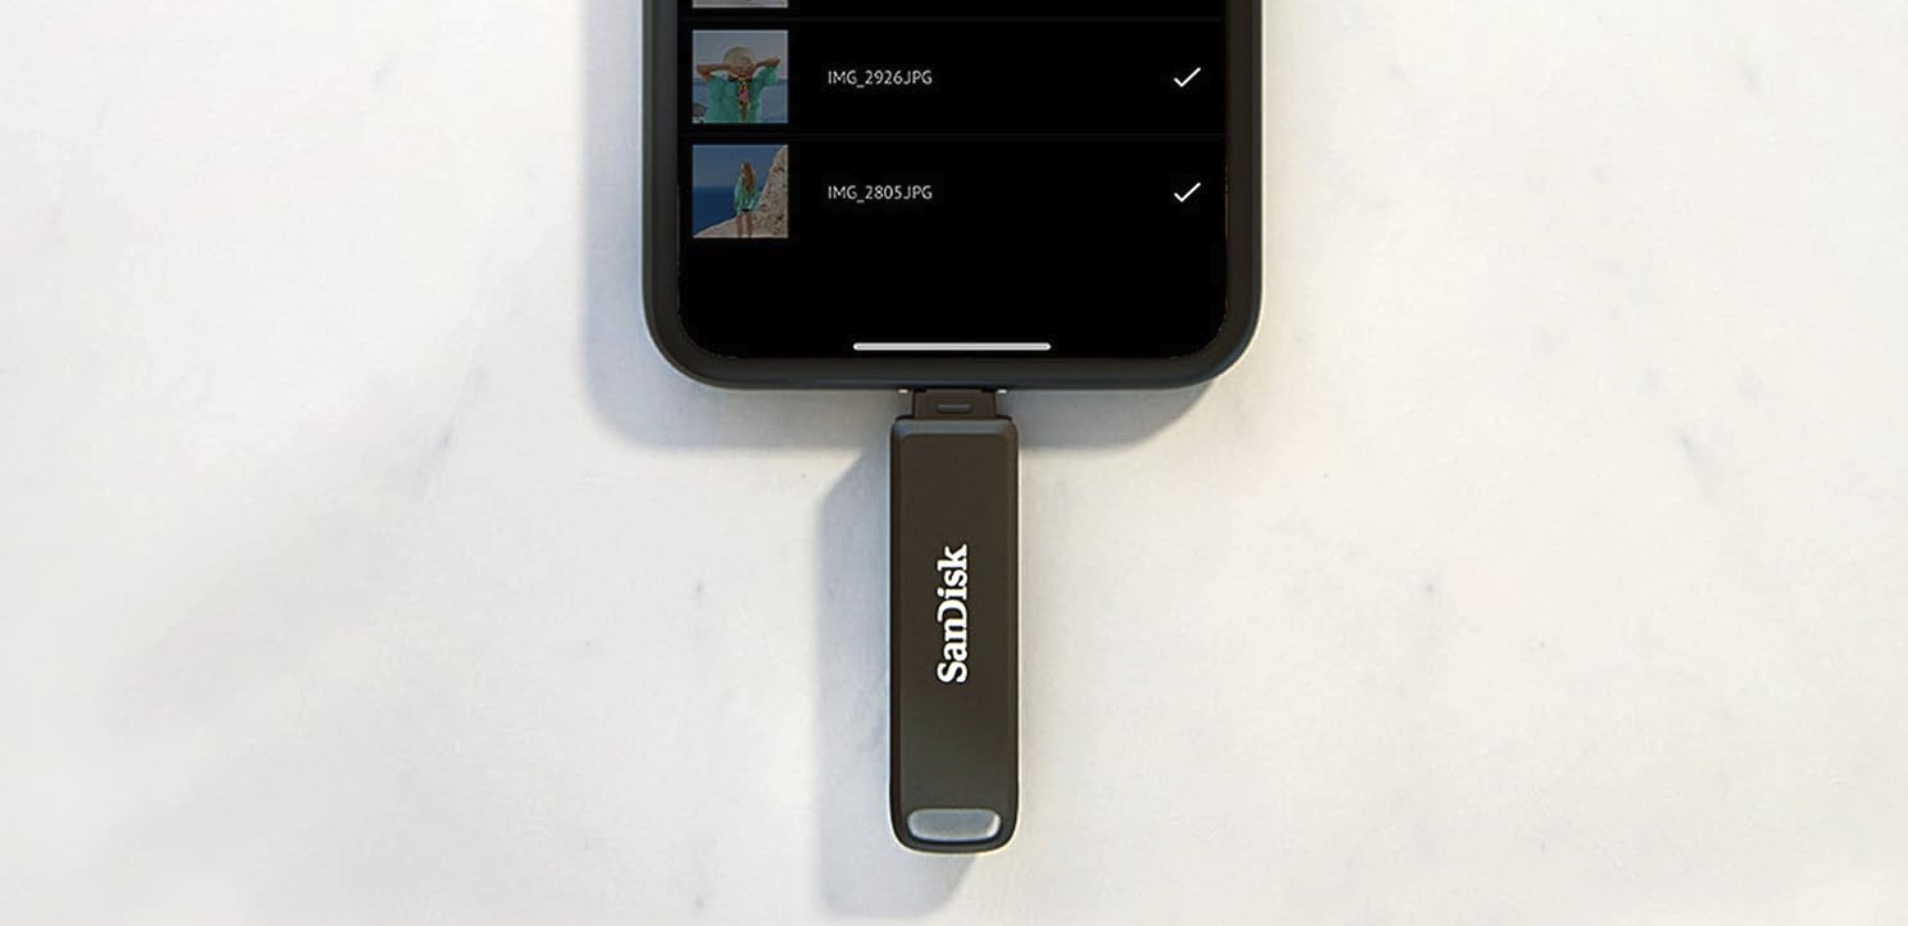
To use a USB flash drive to get more storage on iPhone, simply plug it into your device, open the Files app, tap the Browse tab, and select the storage device.
FAQ
To add more storage on your iPhone, you can use several methods:
- Offload unused apps – this feature automatically removes apps you don’t frequently use but keeps their documents and data.
- Regularly delete unnecessary files, old messages, photos, and videos, or move them to iCloud.
- Upgrade your iCloud storage to save space on your device.
- Use compatible external storage devices like flash drives designed for iPhones.
There are several ways to free up space without paying:
- Clear Safari cache and website data.
- Delete or offload unused apps and games.
- Manage and delete old photos, videos, or files.
- Get rid of large attachments.
Conclusion
Running out of storage on your iPhone can be a problem, but now you’ve got a bunch of ways to fix it, whether you want to keep it free or don’t mind spending a few bucks.
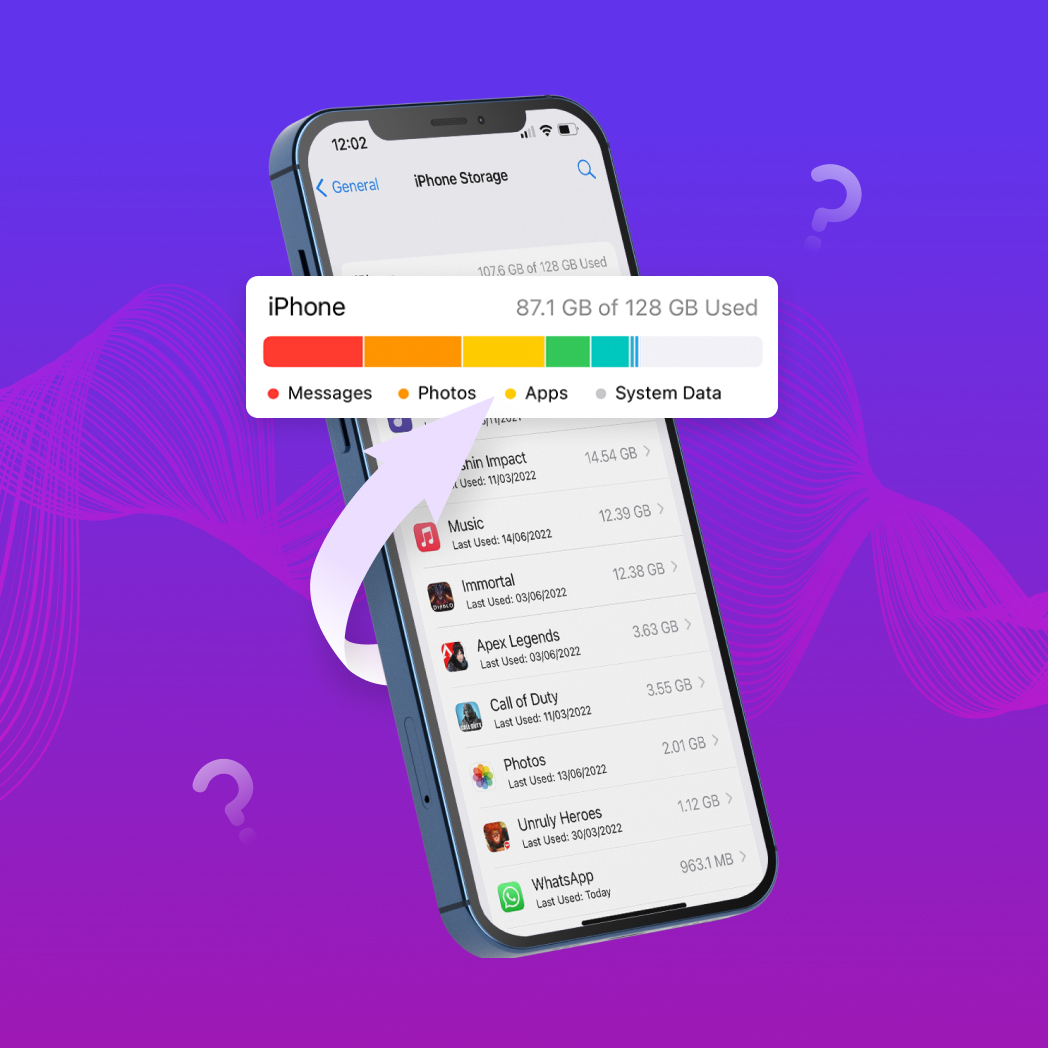
While we mentioned that the free methods work best when you use them together, you don’t always have to do everything. If you only need to clear a bit of space, concentrate on the file type that takes up the most space. To check, go to Settings > General > iPhone Storage and look at the colored graph. In our case, photos and videos took up almost 100 GB, so clearing about 40 GB with Clever Cleaner made a big difference. If apps are eating up the most space, start by clearing their cache (if possible) and deleting the ones you don’t use.
As for paid options, they make things quicker when you need extra storage, but even after using them, it’s a good idea to monitor your storage. If you constantly move files to flash drives, you’ll eventually get tired of buying more and managing them all.
That’s it, we’ve shared everything we know. Now it’s up to you to choose the method that works best. Good luck!