
Table of Contents
Ready to start deleting downloads on your iPhone but not sure where to begin? Downloaded files on your iPhone are not always obvious. It can be difficult to find and locate them because they are stored in different locations. This fact can create a problem when you want to delete downloaded files to claim more storage space on your iPhone. But don’t fret because there are solutions.
Types of Downloads and Where They Are Stored
The location of downloaded data on your iPhone depends on what application you used to download it. Here are examples:
- 🌐 Web browser: Files downloaded from Safari or other web browsers are stored in the “Downloads” folder within your iPhone’s Files app. You can access them by going to Files > Downloads.
🖼️ Media: Images and videos downloaded from platforms like X (Twitter), Facebook, Reddit, etc., are usually stored in the Photos app. Sometimes, videos will be saved under “Downloads” in the Files app, but you can head there and save them to the Photos app.
📧 Mail and messages: Attachments in your Apple Mail and Messages apps are stored within the apps, but you can also save them to Files or Photos for easier access.
📁 Third-party apps: Files downloaded from third-party apps like Dropbox, Google Drive, etc., have their section in your Files app. If you save content in apps like Spotify, YouTube, and similar for offline use, the apps store them in their own interface.
It’s also worth mentioning that media files (music, images, and videos) occupy significant space on your iPhone. Content apps and games can also occupy a large space on your device. They tend to cache data on your device and, consequently, occupy more storage space. However, you can delete both raw and cached data to claim more space.
5 Must-Know Methods to Clear Downloads on iPhone
We tested different ways to remove downloaded files on an iPhone and are ready to explain each of them to you. When choosing a method to apply, you should rely on where most of your files are stored. Of course, to delete all downloads on your iPhone, it’s best to go through each method in turn. So, the main ways include:
Method 1: Manage Downloads in the Files App
The Files app is typically the main repository for downloads from the Internet or other resources, but you choose to save them there. You can easily remove your downloaded files directly from this area. Examples of files that go to this location include PDF and Word documents, videos, audio, etc. You can remove them both from local storage and from iCloud to save space.
Follow these steps to delete your downloaded files from the Files app:
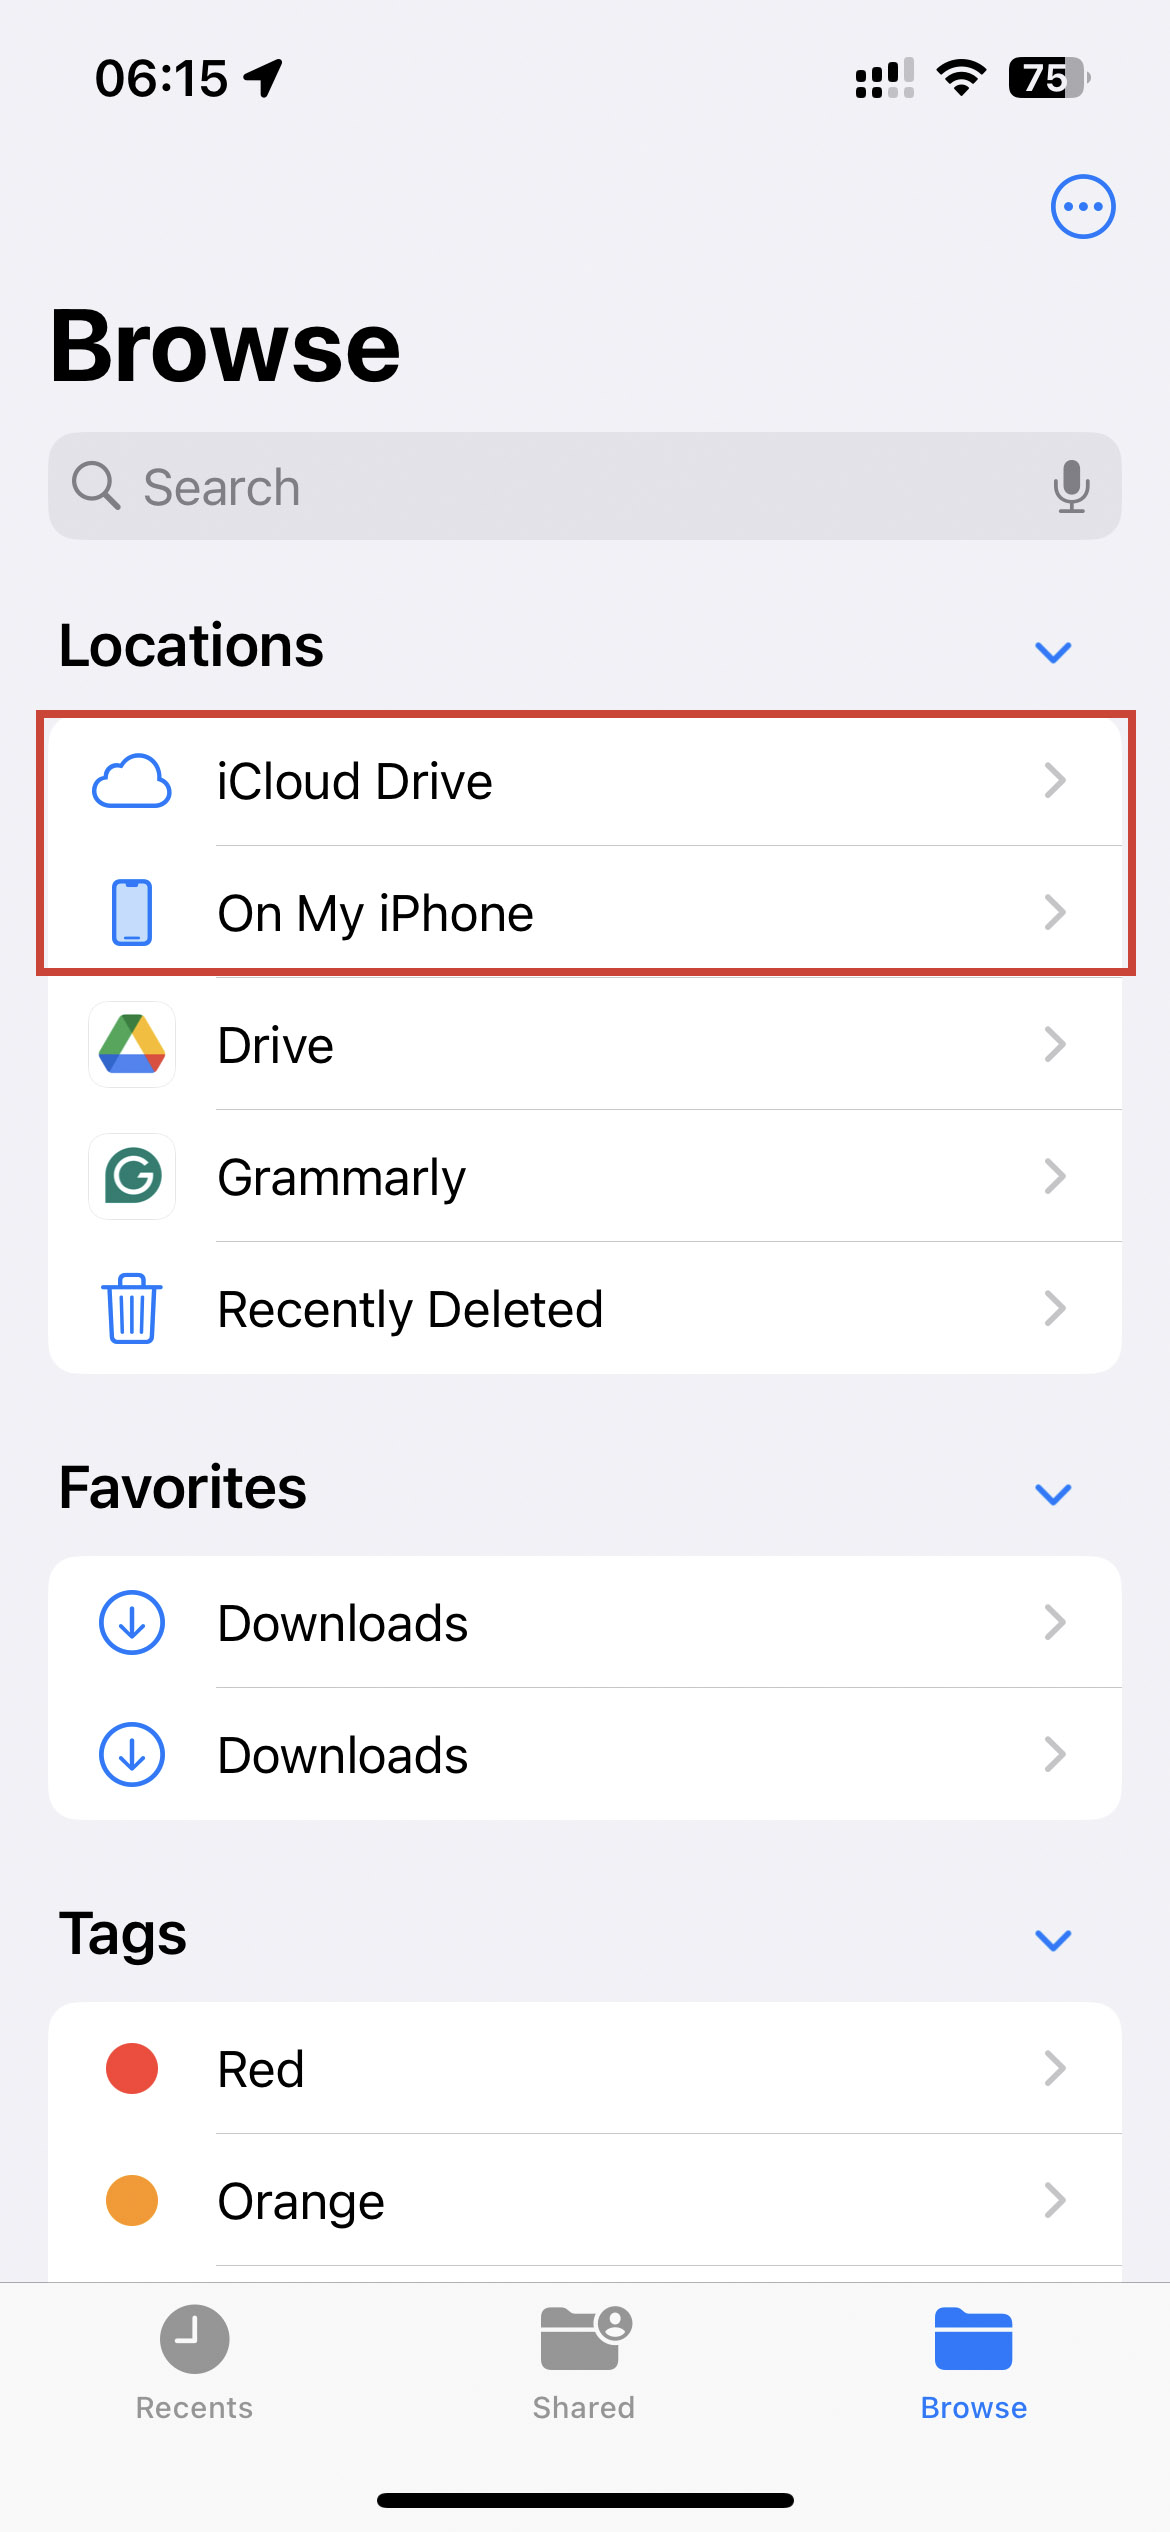
- Open the Files app.
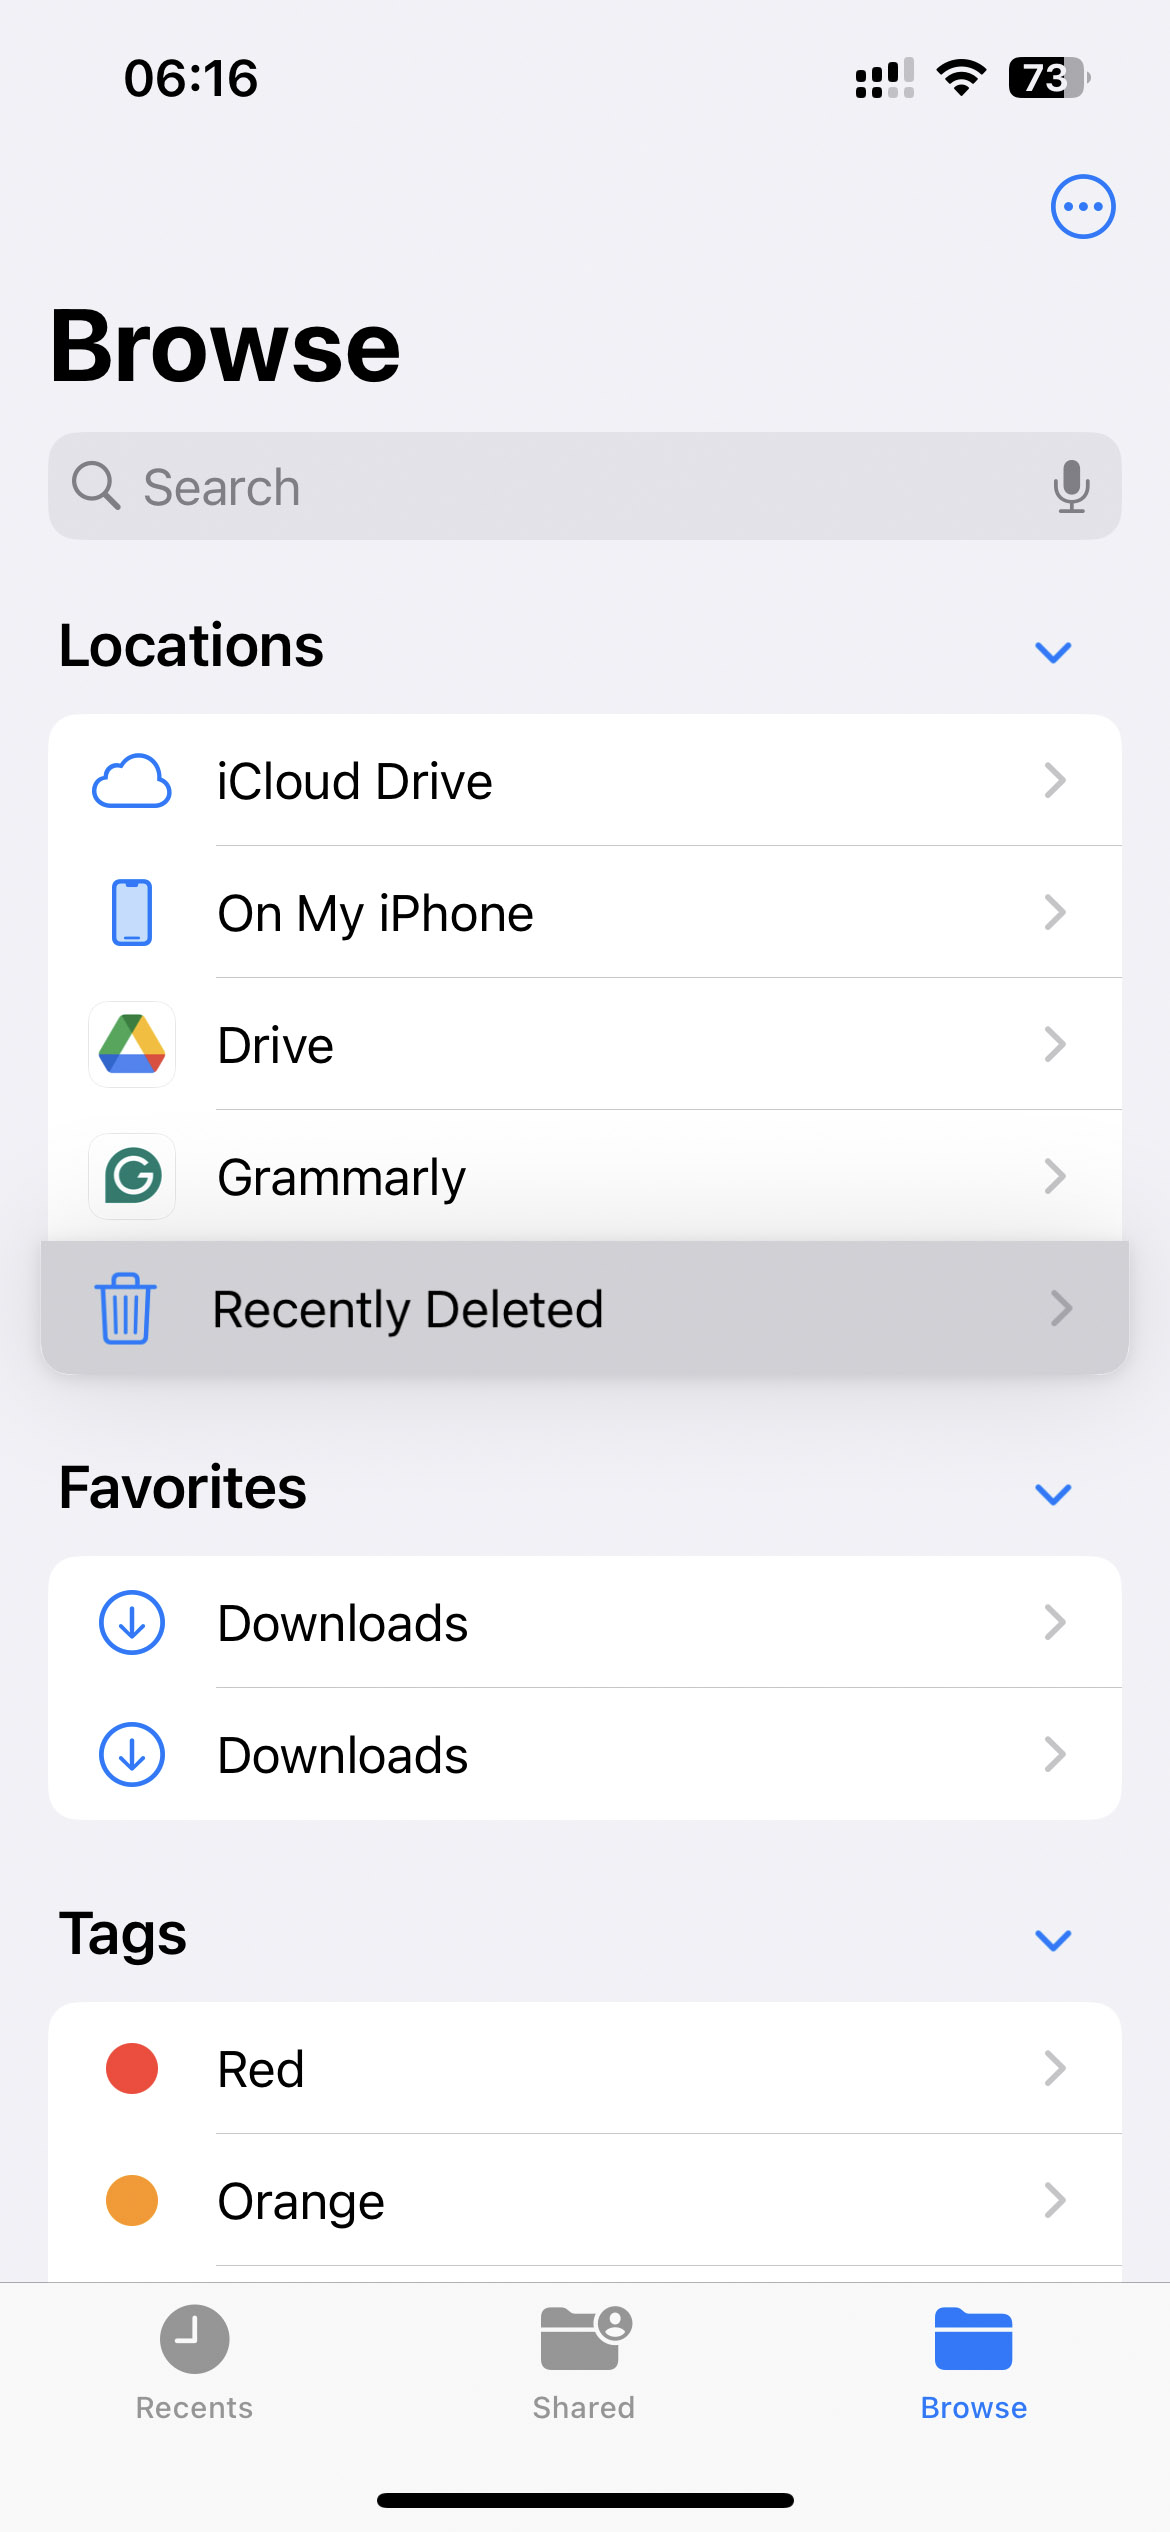
- Tap On My iPhone or iCloud Drive under Locations, depending on what you use as your primary download storage.
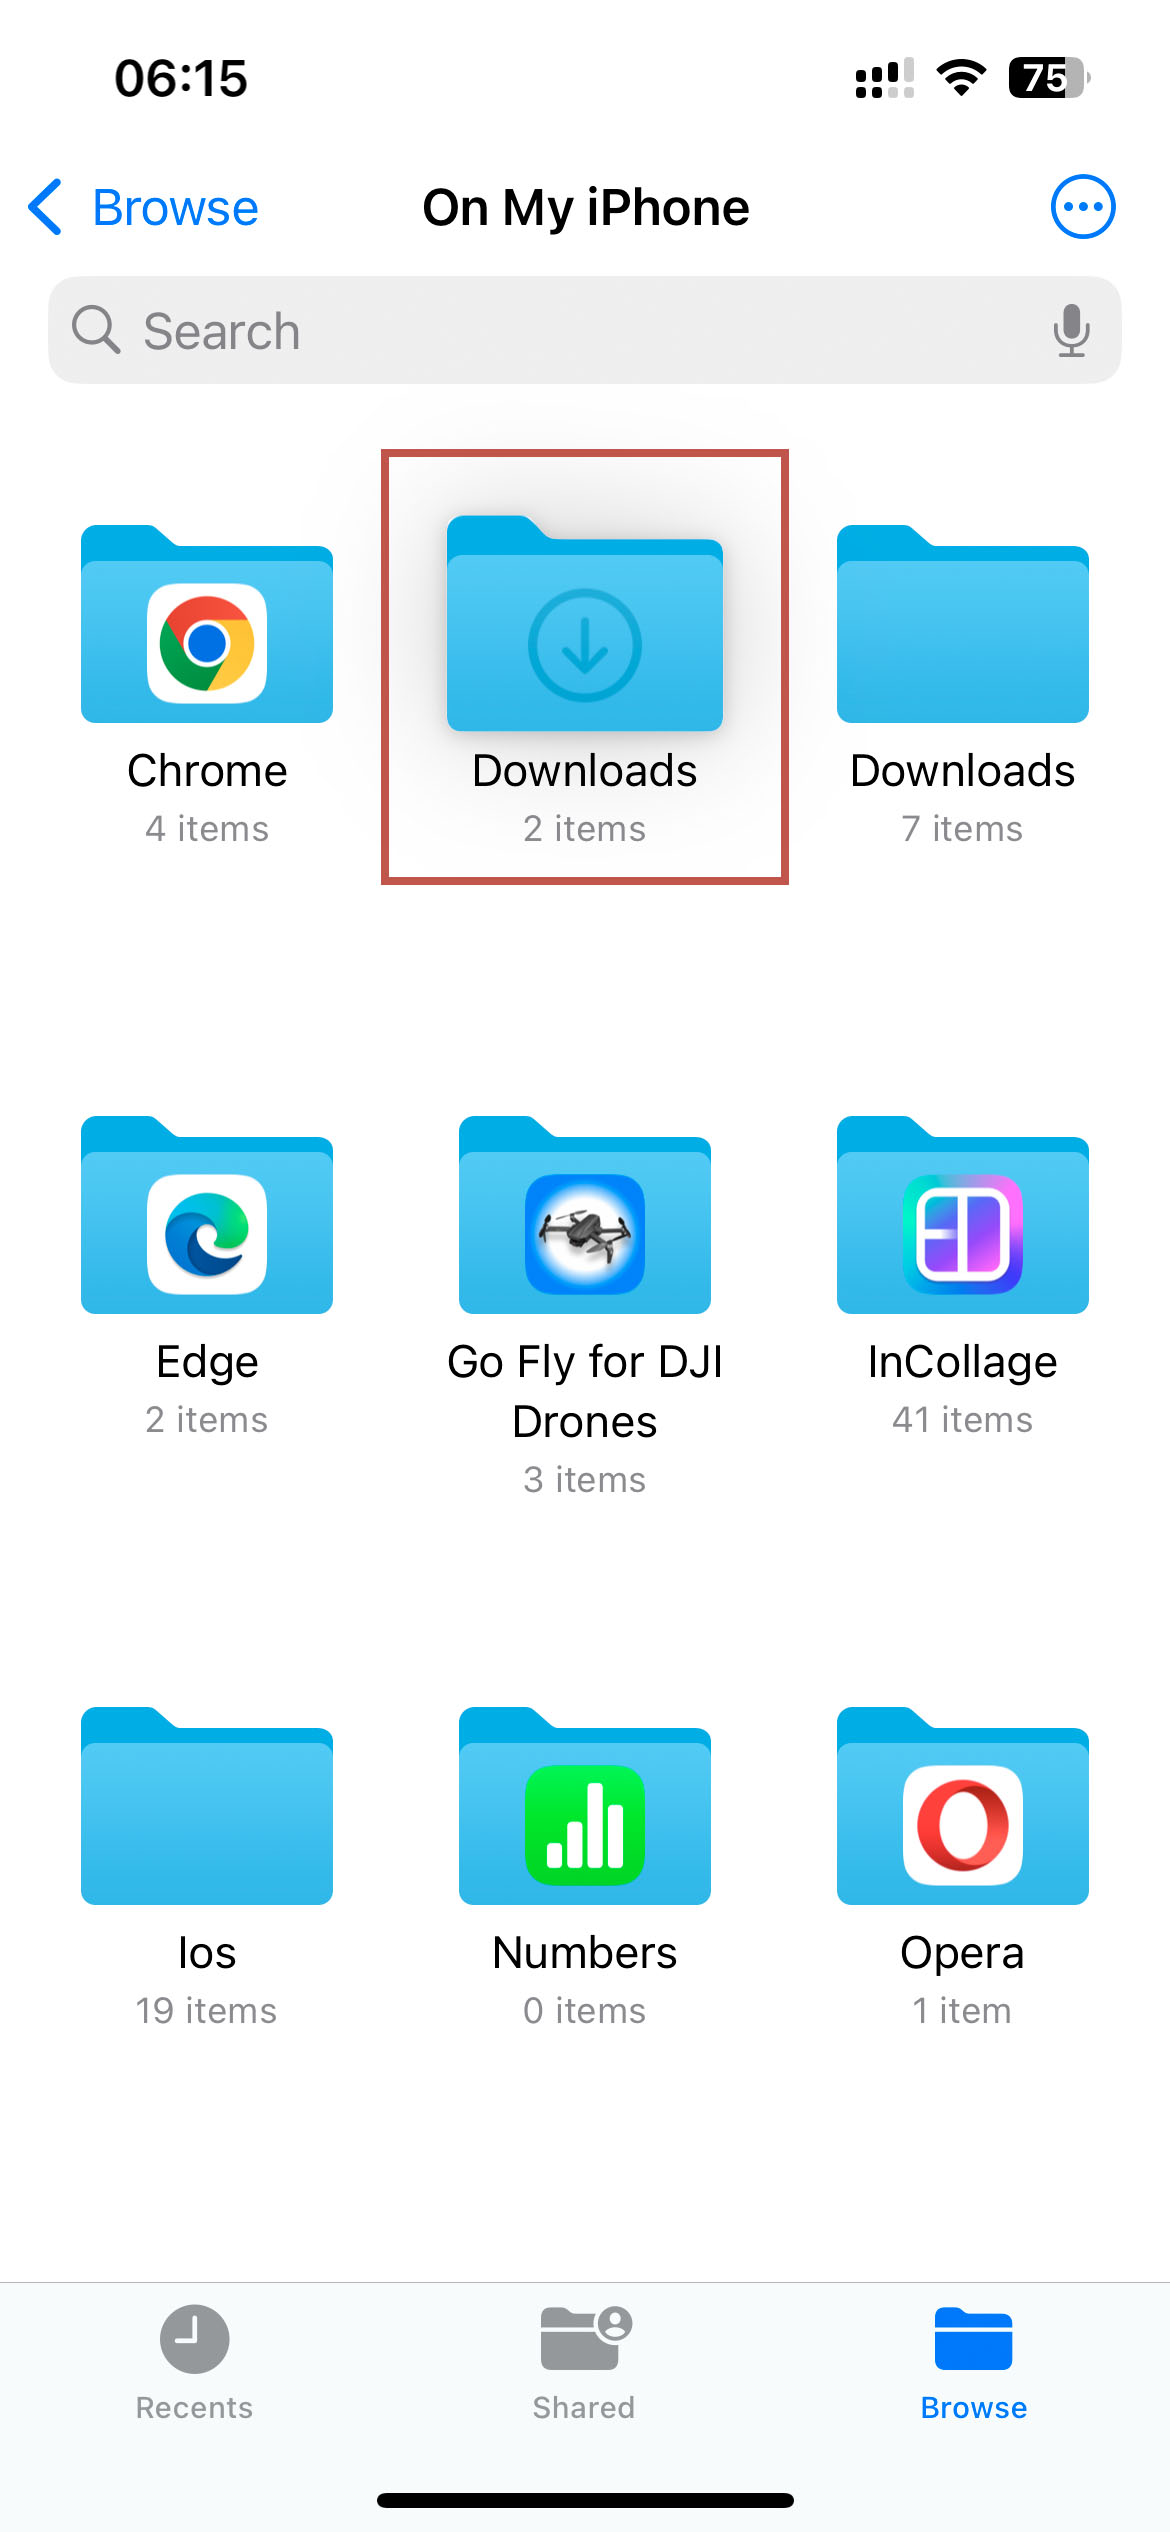
- Open the Downloads folder.
- Tap and hold any file you want to delete till a menu pops up. Click Delete.

- Alternatively, click the three-dotted menu (…) on the top-right corner and tap Select.
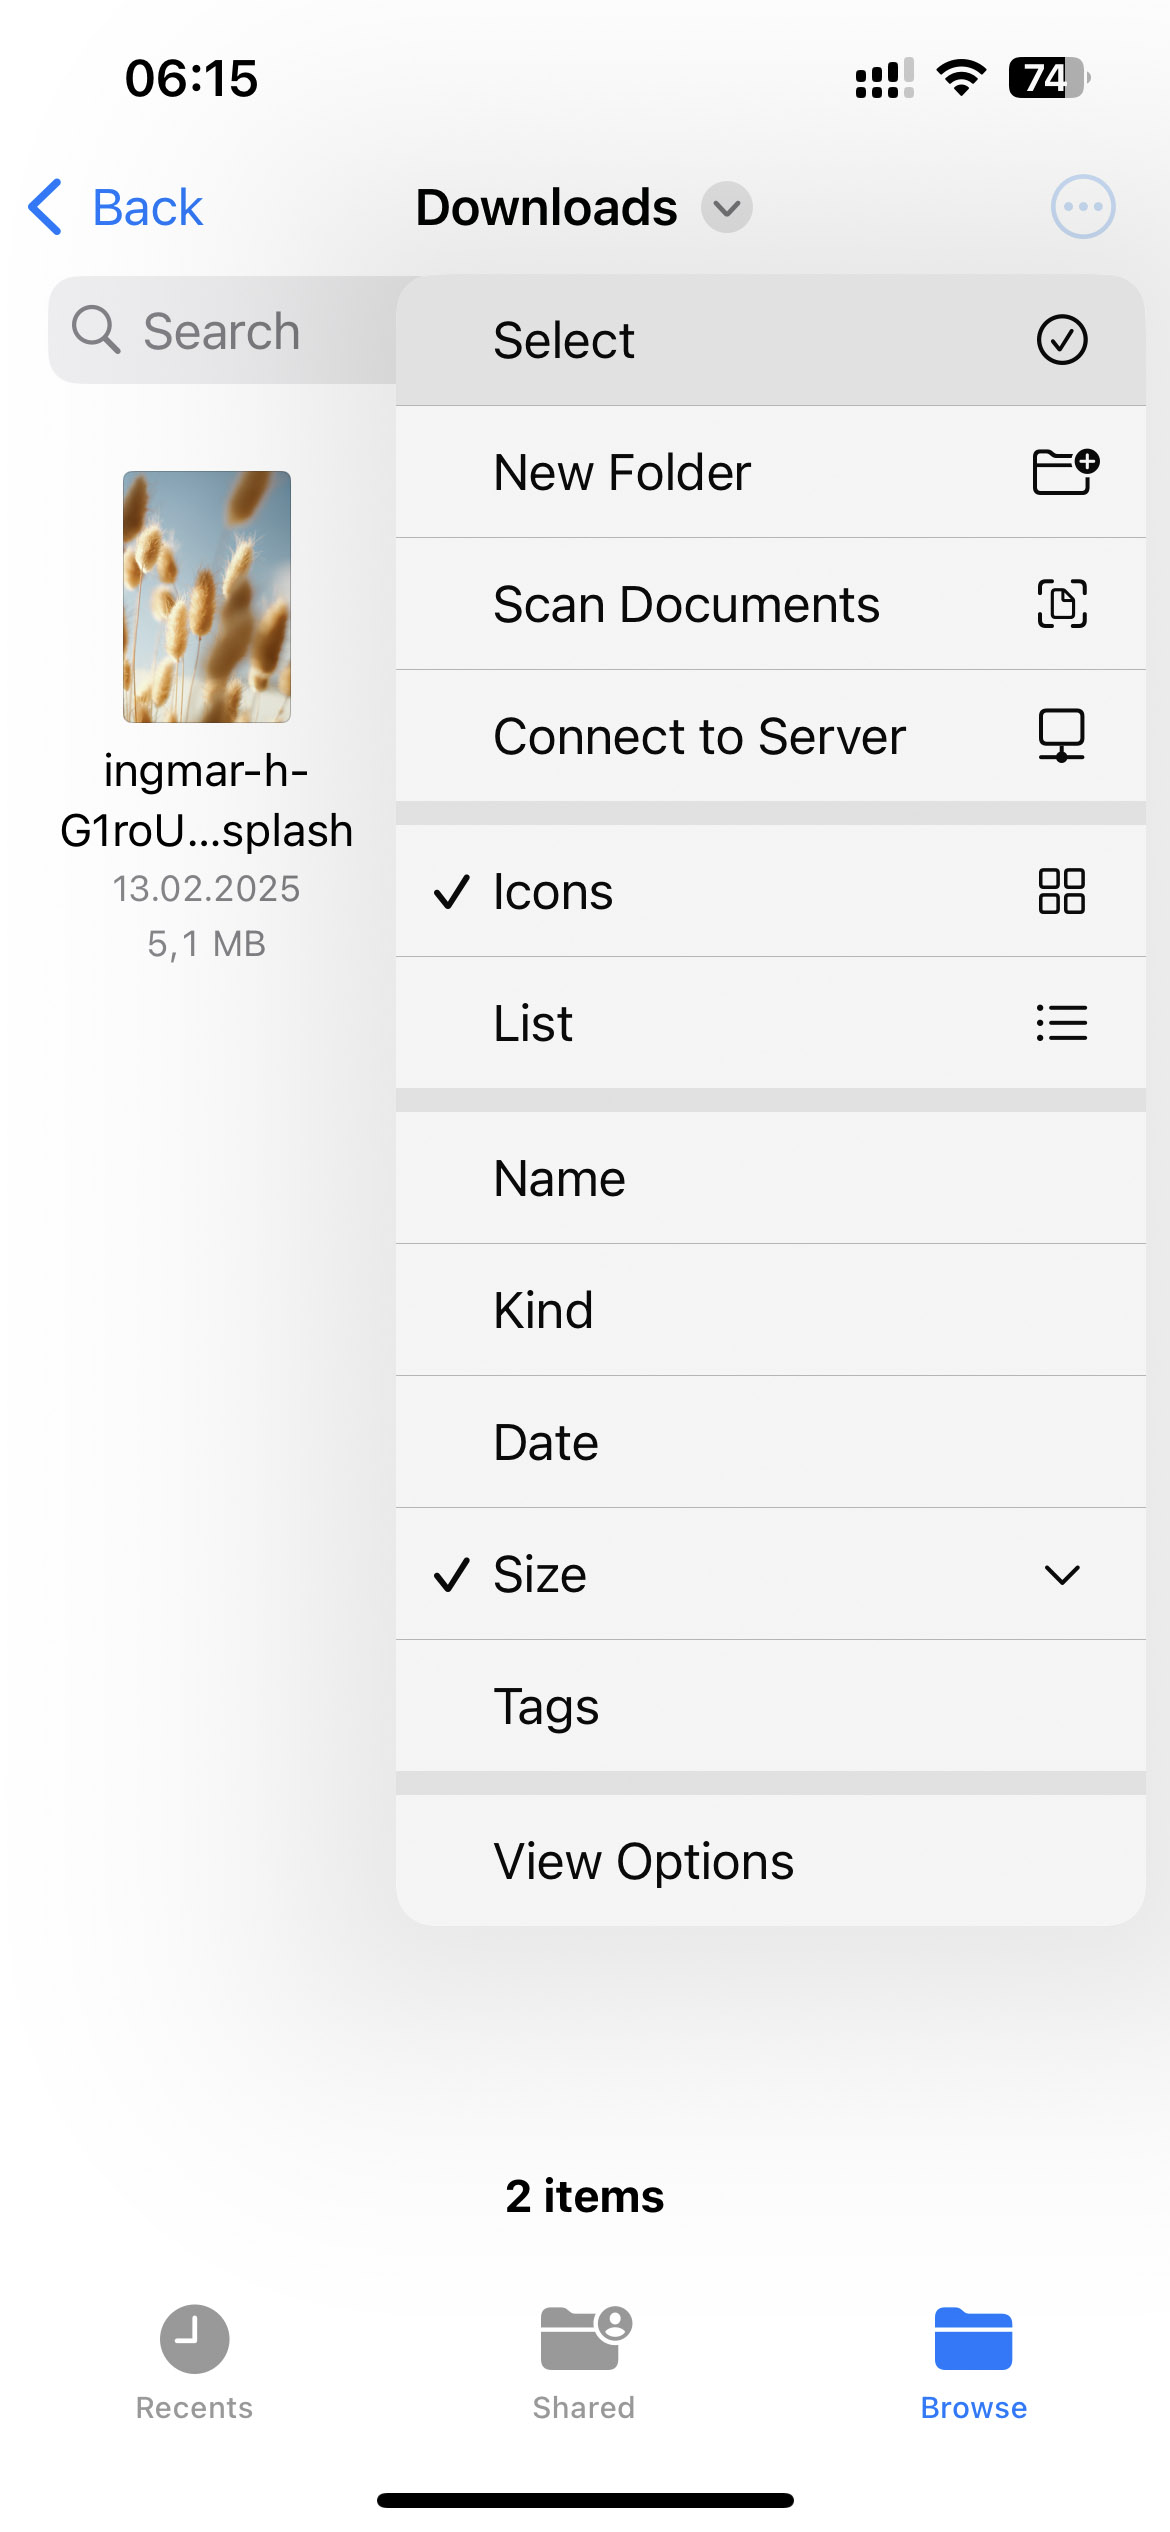
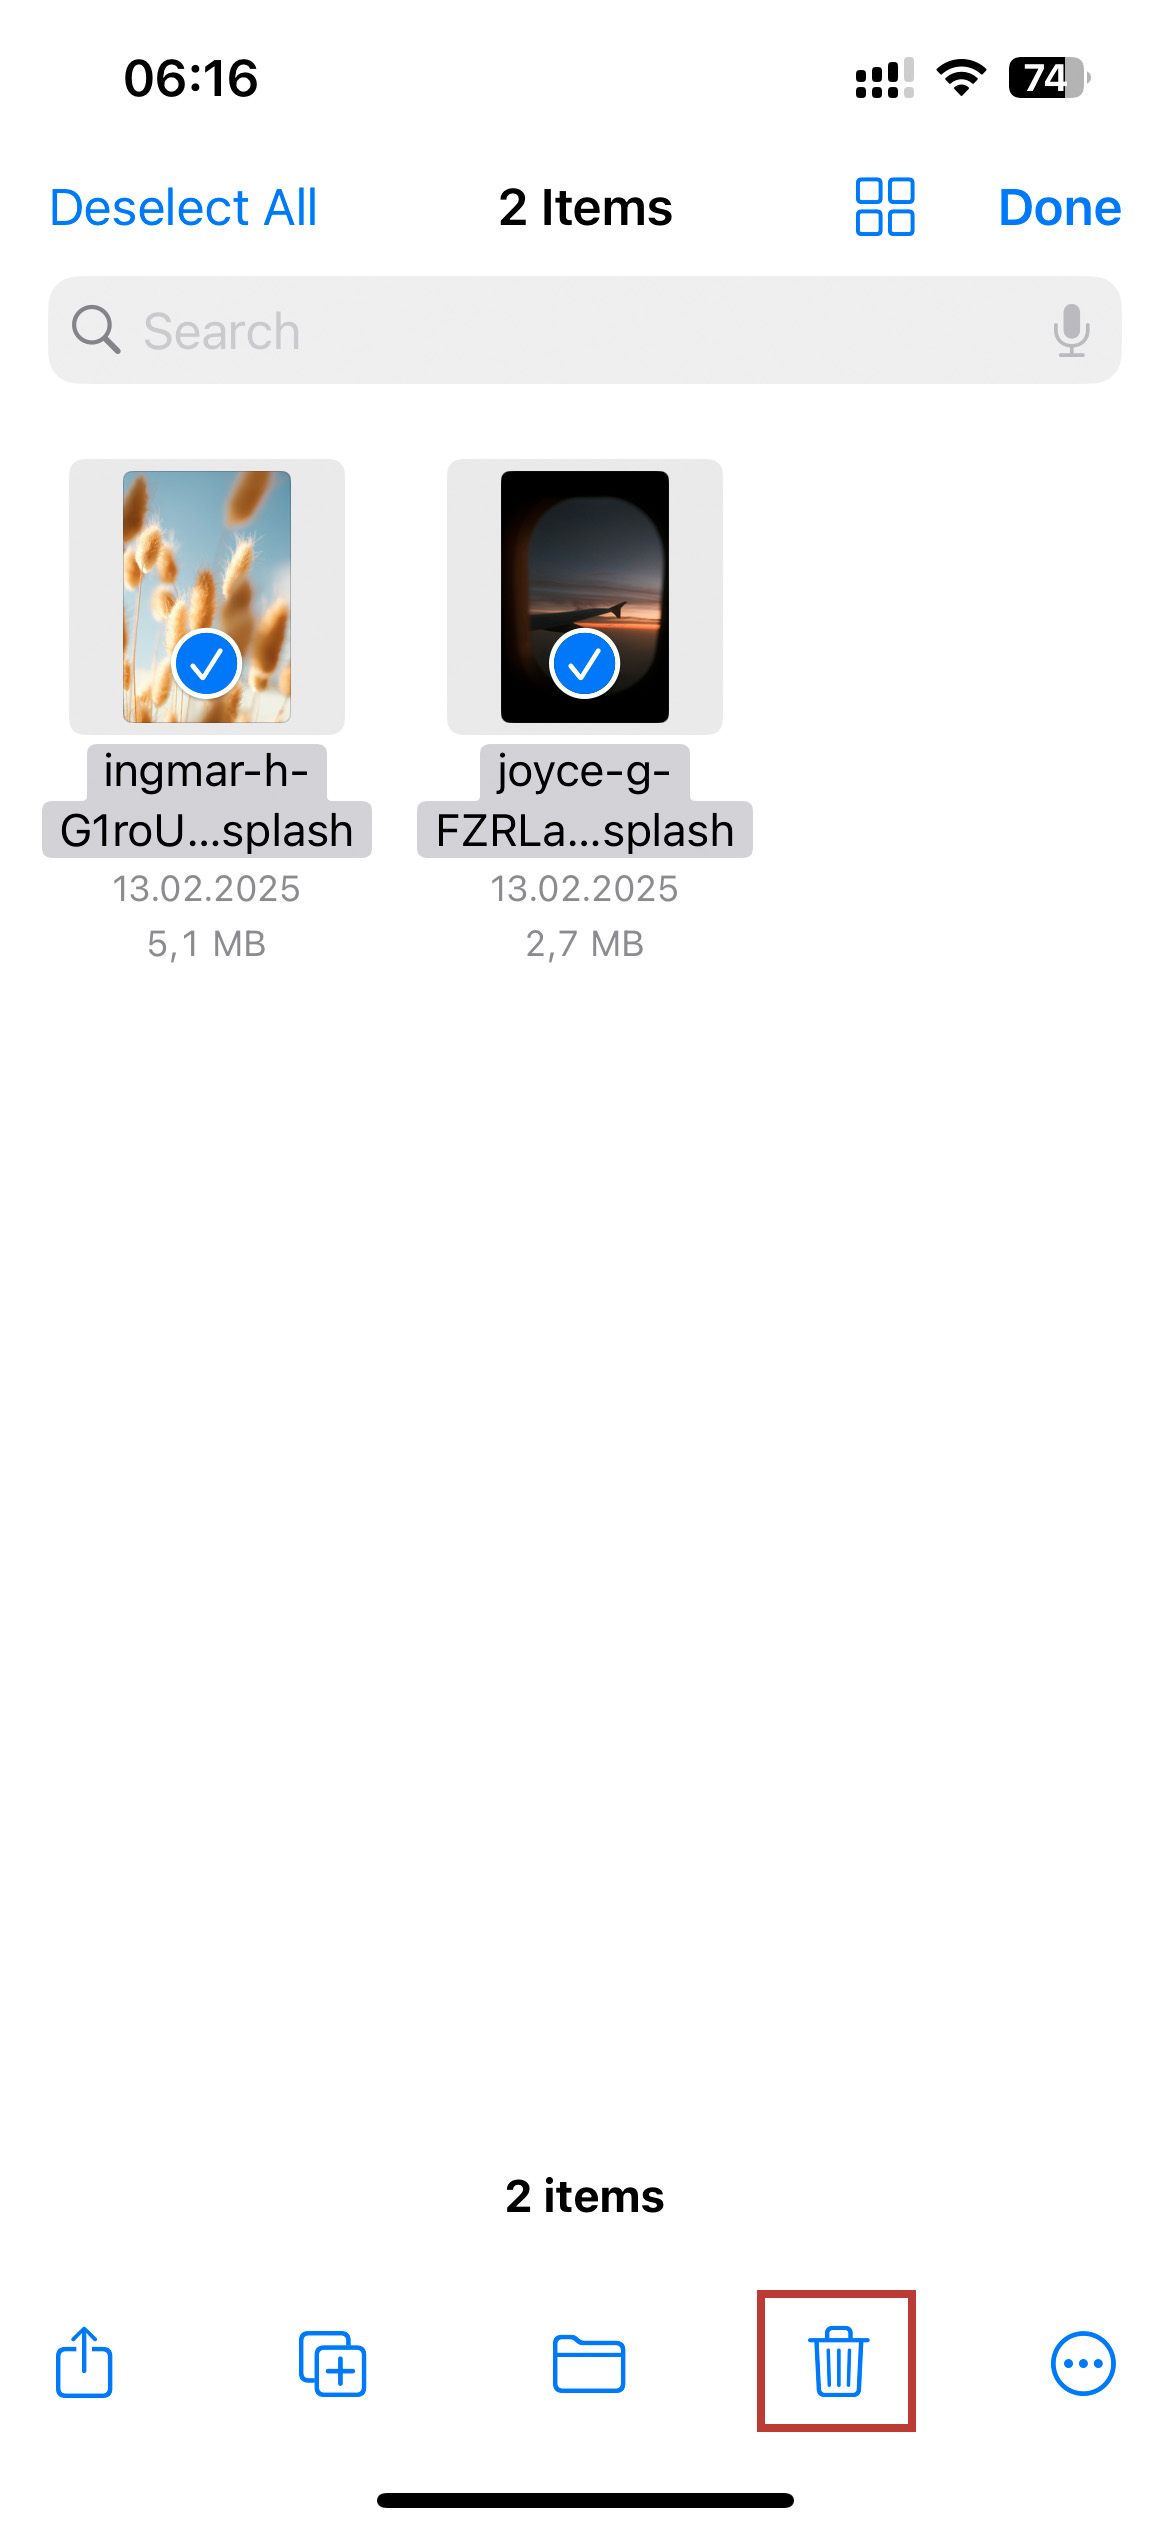
- Choose the files you want to delete and click the trash icon at the bottom menu. This is the bulk deletion option.


However, no matter what you’ve selected under Locations (iPhone or iCloud), your downloaded files will still sit in the “Recently Deleted” folder in the Files app after you delete them. If you want to permanently delete these downloaded items on your iPhone, you’ll need to take a few extra steps:
- In the Files app, navigate to the Recently Deleted folder located under Locations.
- Tap Select in the upper right corner.

- Choose the downloads you want to permanently remove or tap Delete All to remove all items.
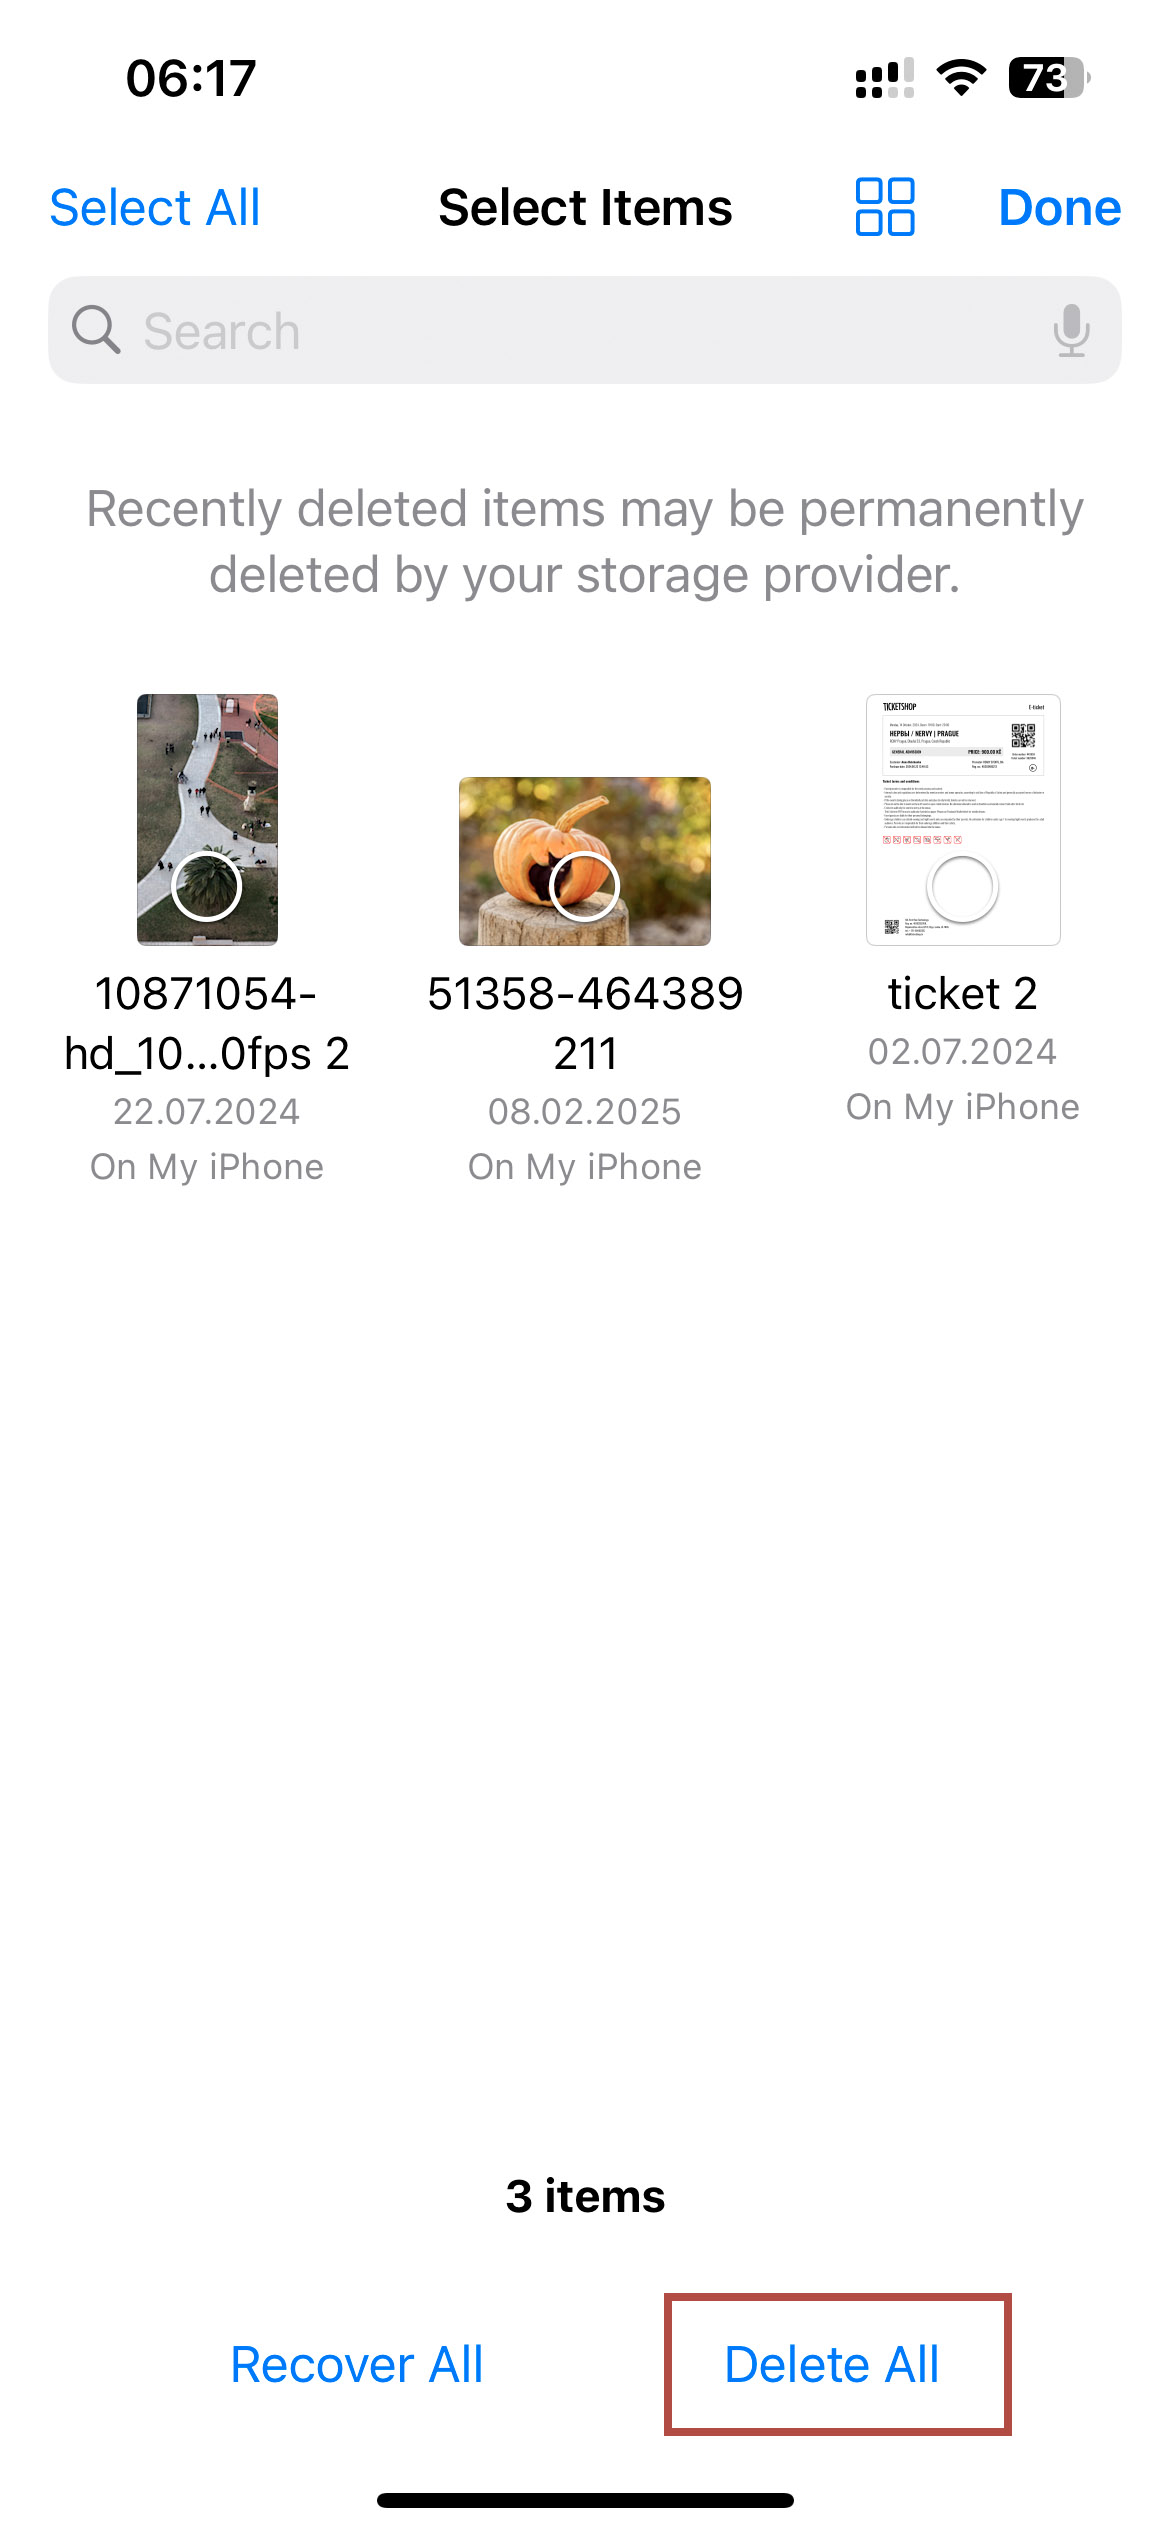
- Confirm your choice by tapping Delete to erase the selected items permanently.


Method 2: Delete Downloads from Web Browsers
While it is most convenient to delete downloads from the Internet through the Files app interface, there is another way to do it through the browser application interface, whether you’ve downloaded a batch of PDFs from a work email link, snagged some concert tickets from a booking site, or saved images from a social media platform. However, there are a few things to keep in mind with this method, it all depends on which browser you’re using.
If you use Safari or Firefox, deleting downloads using the method described below will only remove recent downloads from your iPhone’s download history, not the files themselves from your device. In this way, you clear only the part of the browser cache occupied by these downloads, but the files themselves will still be available in the Downloads folder via the Files app. If this option suits you, then follow these steps:
- Open the Safari app.
- Tap the arrow icon next to the search bar/website tab and click Downloads. This icon will be visible only if you have previously downloaded files via Safari.
- On the list of Downloads, Swipe left on the file you want to remove and tap the Delete button.


On the other hand, Chrome and Opera use different mechanisms, and from the browser app interface, you can go to their storage location on your iPhone and delete them from local storage. We will show you how to do this using Chrome as an example:
- Open the Google Chrome app.
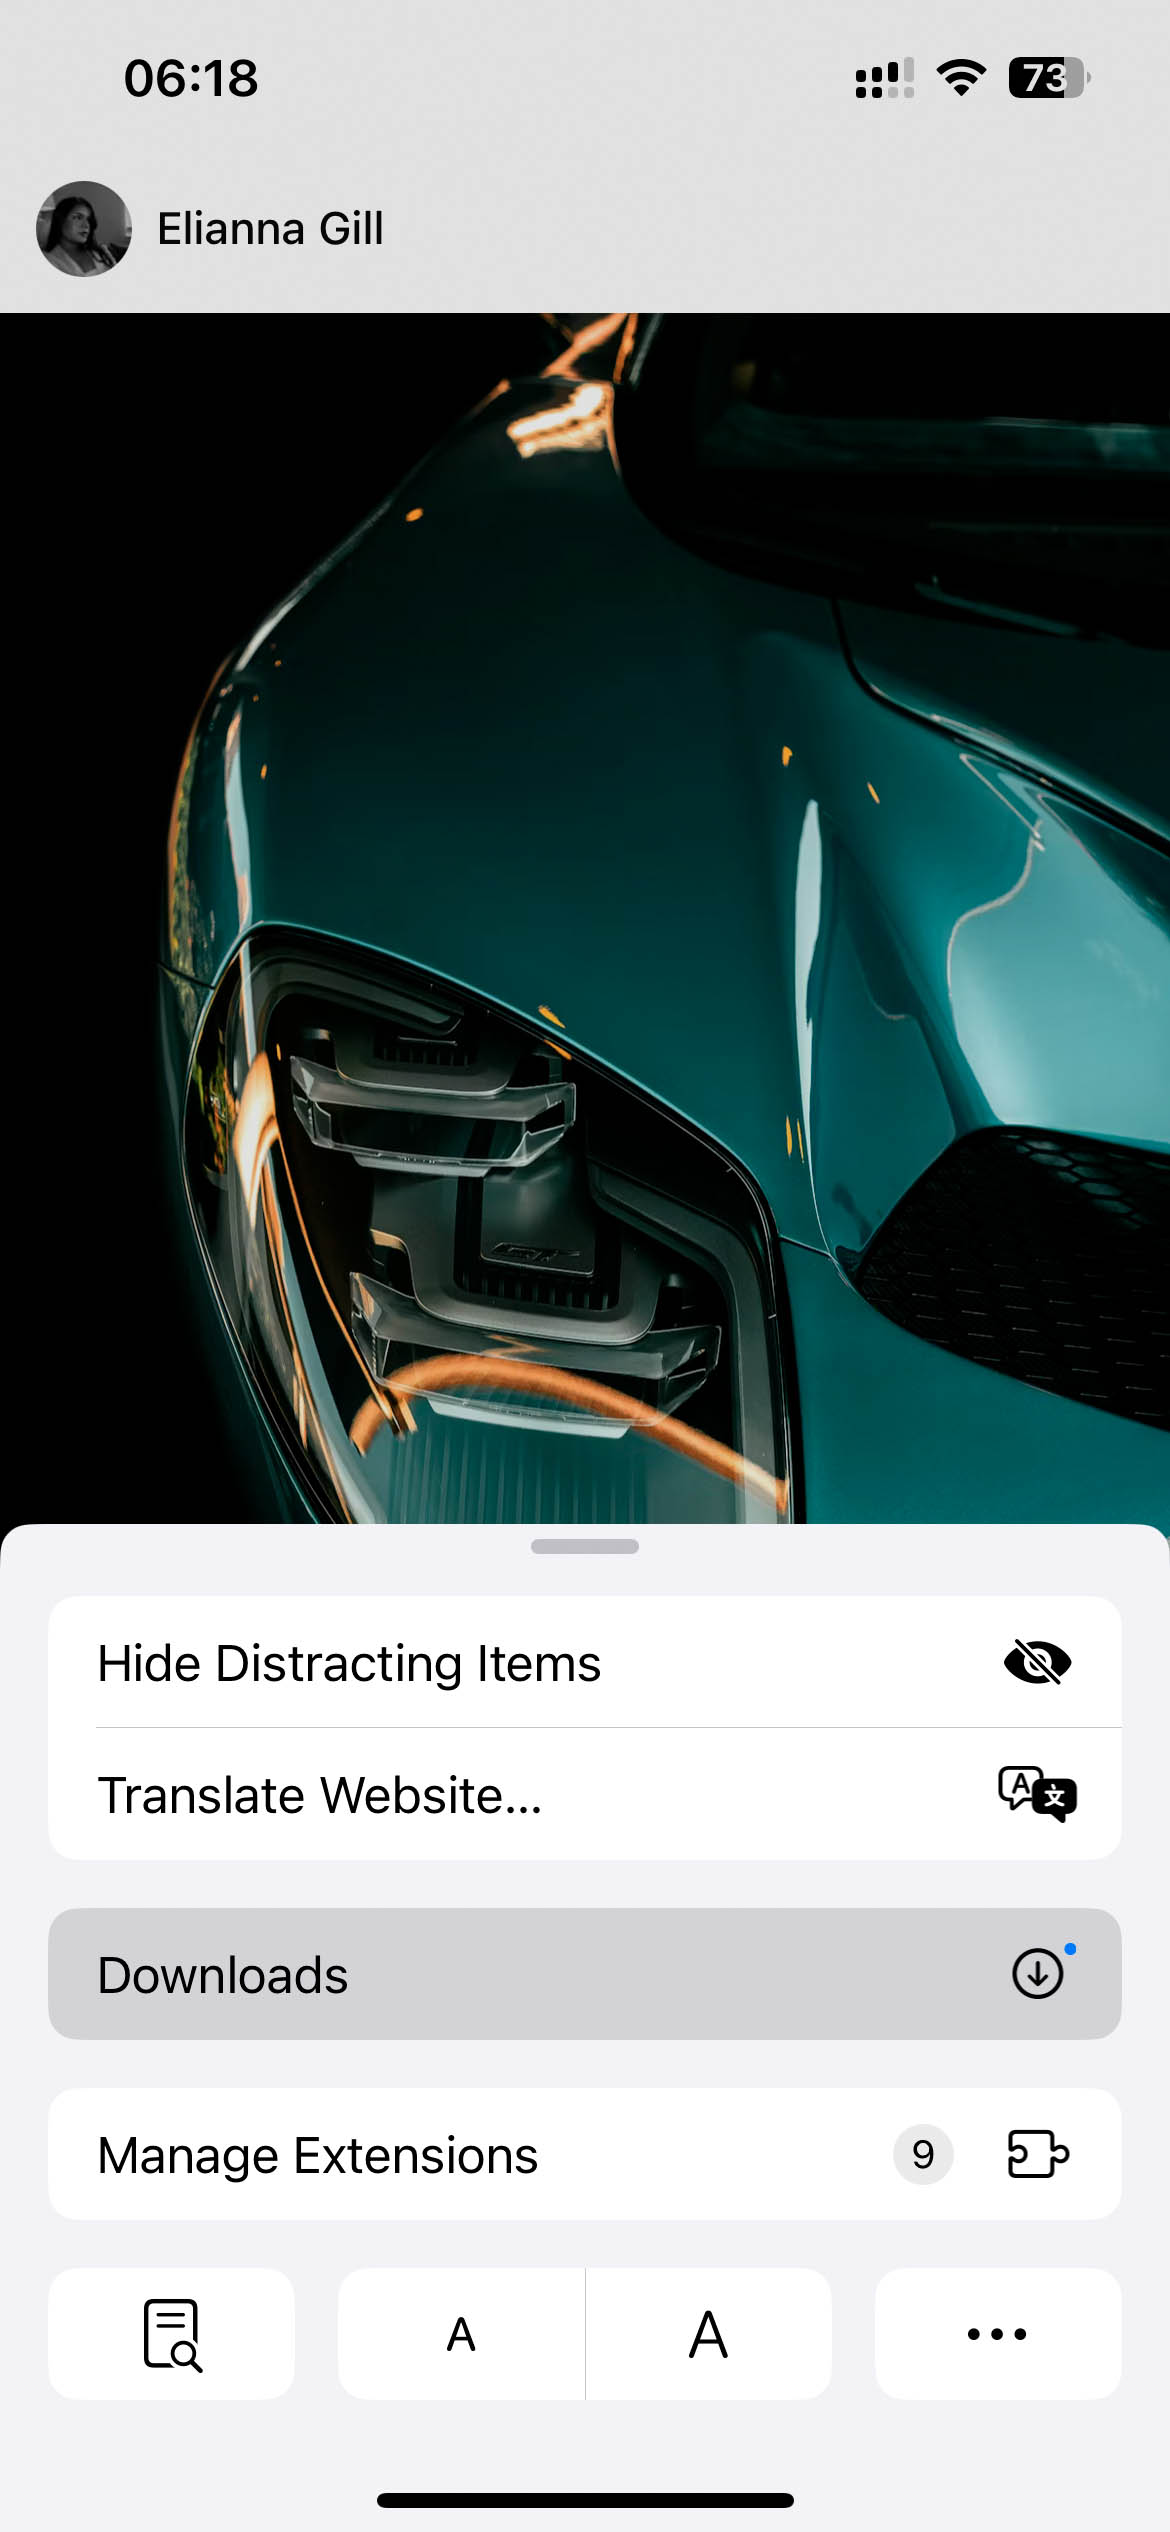
- Tap the three dots in the bottom right corner and click Downloads from the menu that pops up.

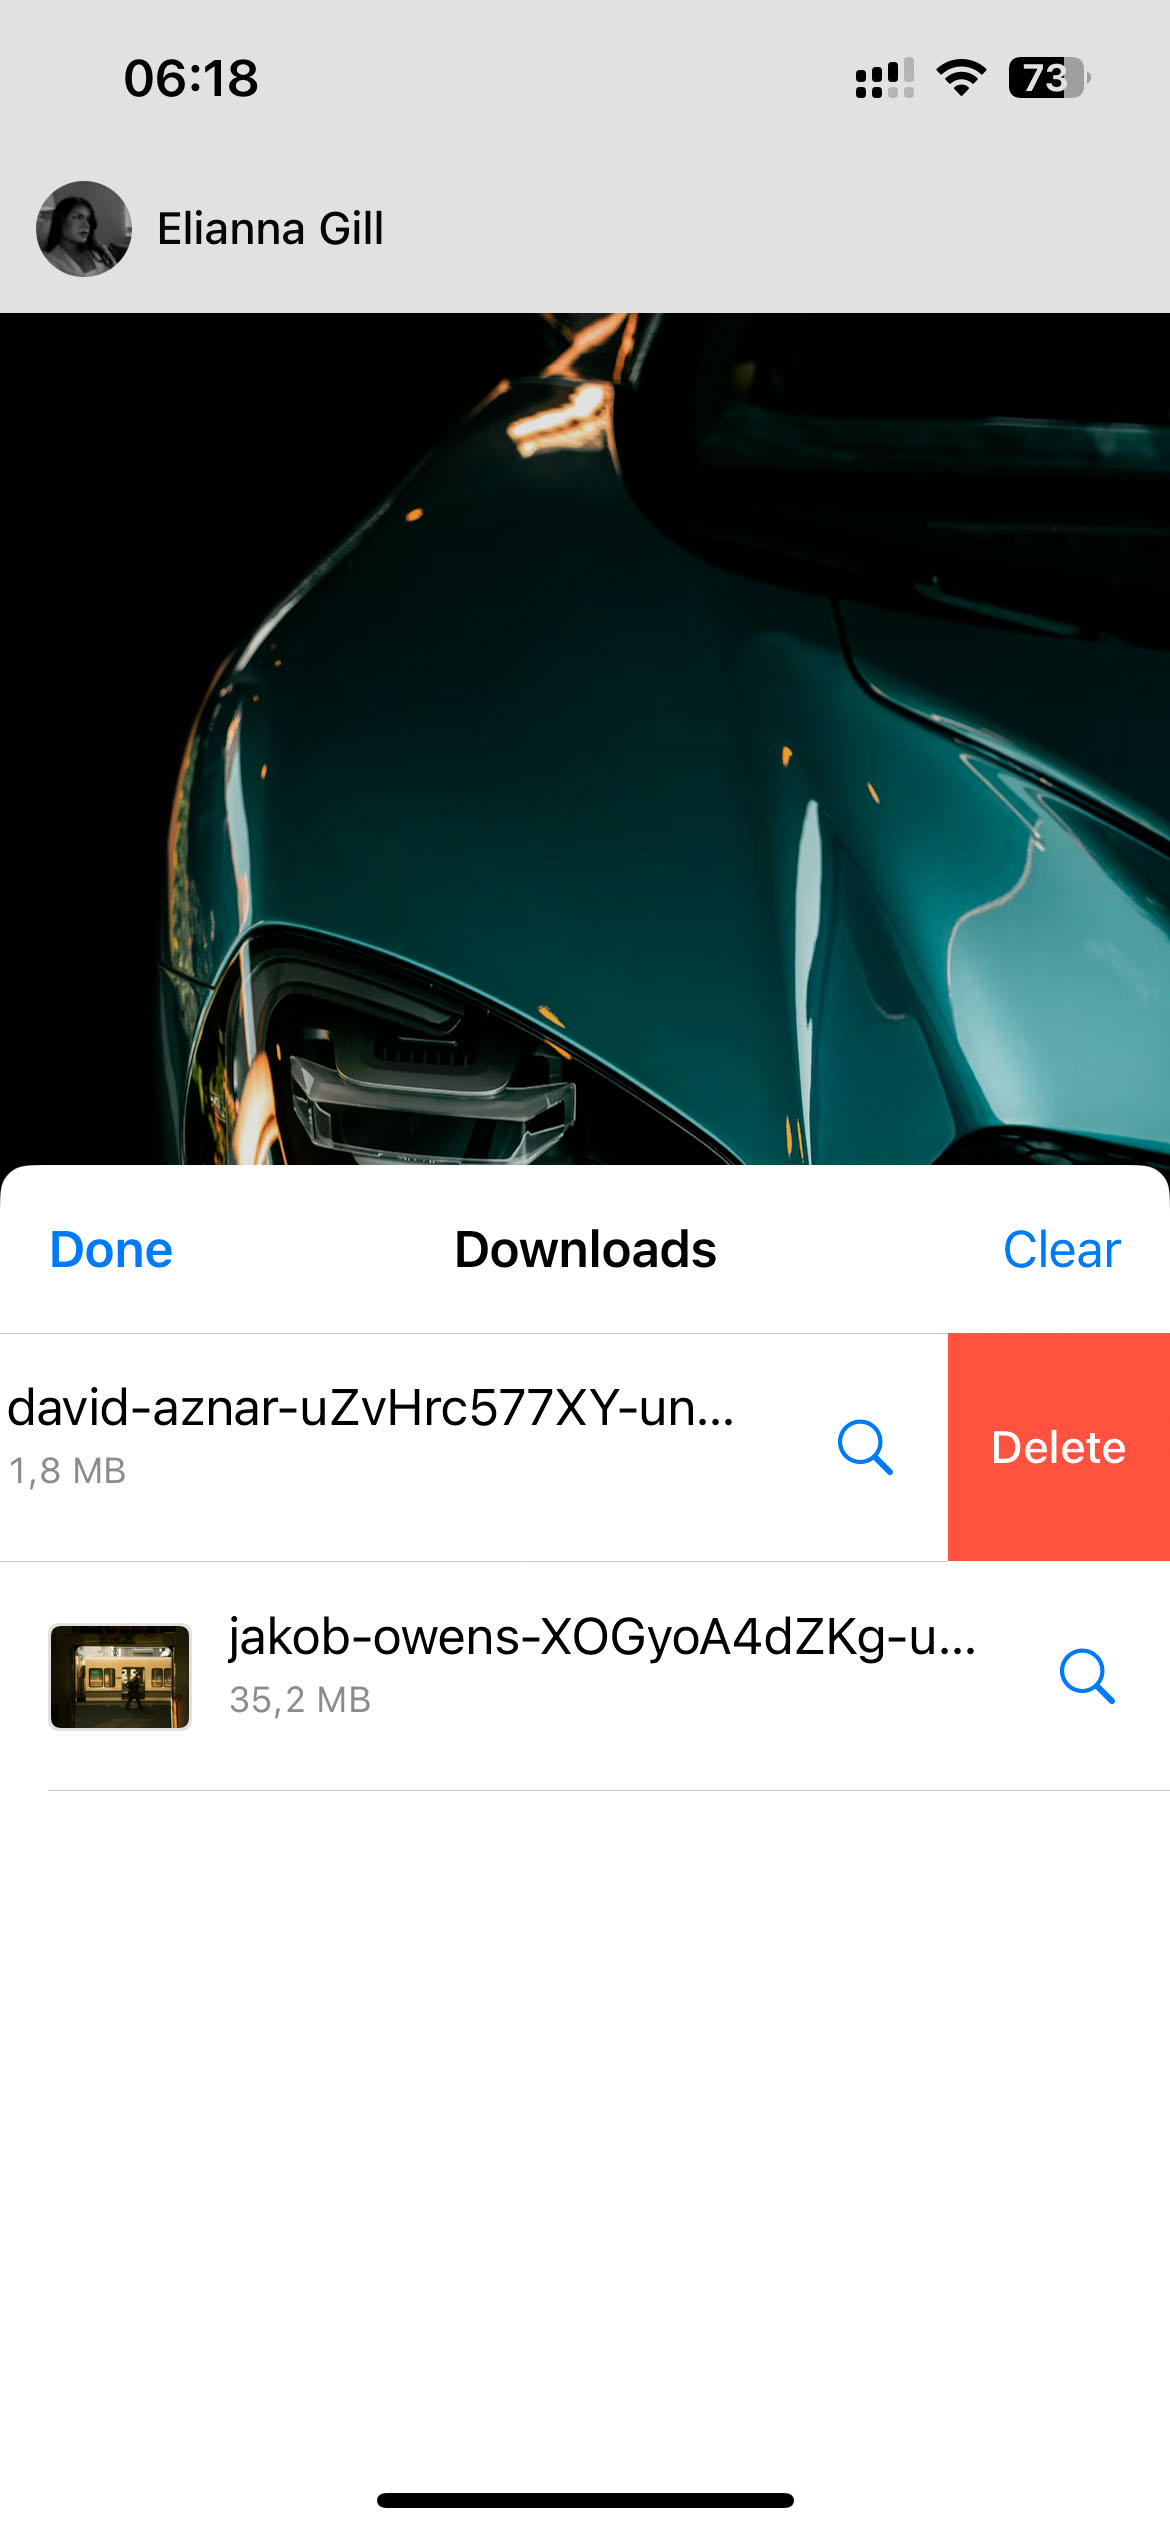
- Clicking Downloads will redirect you to the folder in the Files app where Chrome stores all your downloaded files.
- Select and delete the ones you want.

- If you want to permanently delete these downloads, go to the Recently Deleted album and clear it, as shown at the end of the previous method.


Method 3: Check the Downloaded Items in the Photos App
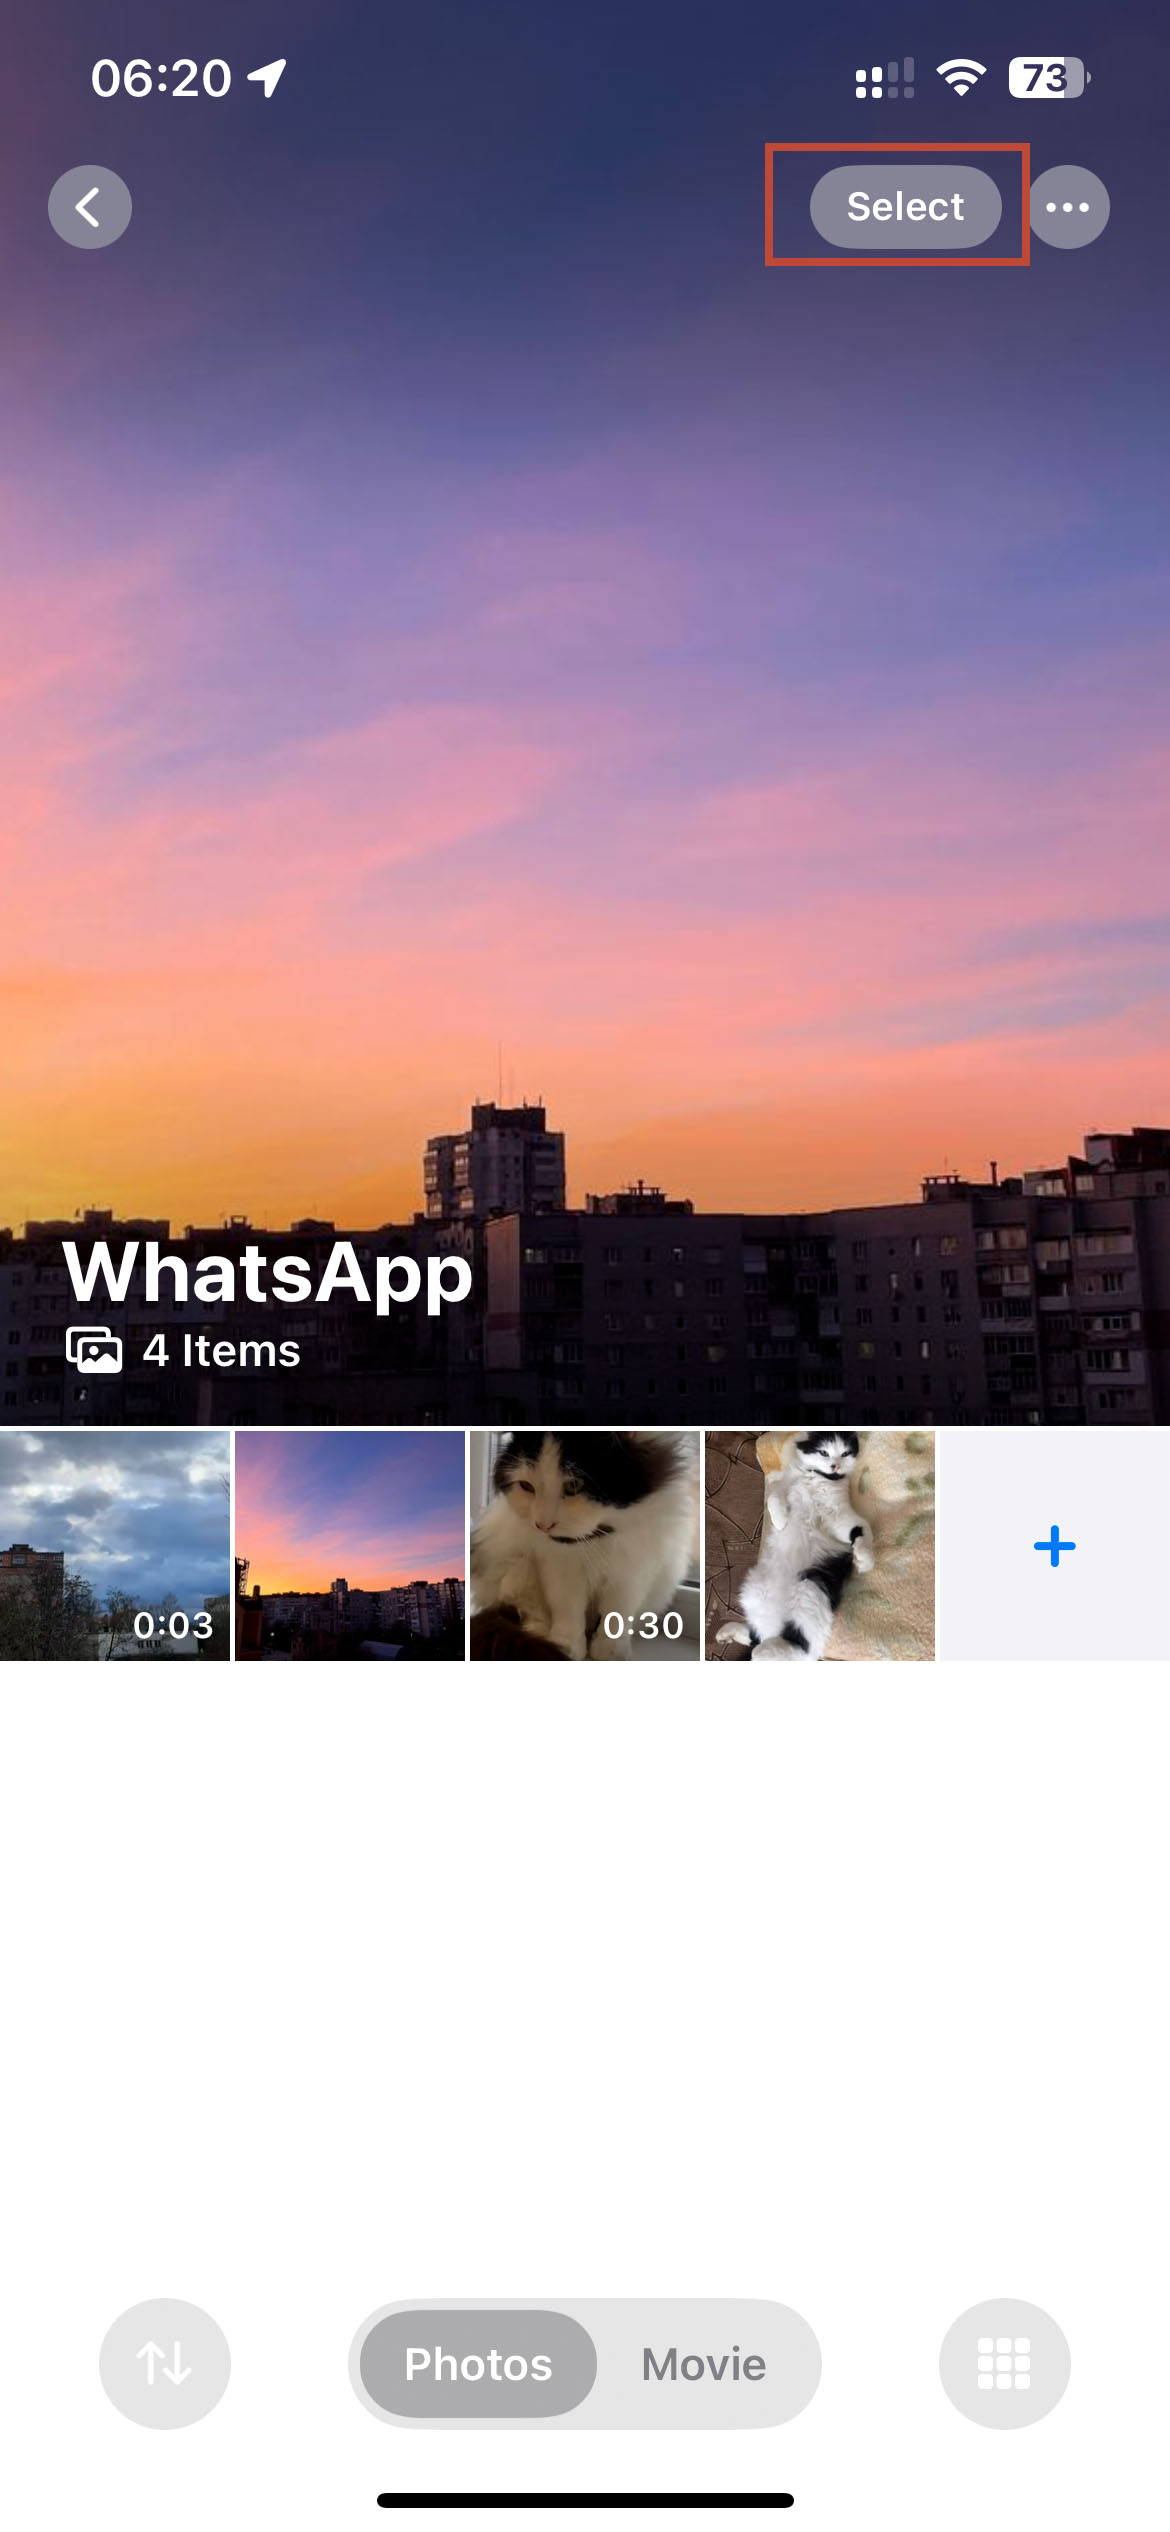
Also, don’t forget that downloaded photos and videos usually end up in the Photos app. Depending on the app you used to download them, they might show up in different albums. For example, apps like Snapchat and WhatsApp often create their own albums for saved files, while others just drop everything into your main photo library under the Recent Days section. We’re not going to break down the steps for each album, but we will show the general principle of how to delete downloaded photos or videos on iPhone in the Photos app:
- Open the Photos app.
- Open the album you want to delete photos or videos from.
- Tap and hold the photo or video until a menu pops up. Tap Delete and Delete Photo/Video to confirm the action.
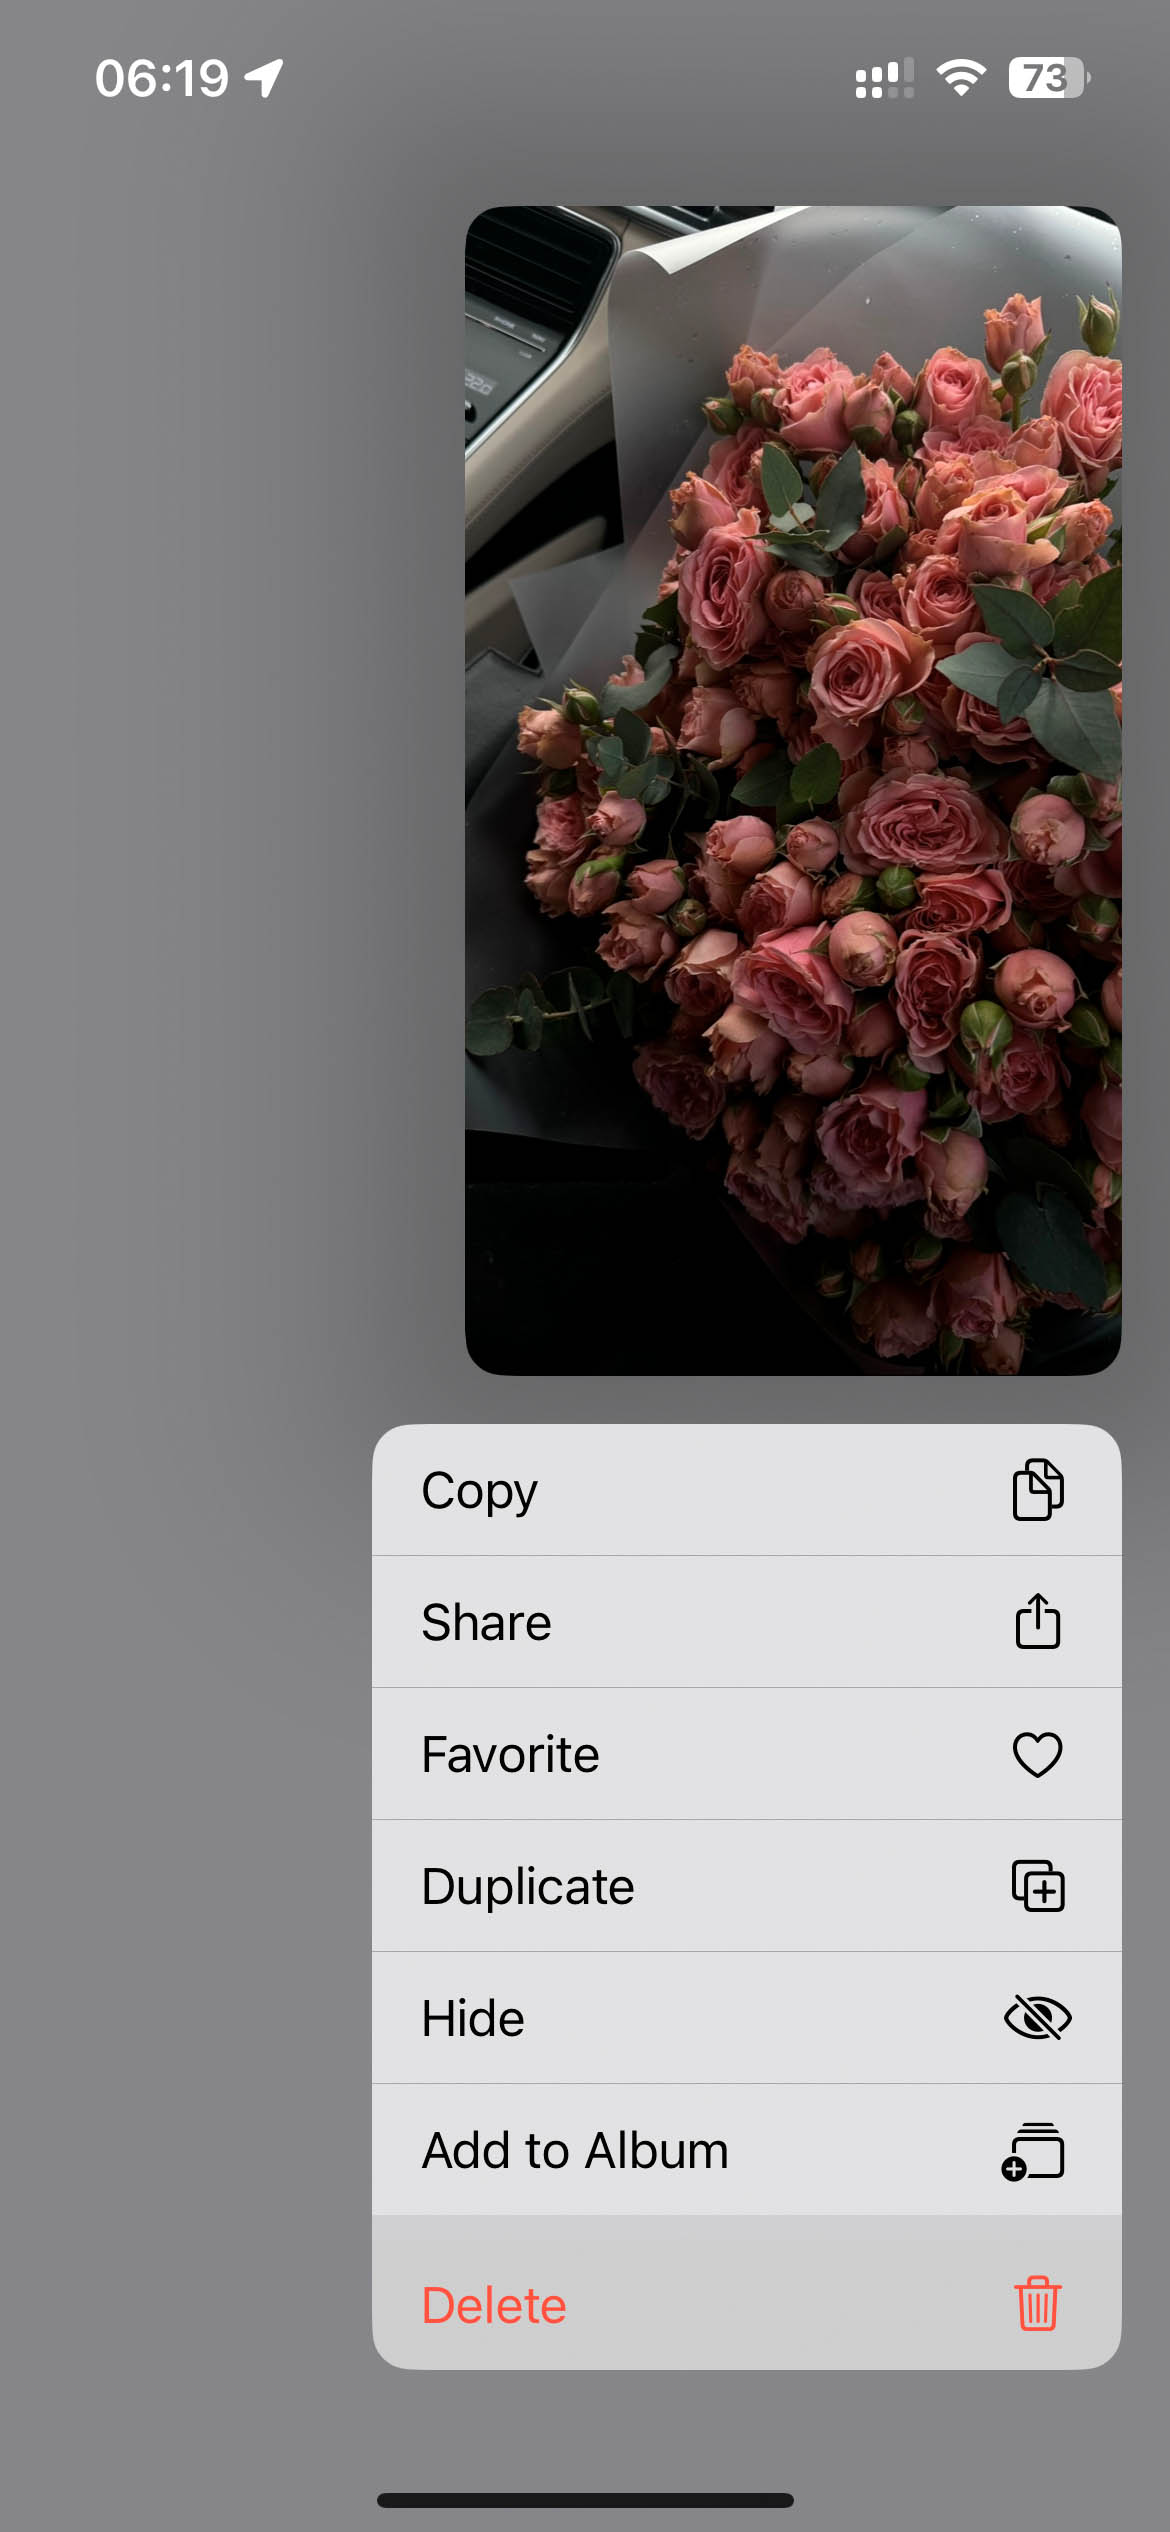
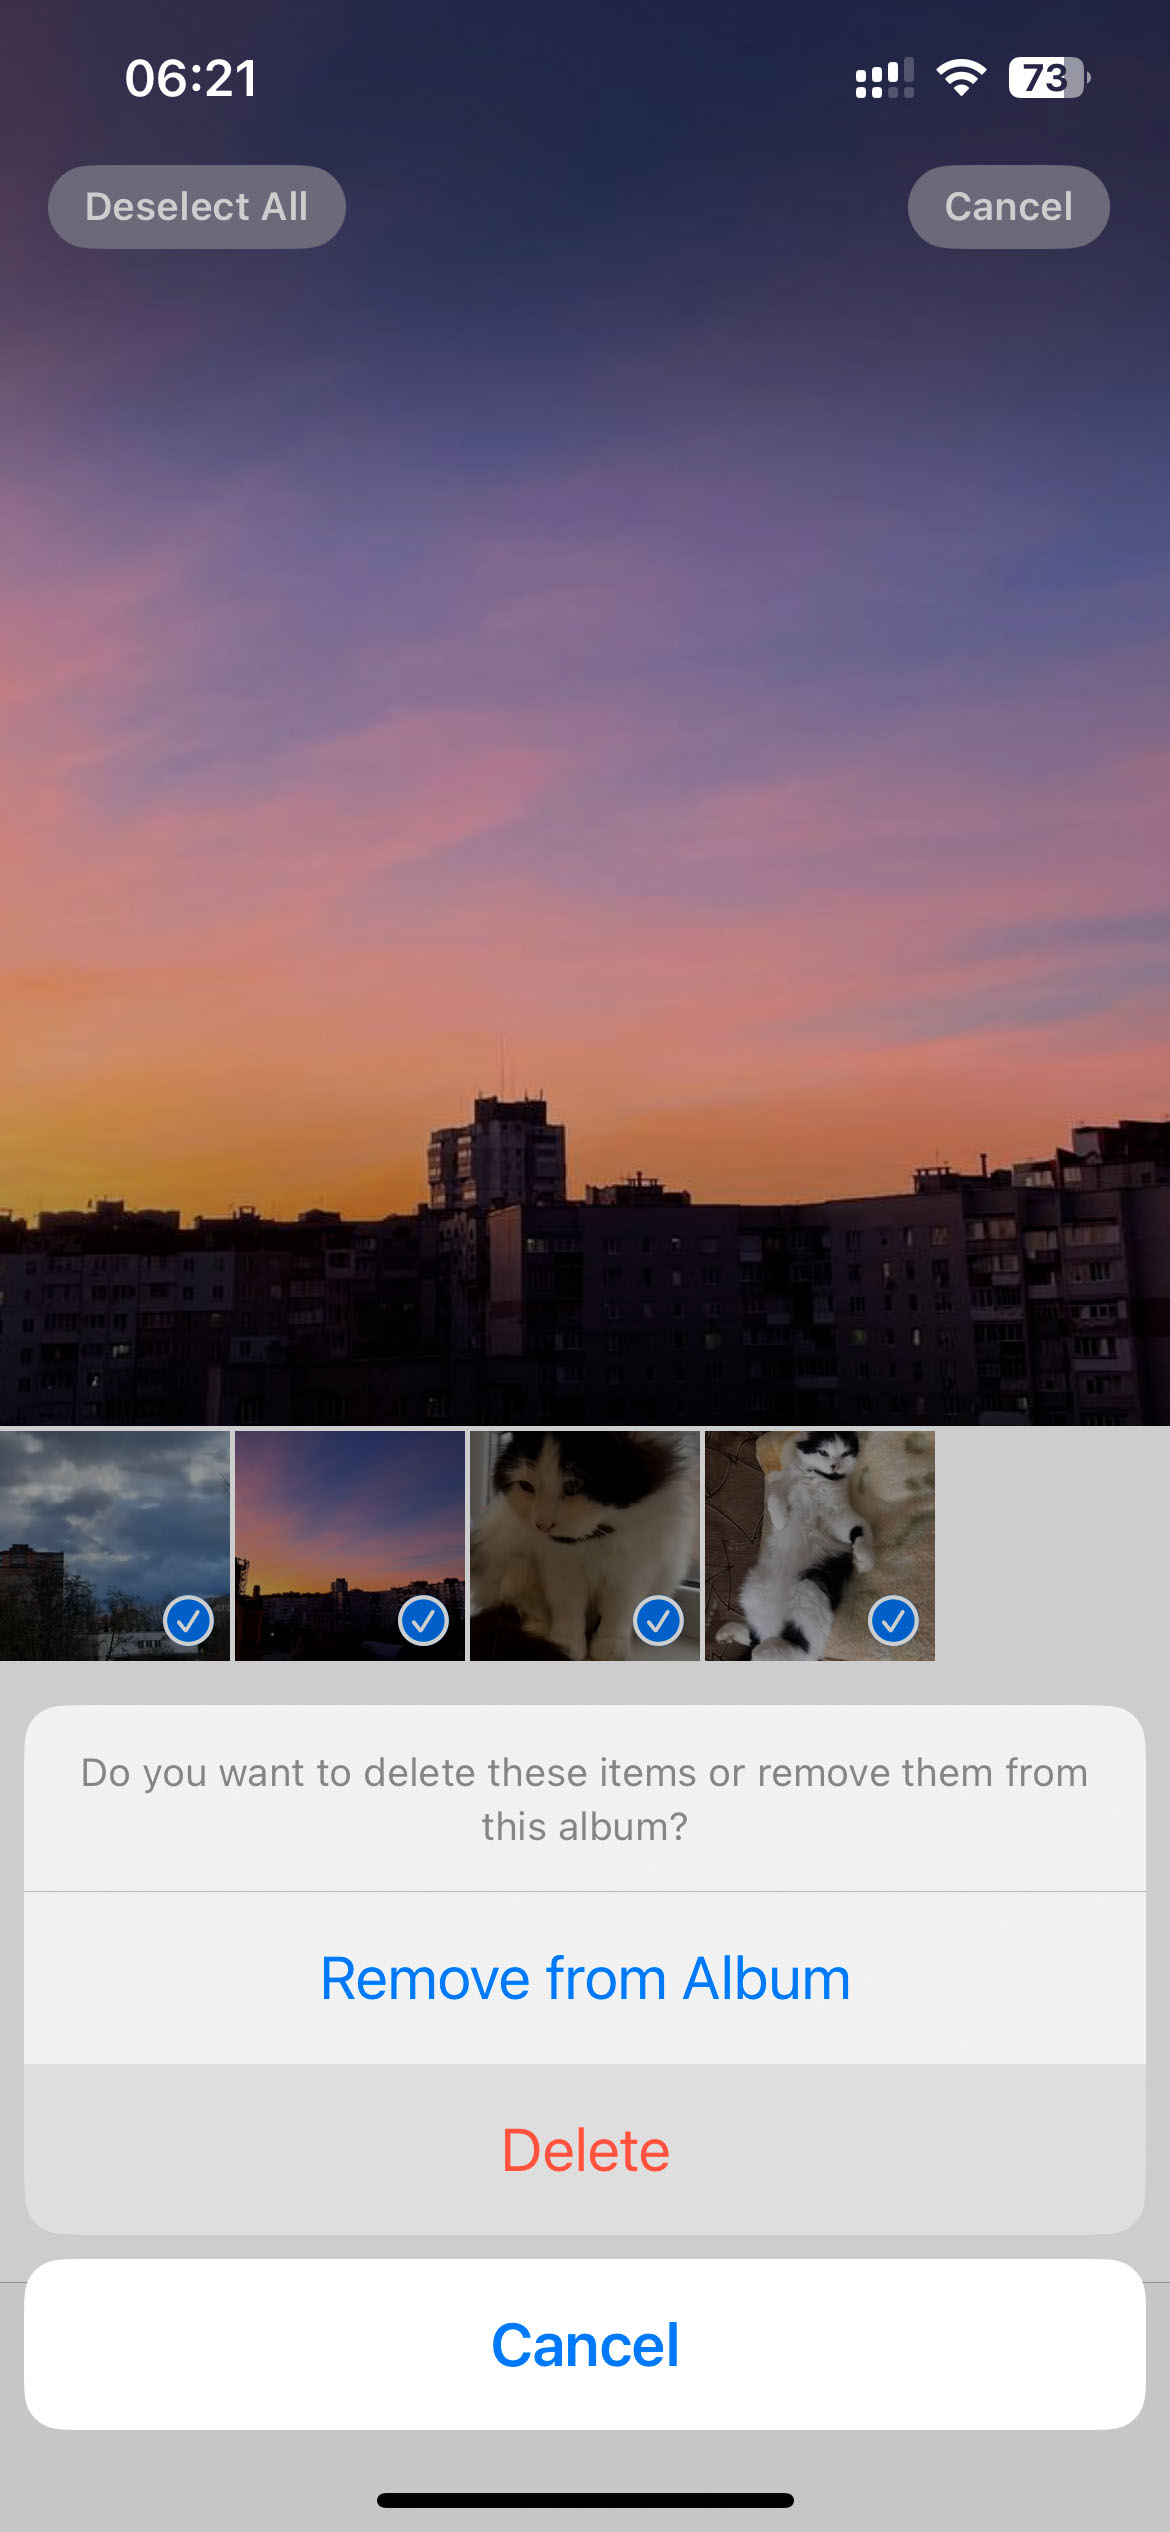
- If you want to delete multiple photos simultaneously, tap Select at the top-right corner after opening the album and choose all the files you want to remove from the Photos app.
- Tap the trash icon at the bottom menu and Delete to confirm the action.


However, you can permanently delete the photos before the 30-day period by following these steps:
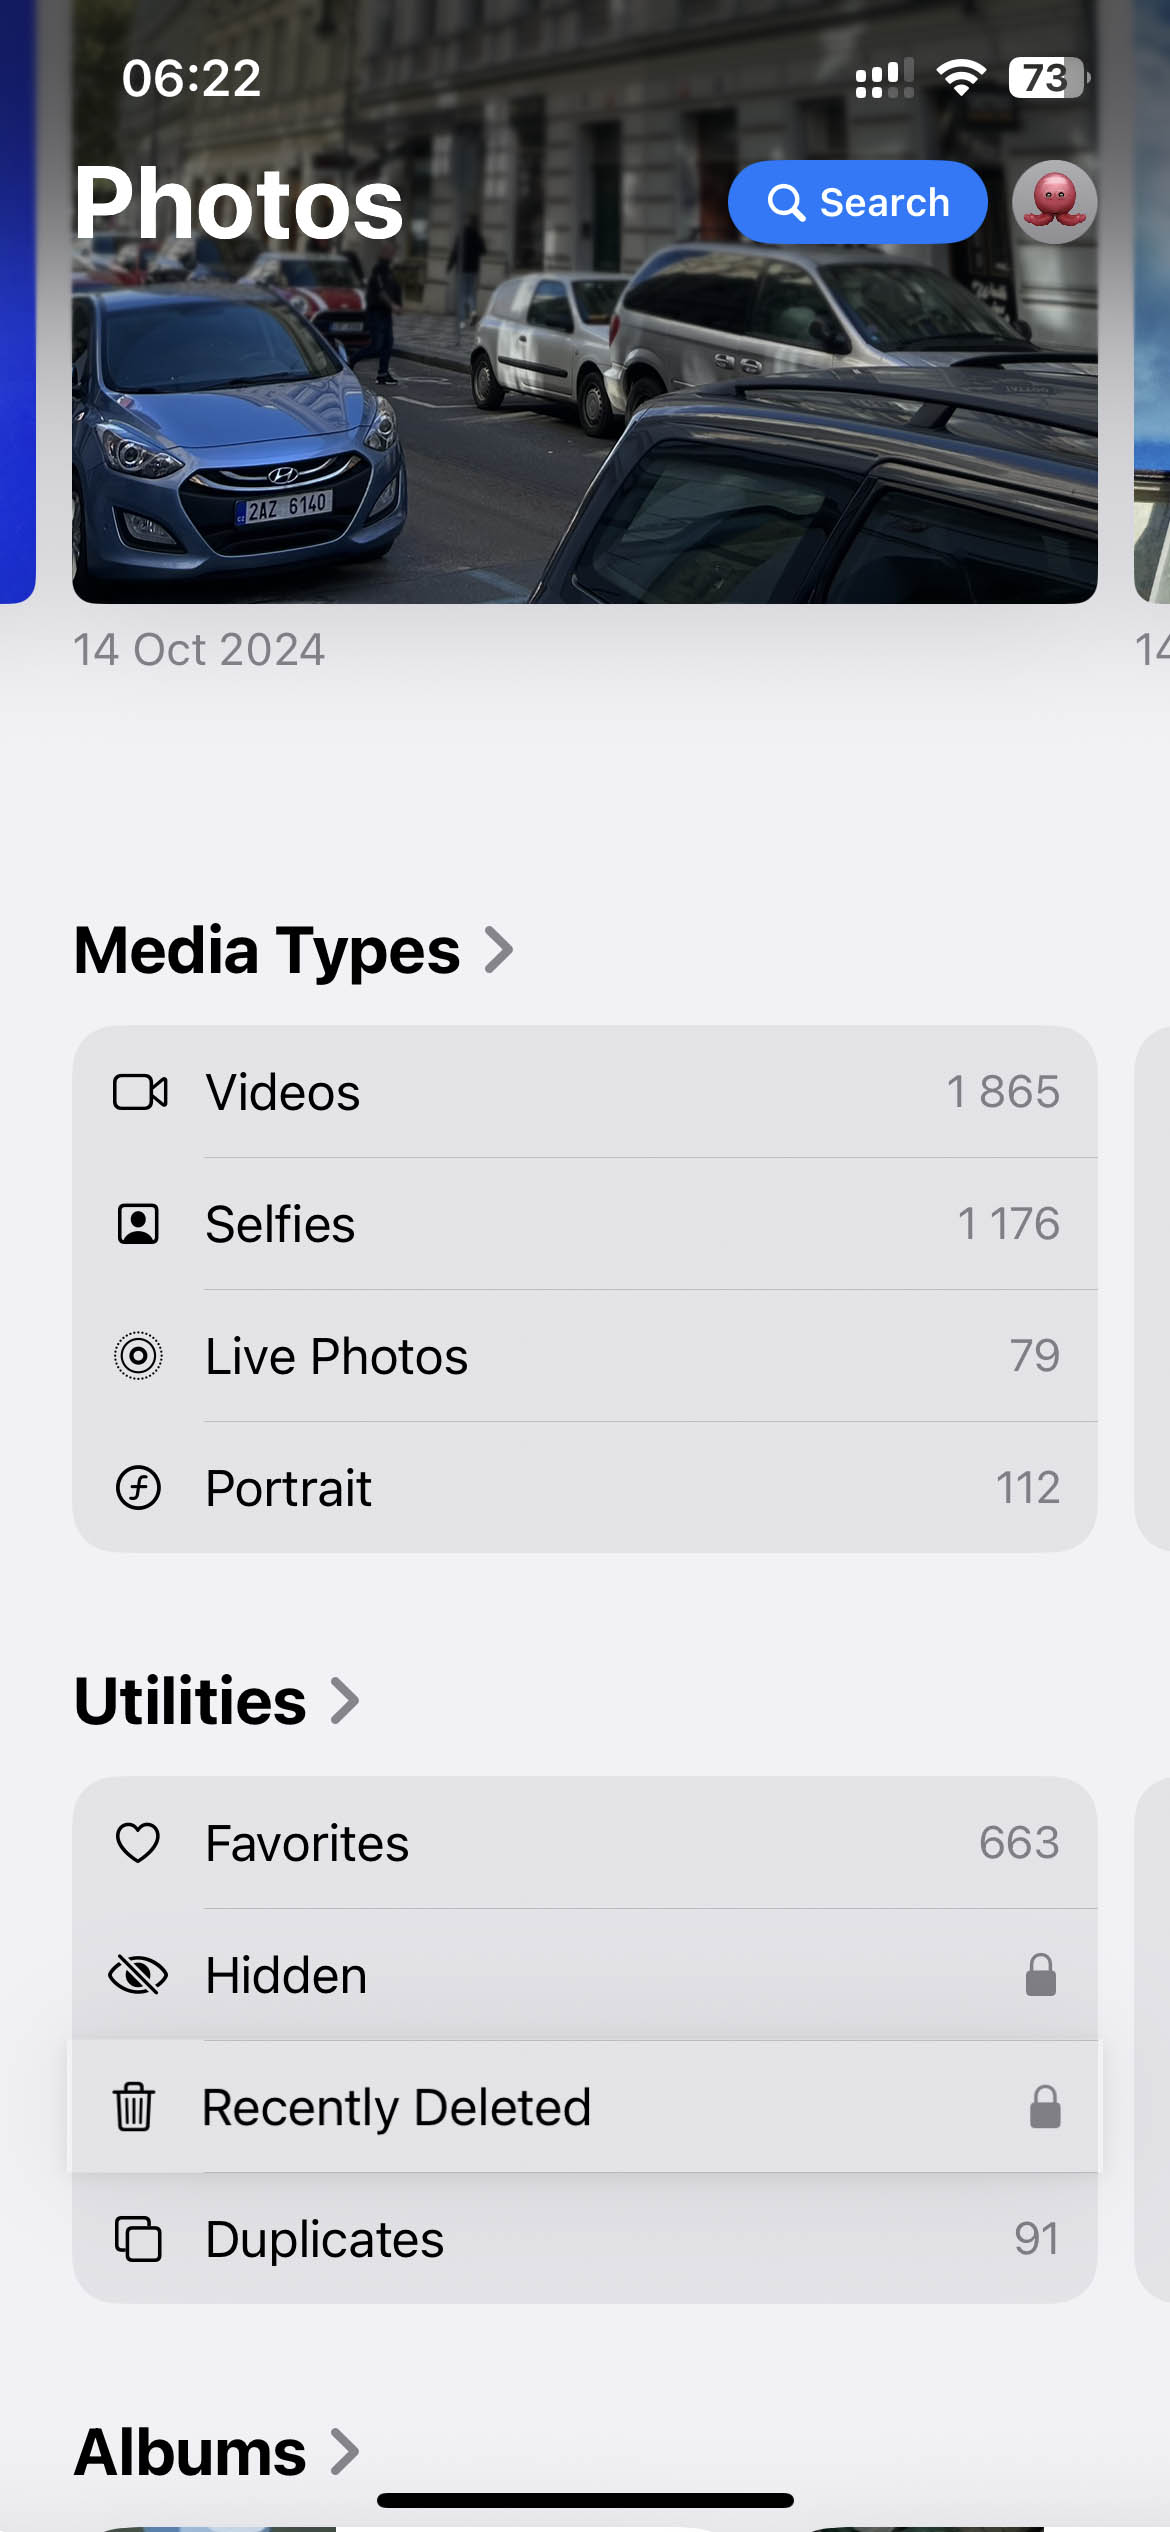
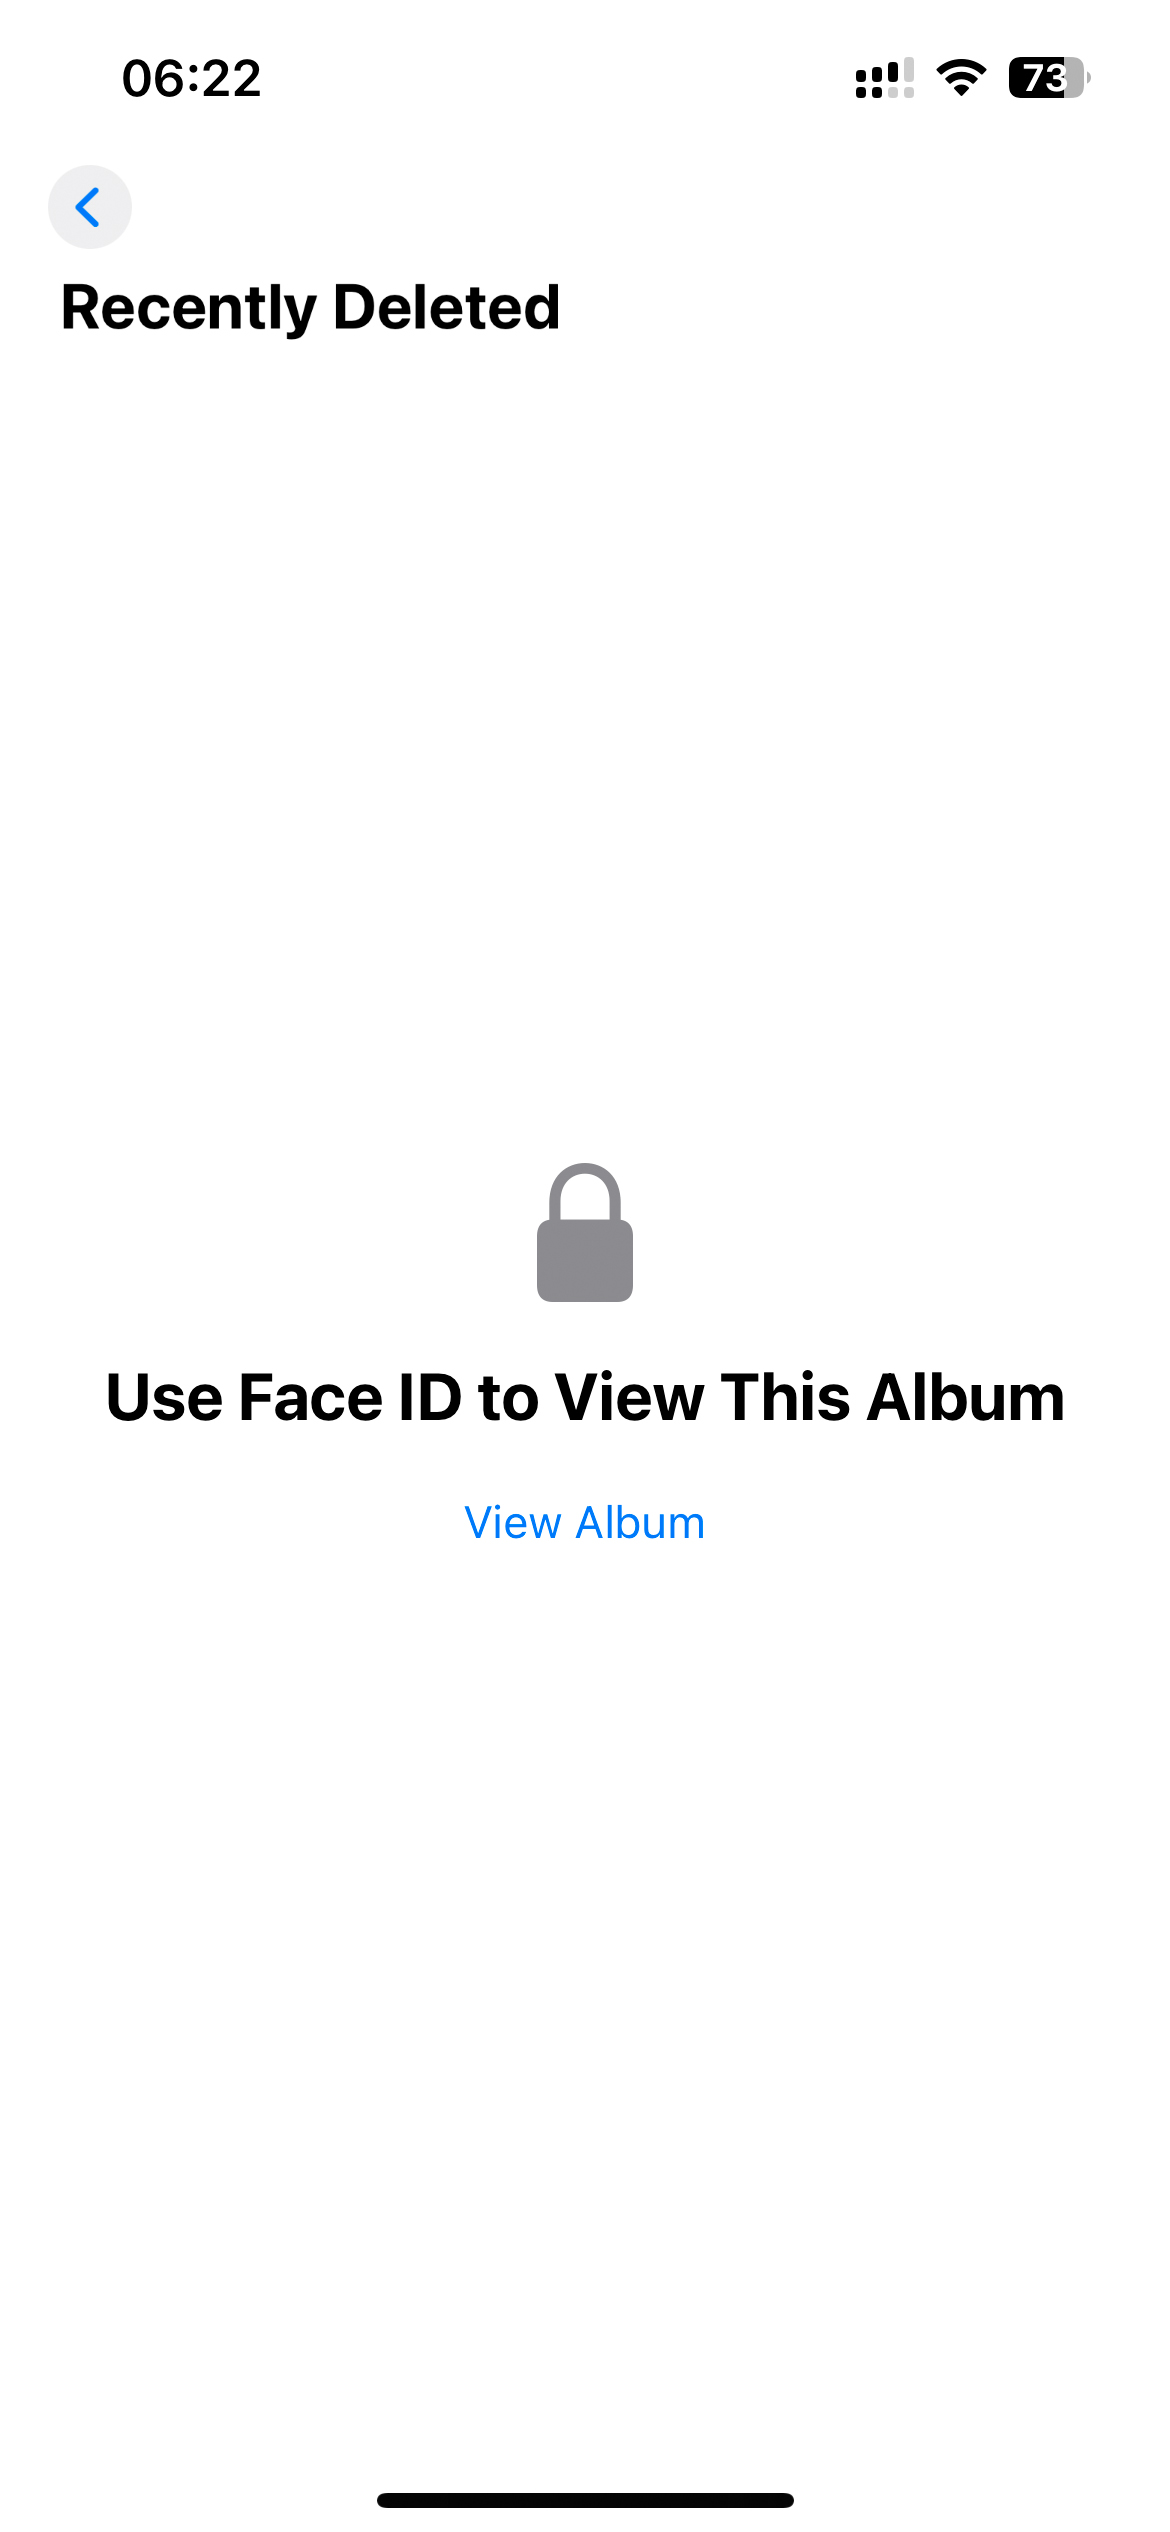
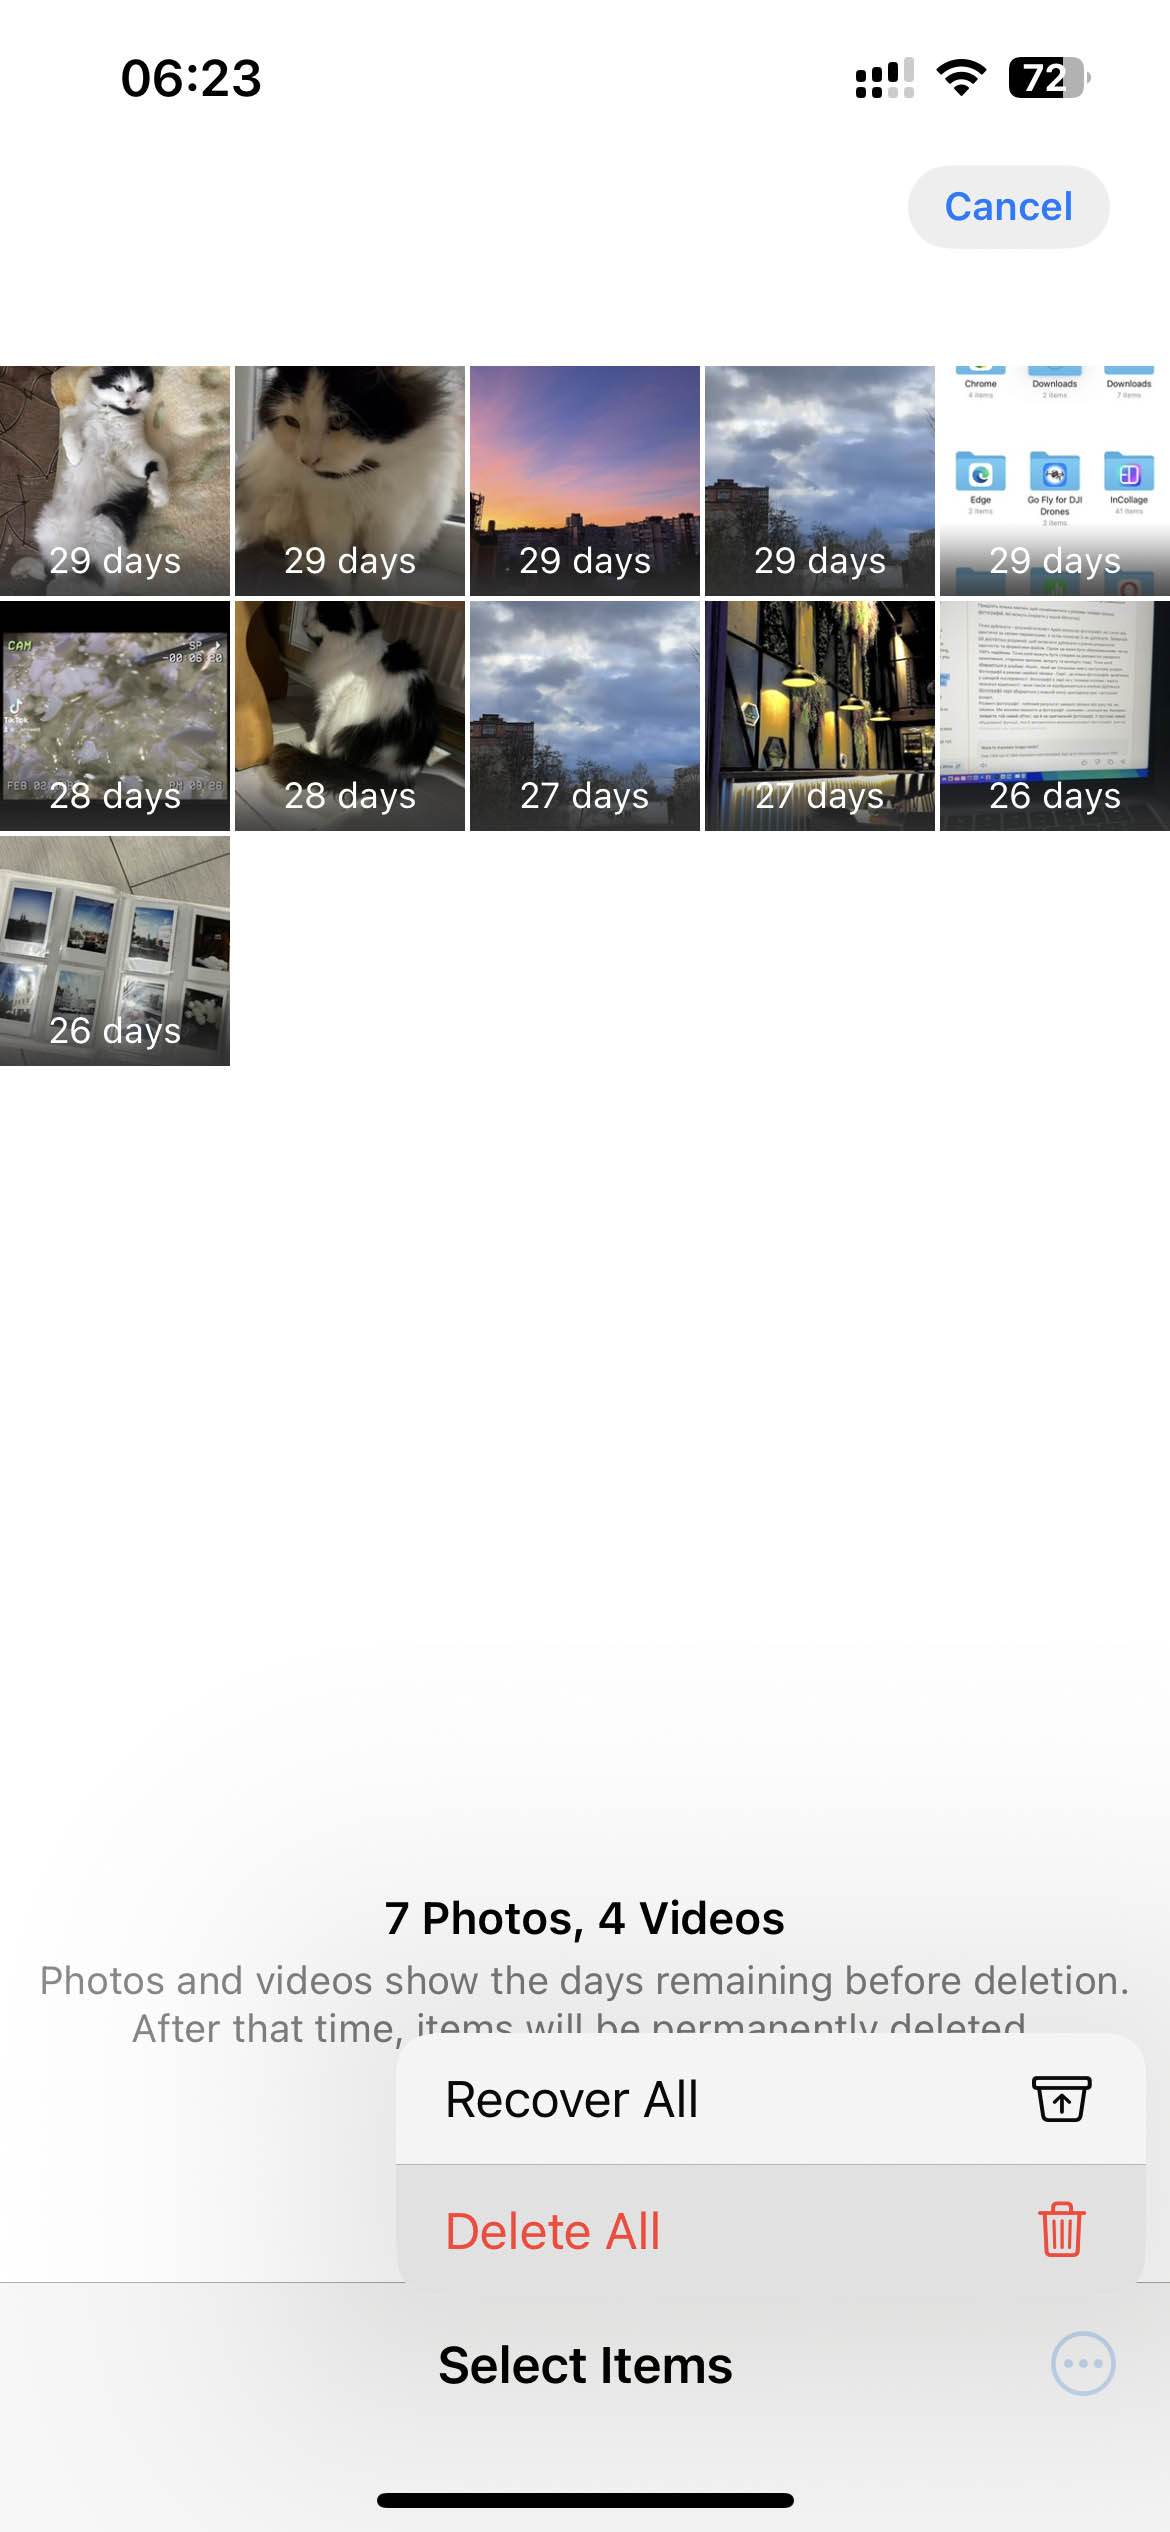
- Open the Photos app, scroll down, and find the Recently Deleted folder under Utilities.
- You may be prompted to sign in with your Apple ID or enter a password. Follow the prompt to authenticate your identity.
- Tap Select at the top-right corner.
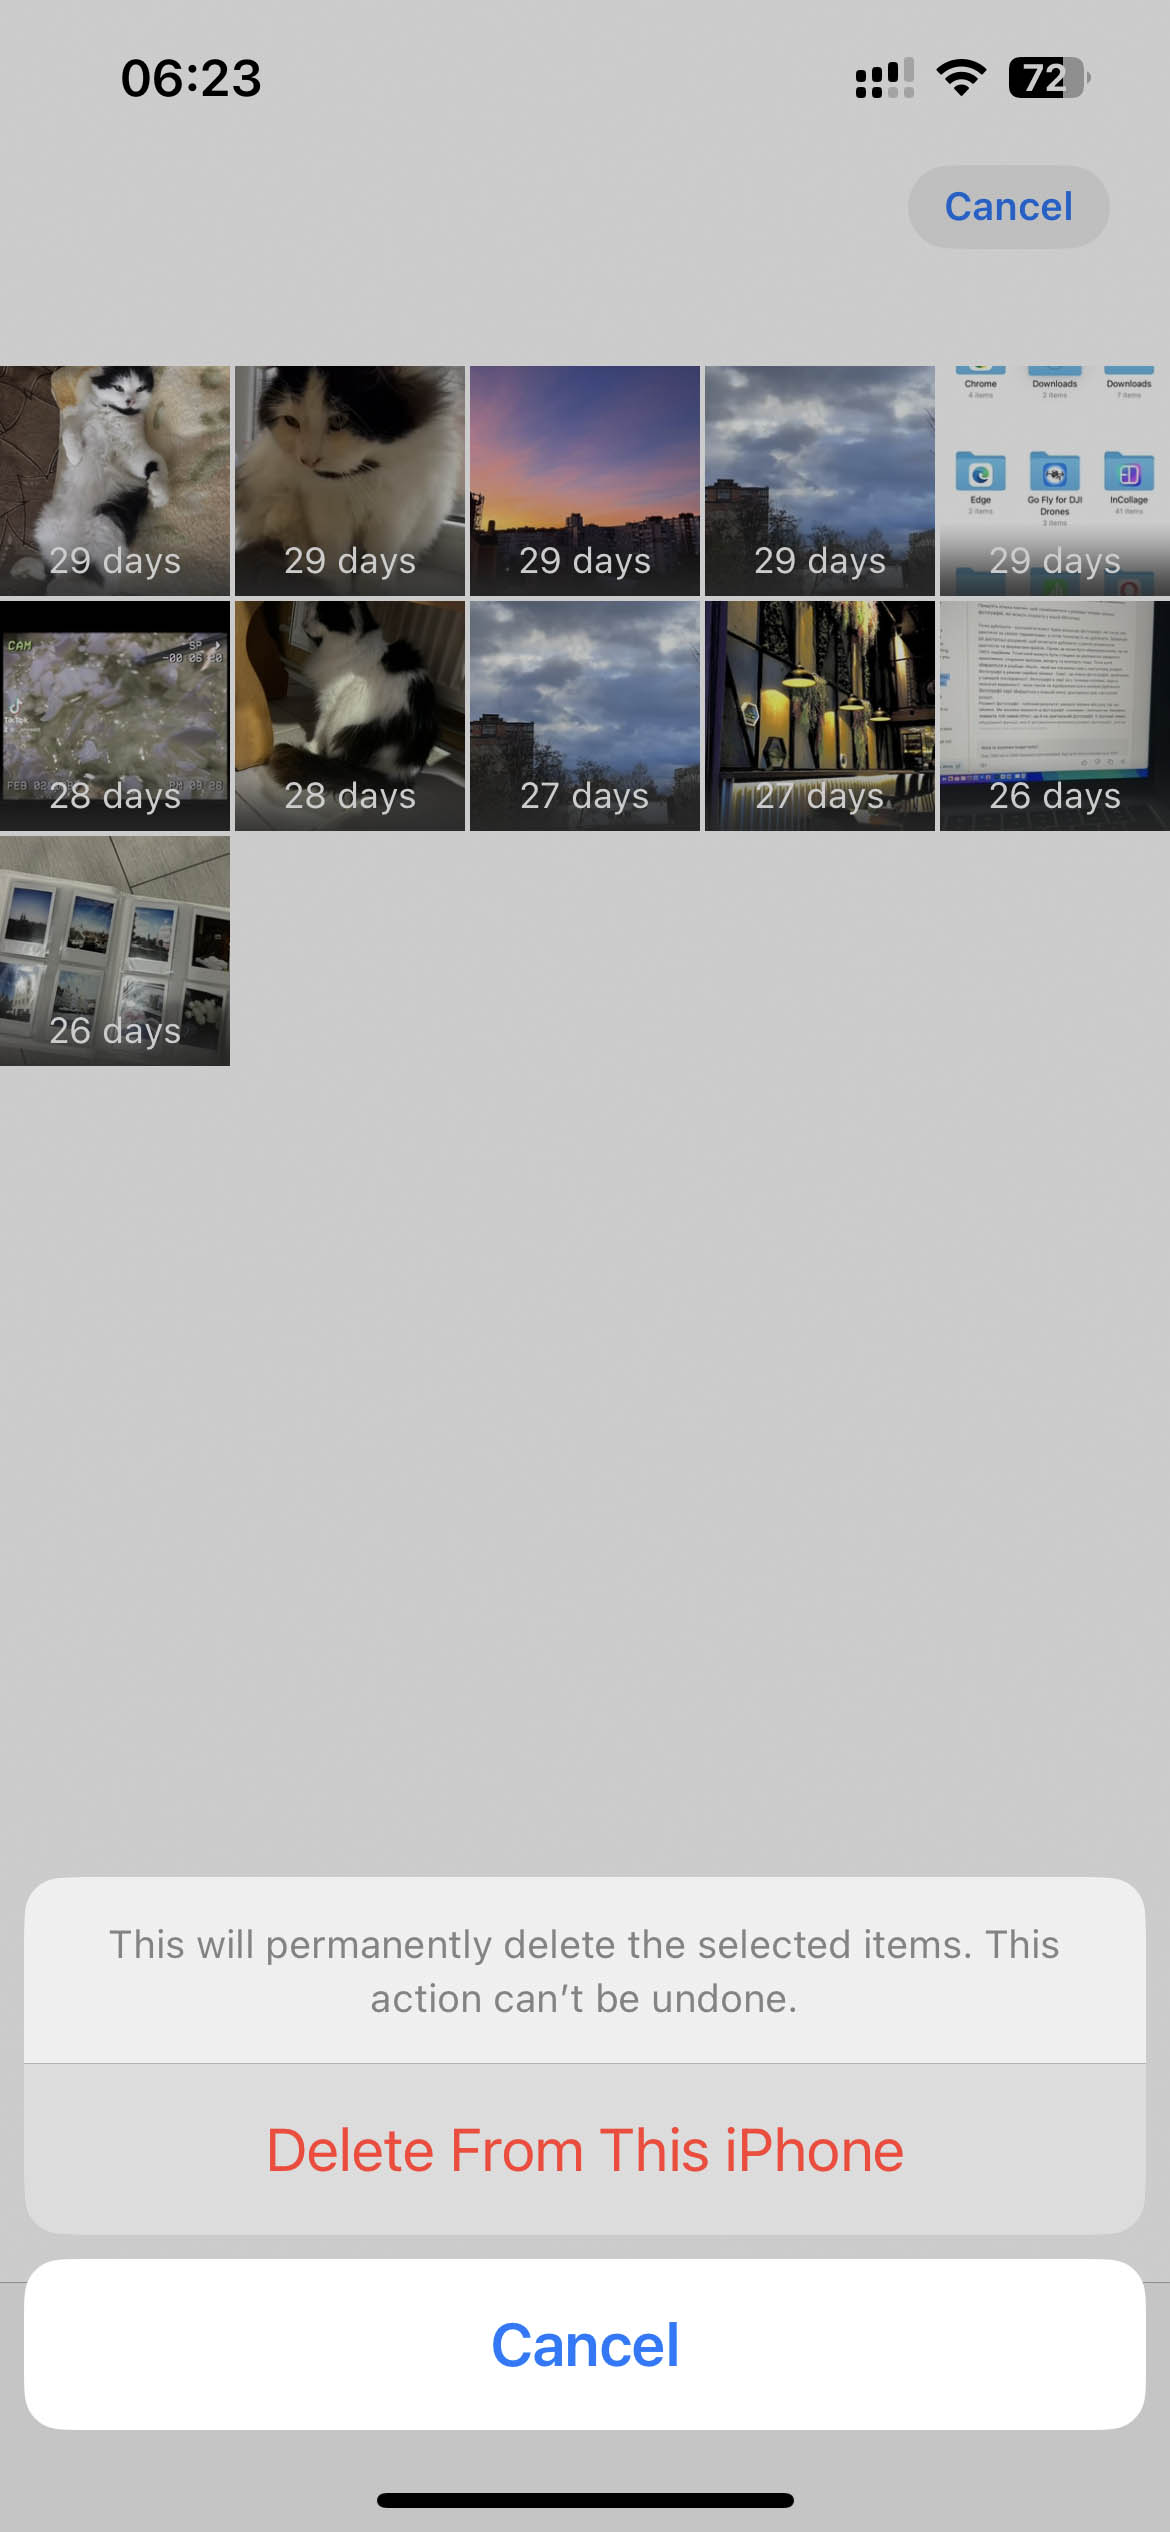
- Choose the photos or videos you you want to remove and tap on the three dots icon at the bottom-right corner, then tap Delete or Delete All to remove all items.
- Confirm your choice by tapping Delete From This iPhone to permanently erase the selected items.


It’s easy and very efficient to get rid of downloads on iPhone via this method.
Method 4: Remove Downloaded Content from Media Apps
Downloaded content from media apps like Apple Music, Spotify, Netflix, YouTube, Podcasts, and others can take up a big chunk of your iPhone’s storage. Even though the actual files are stored on the service’s servers, your phone still saves access files for offline use. If you’ve downloaded a lot of content to watch or listen to later, those files can easily add up to tens of gigabytes. So, clearing them out is a smart way to free up space. The steps to clear downloaded files manually depend on the app, but let’s see a few examples.
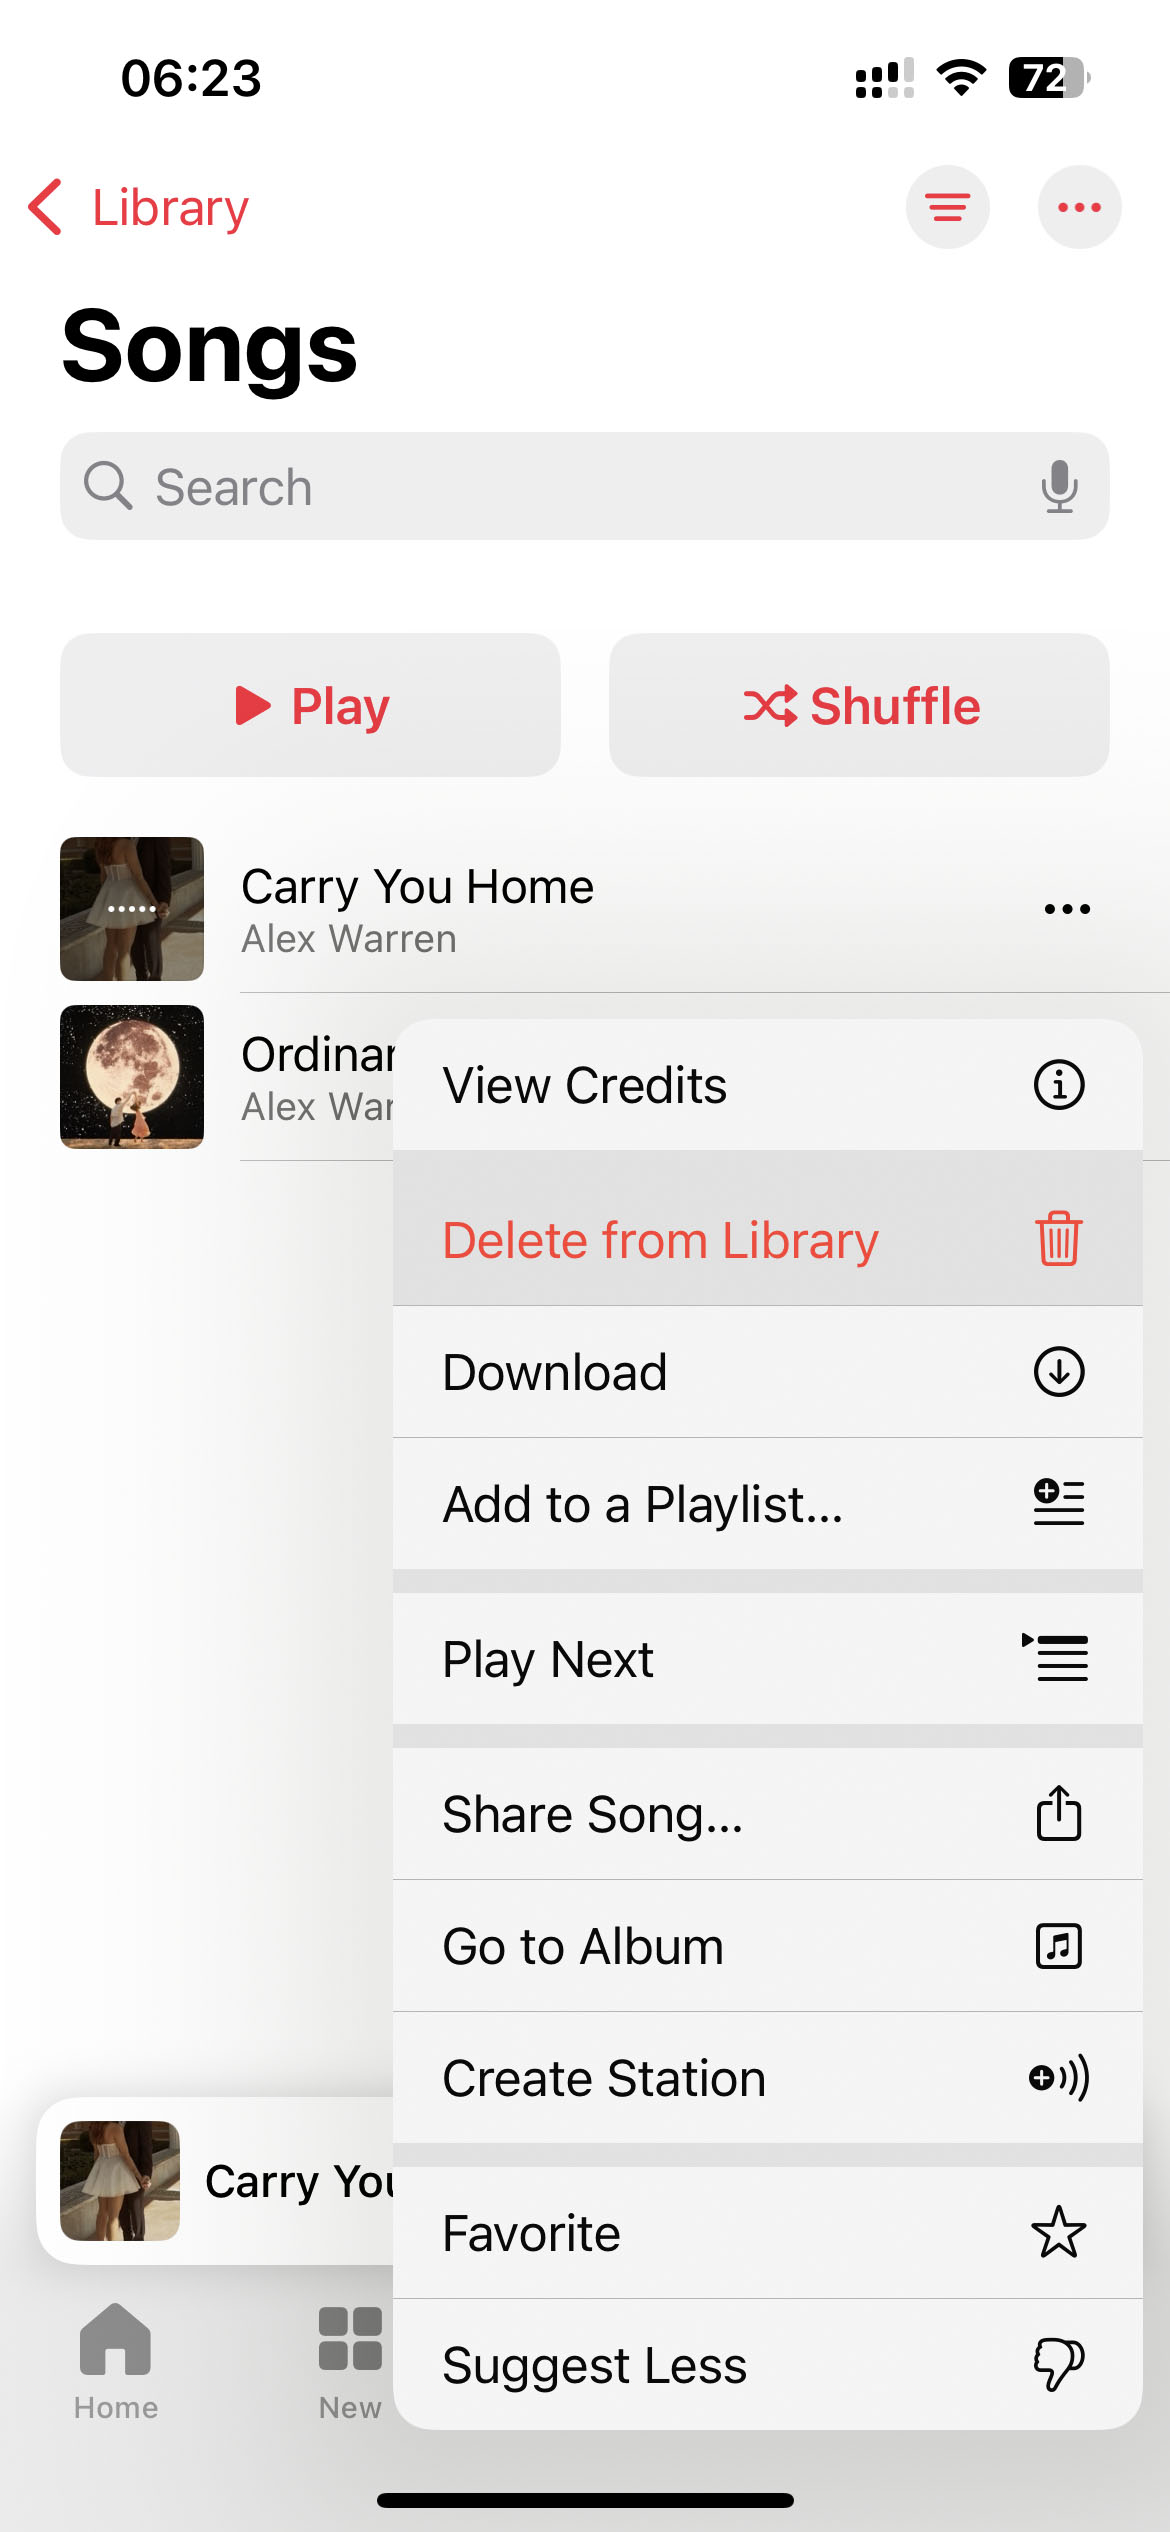
Apple Music
- Open the Apple Music app.
- Head to the Library section.

- Select Songs.
- Click the three dots next to the song you want to delete and tap Delete from Library.


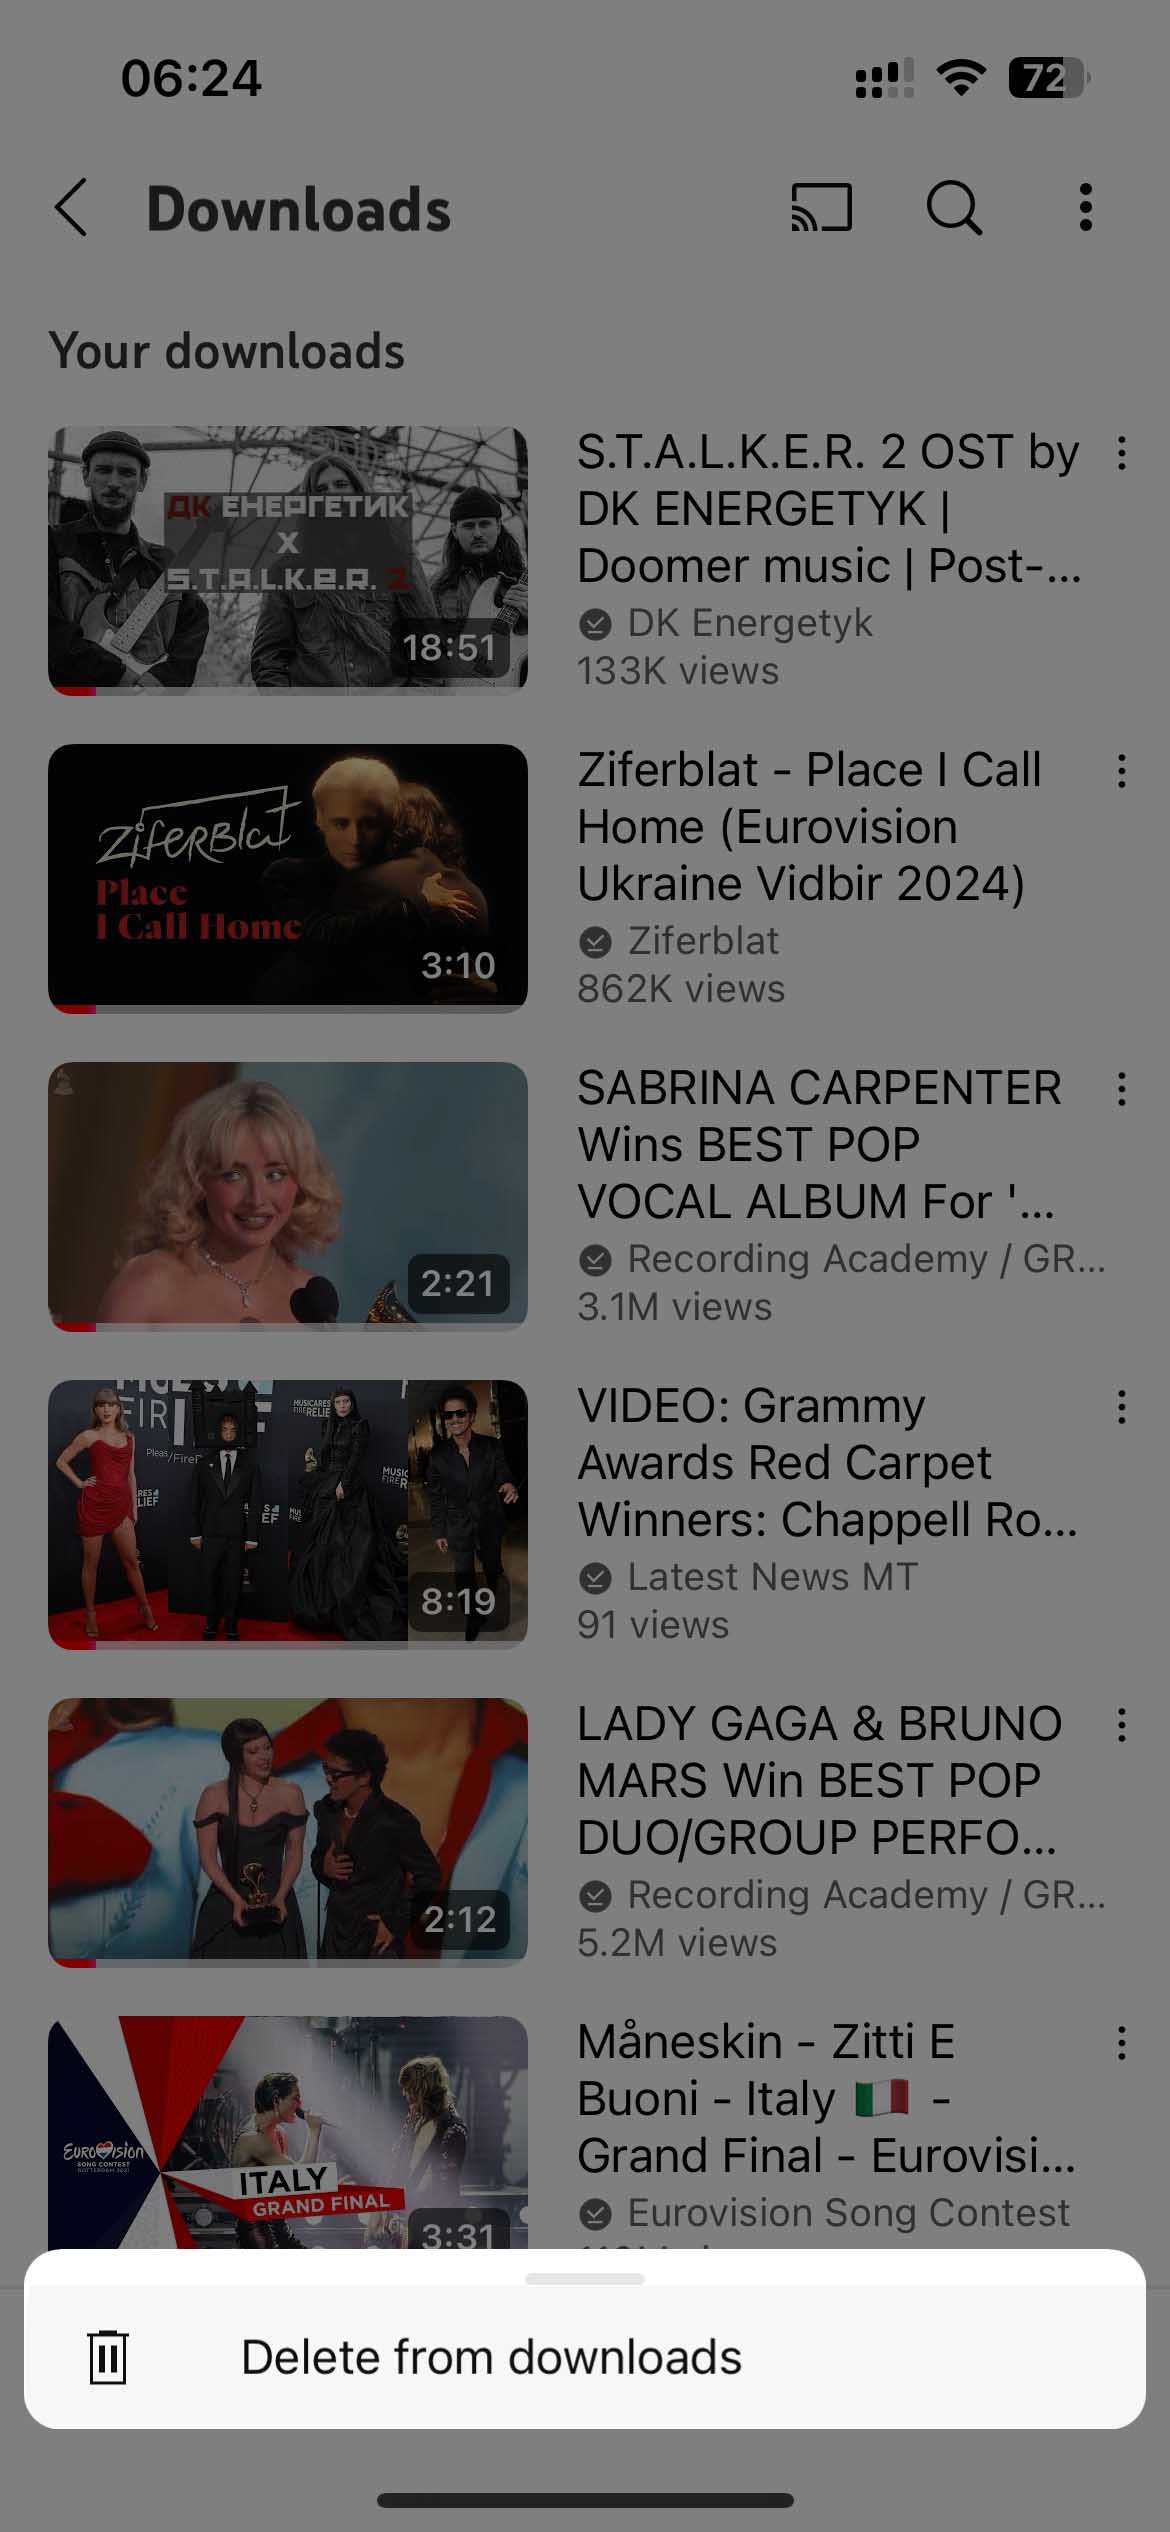
YouTube
- Open the YouTube app.
- Head to the You section.
- Tap Downloads.
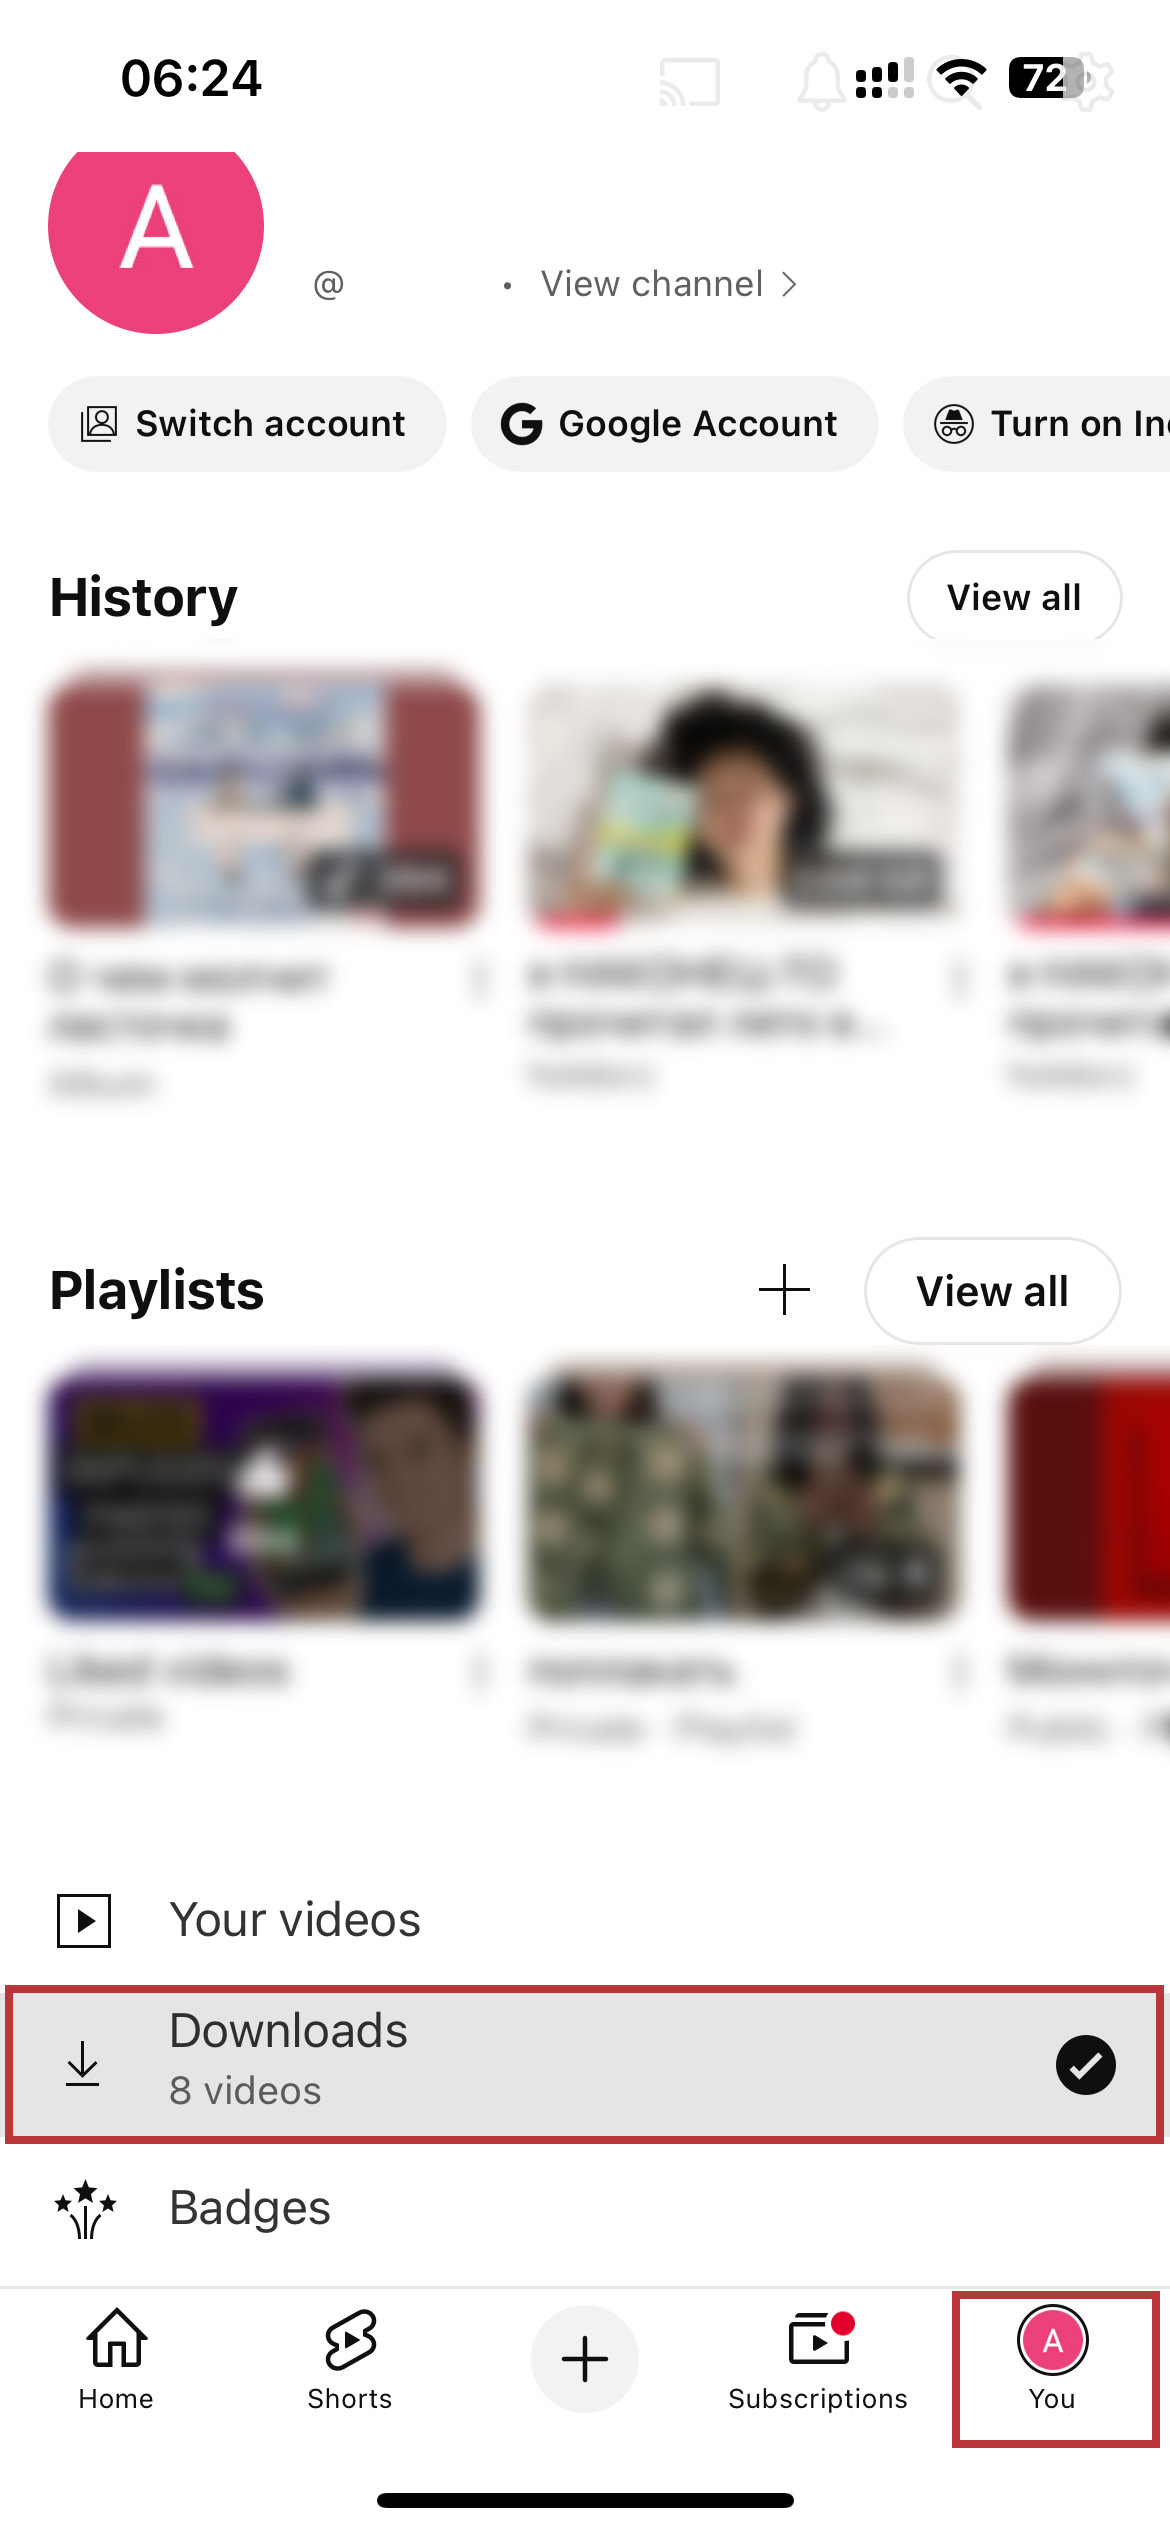
- Tap the three-dotted button next to the video you want to remove and tap Delete from Downloads.


The steps differ depending on the app, but it’s not difficult to decipher. It’s usually a variation of the steps in the above examples.
Method 5: Uninstall Downloaded Apps You No Longer Need
Since apps are technically downloaded files too, deleting the ones you no longer use can free up a good chunk of storage on your iPhone. If you want to clear the cache for an app but still plan to use it, just delete the app, then head to the App Store and reinstall it.
Here’s how to do it:
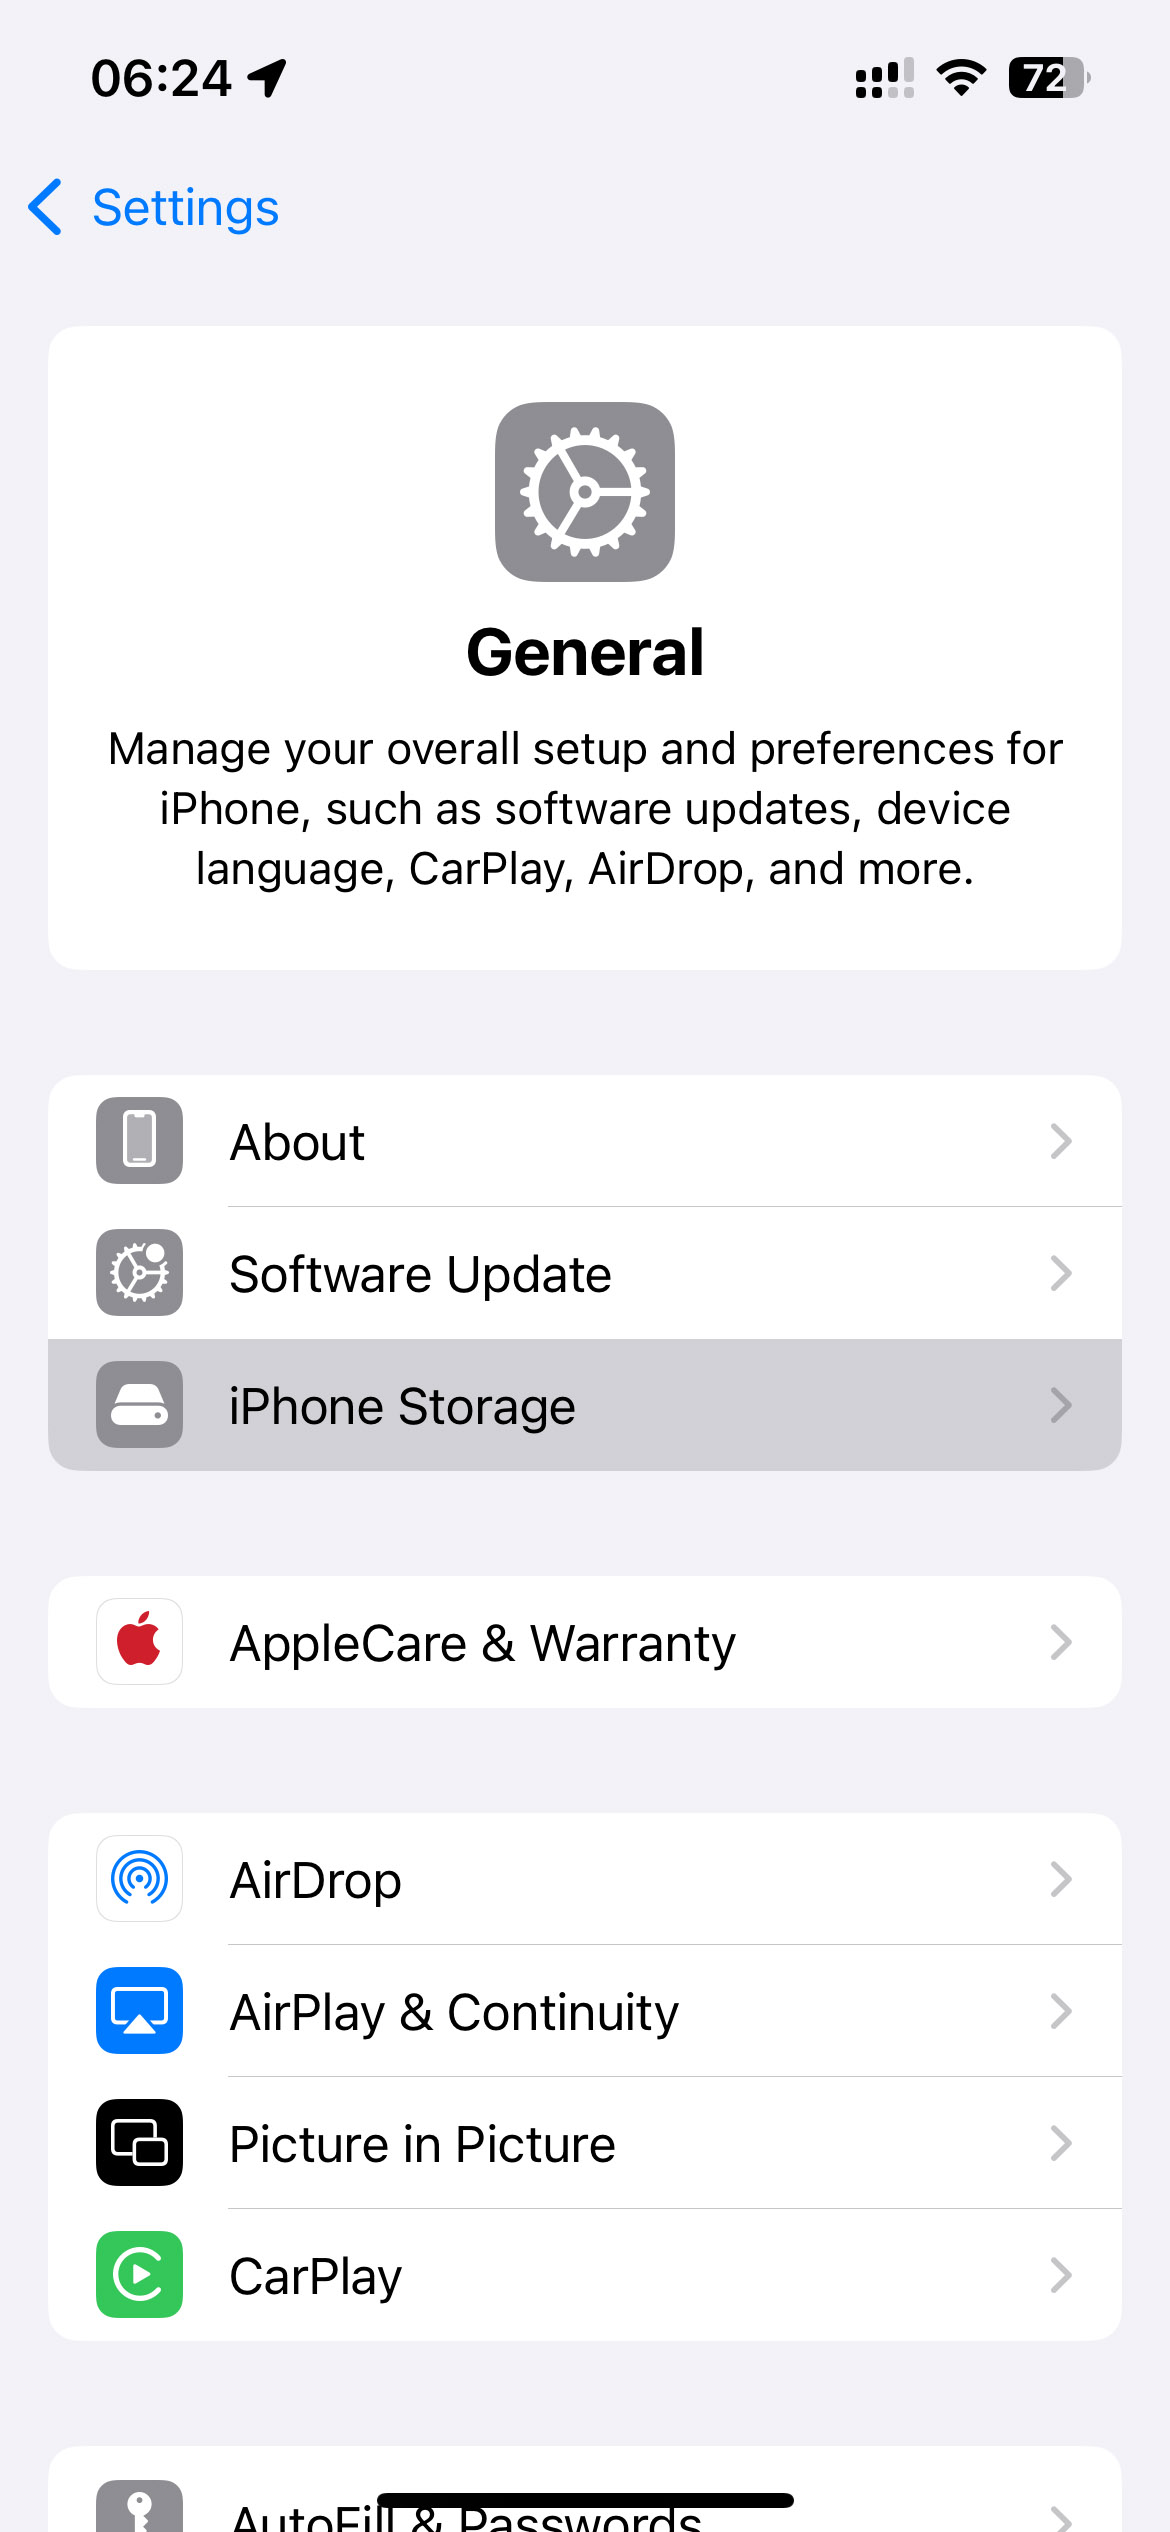
- Open your iPhone’s Settings app.
- Tap General > iPhone Storage, and you will see a list of all the apps on your phone.
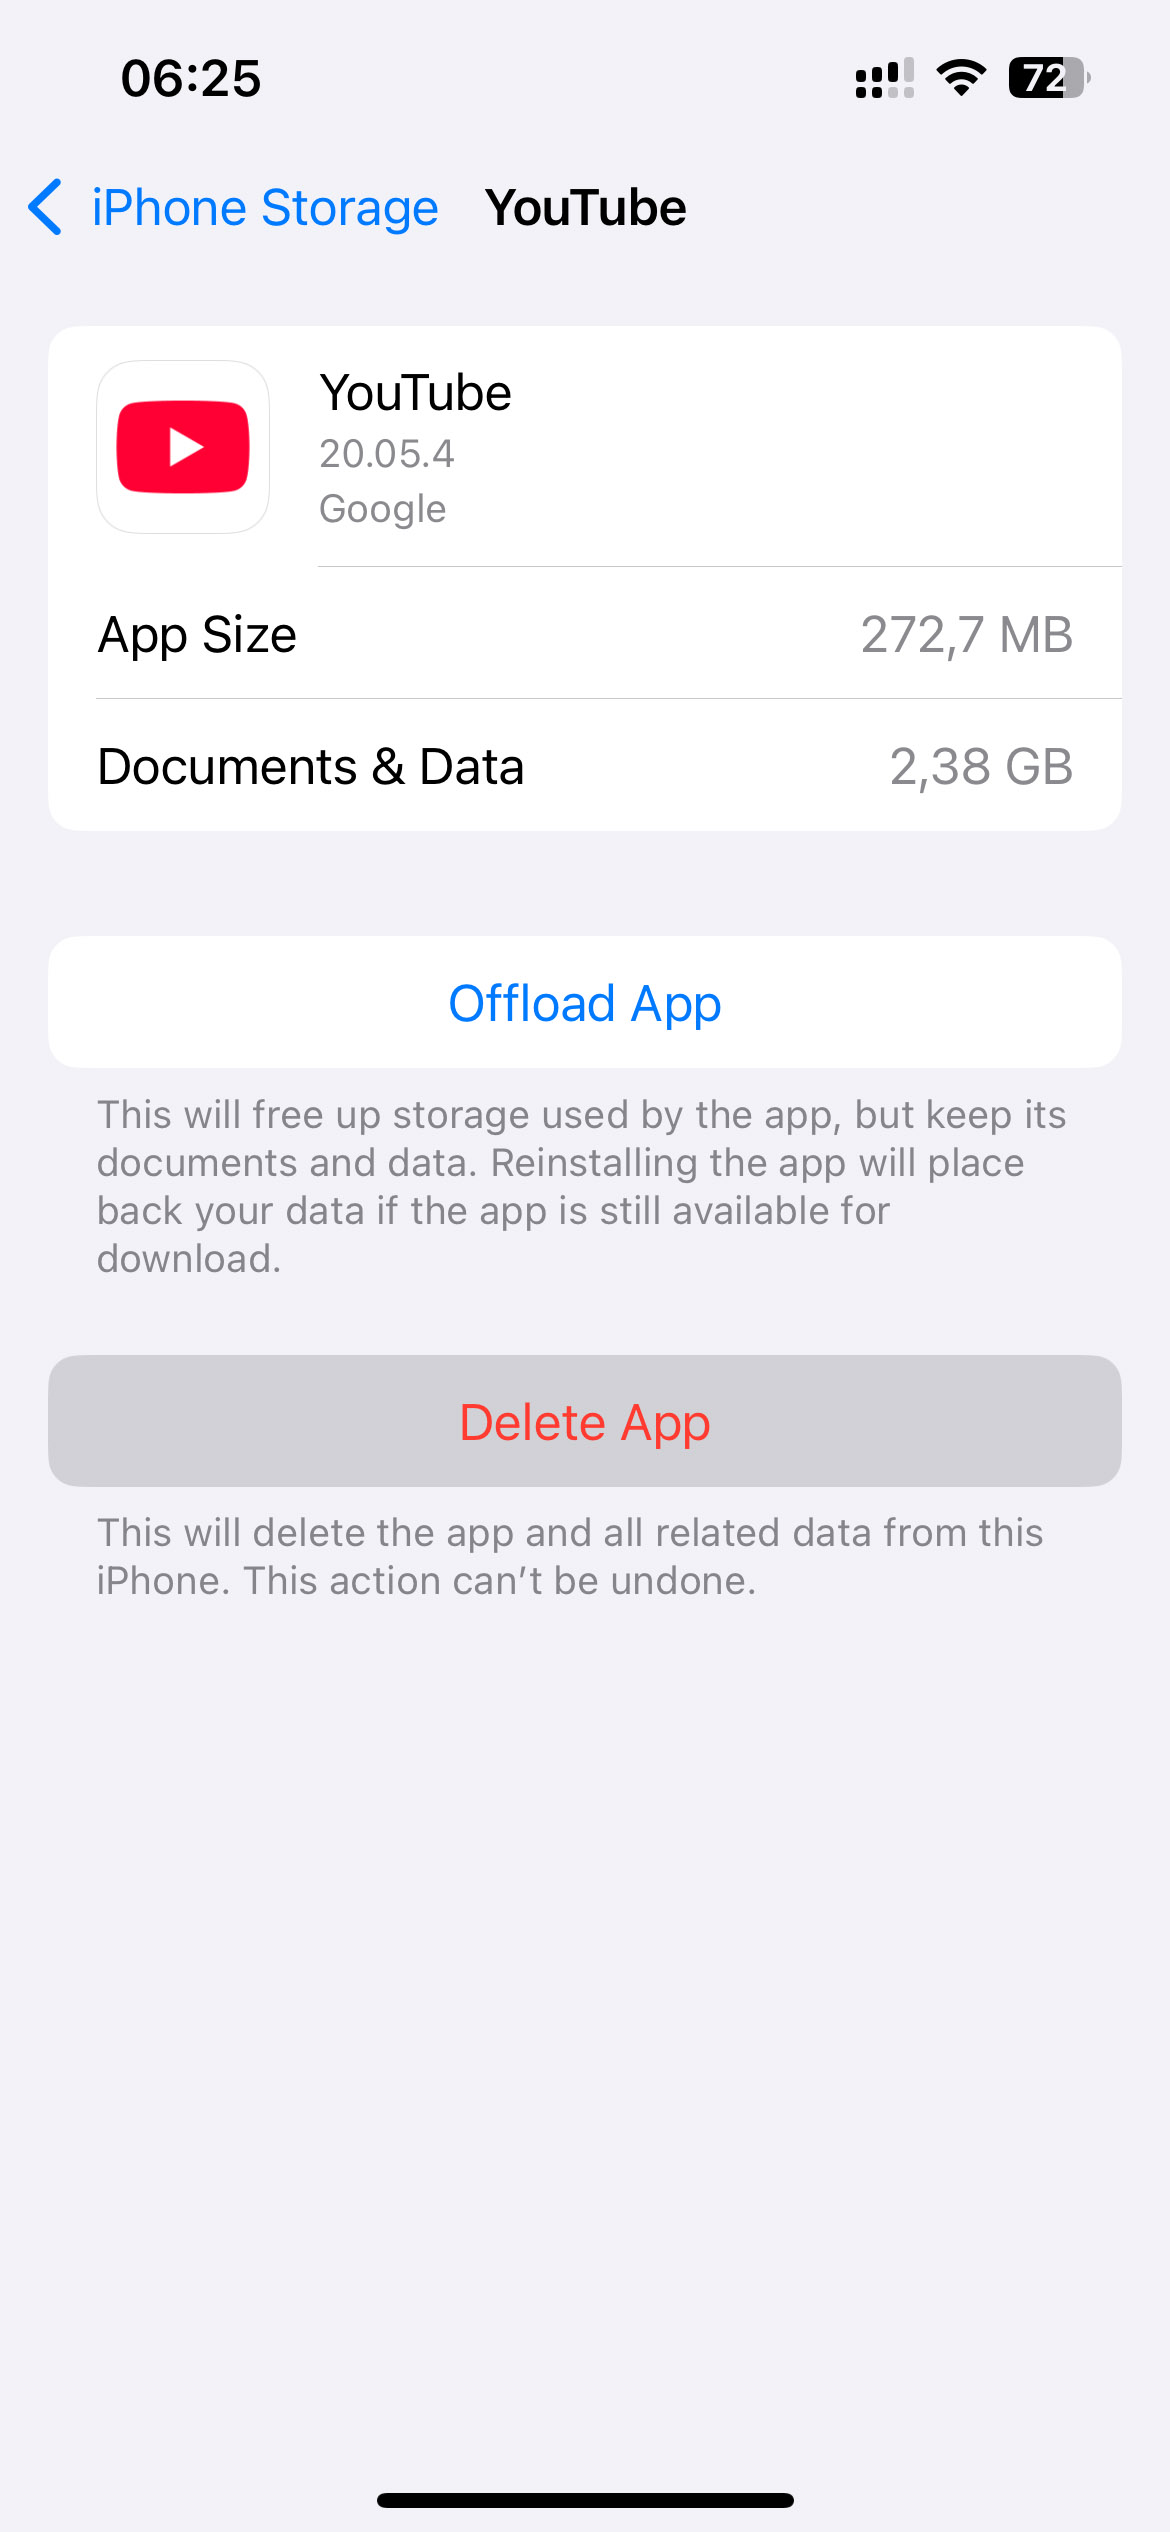
- Tap the app you want to remove, and you will see two options: Offload App or Delete App. The Offload App function deletes the application but leaves the data associated with it on your iPhone, which is not suitable for our task. Therefore, tap Delete App and confirm the action.
- If necessary, then head to the App Store and download the app again.


Don’t Stop Cleaning Your iPhone on Downloads
If you’re deleting downloaded files to free up space on your iPhone, it’s worth taking things a step further by also clearing out apps and content from the Photos app, as these are the two main categories that usually occupy the most space on users’ iPhones. Since we’ve already talked about managing large or unused apps, let’s shift the focus to specific types of media files, like duplicates, similar photos, large videos, and unnecessary and old items.
We’ve put together a list of the best iPhone cleaner apps, which you can check it out and pick the one that works best for you. In this article, though, we’ll focus on the Clever Cleaner: Free AI Cleaner App. This relatively new, free app is receiving strong user reviews and offers four helpful tools for cleaning your photo gallery without deleting anything important.

- Download the Clever Cleaner app from the App Store.
- Open the app and grant it access to your Photos app.
- Choose the ‘Heavies’ function, which identifies and displays only large videos from your gallery. This feature is valuable because the Photos app does not offer native functions for this task.
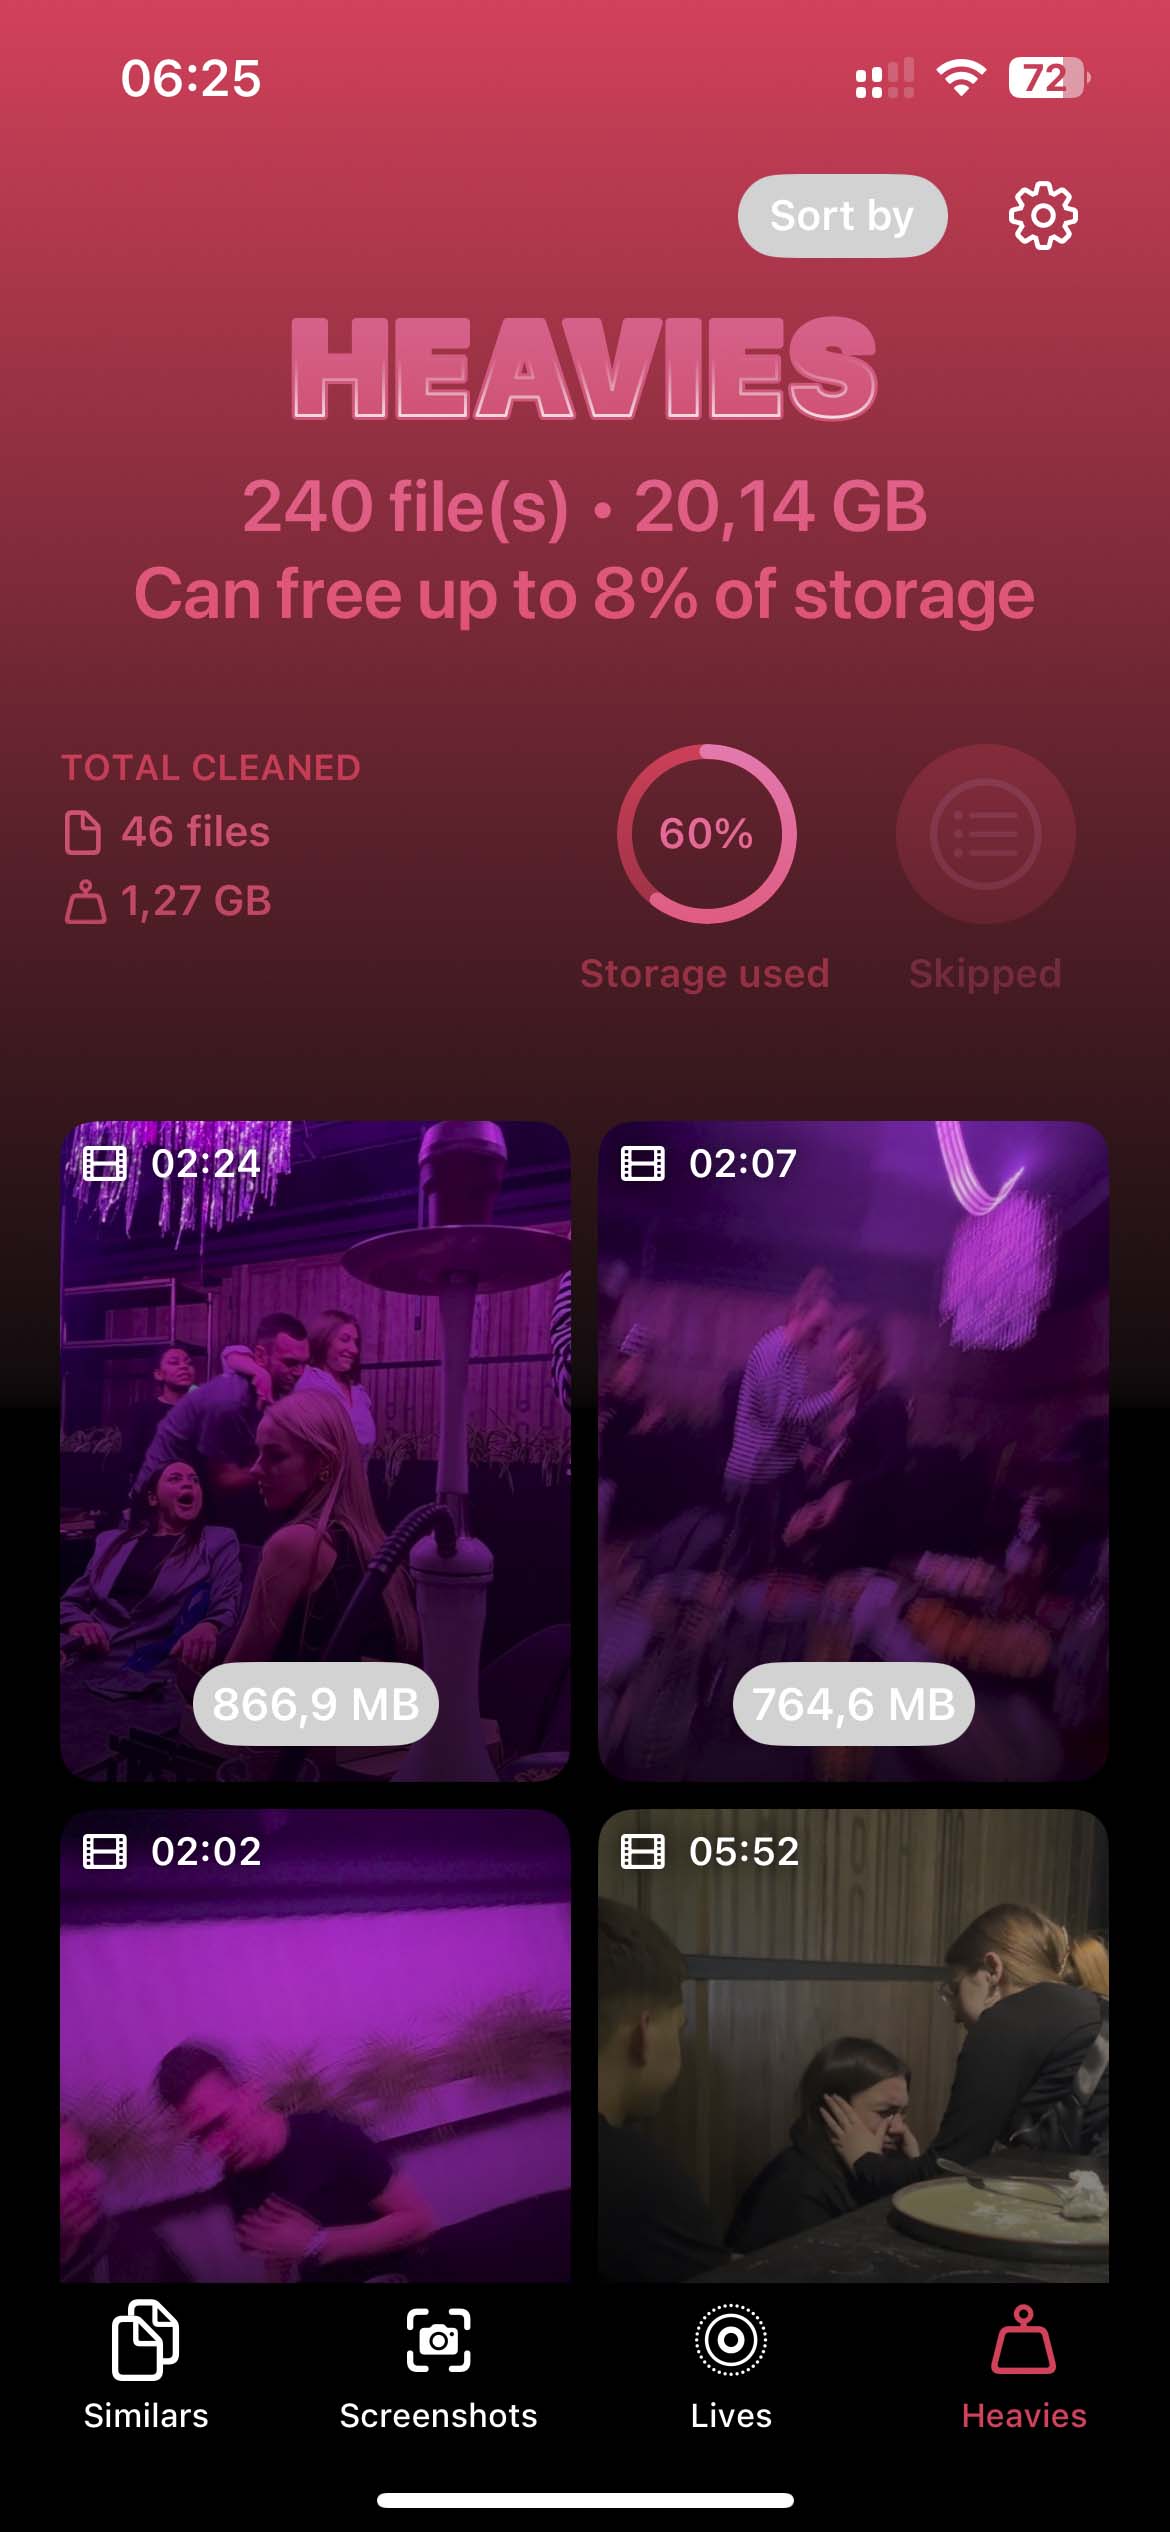
- Review the results to identify the videos you wish to delete, and tap on them. You may select multiple videos or use ‘Select All’ at the top to choose all at once. Then, press the ‘Move to Trash’ button, which appears in red in the middle of the screen.
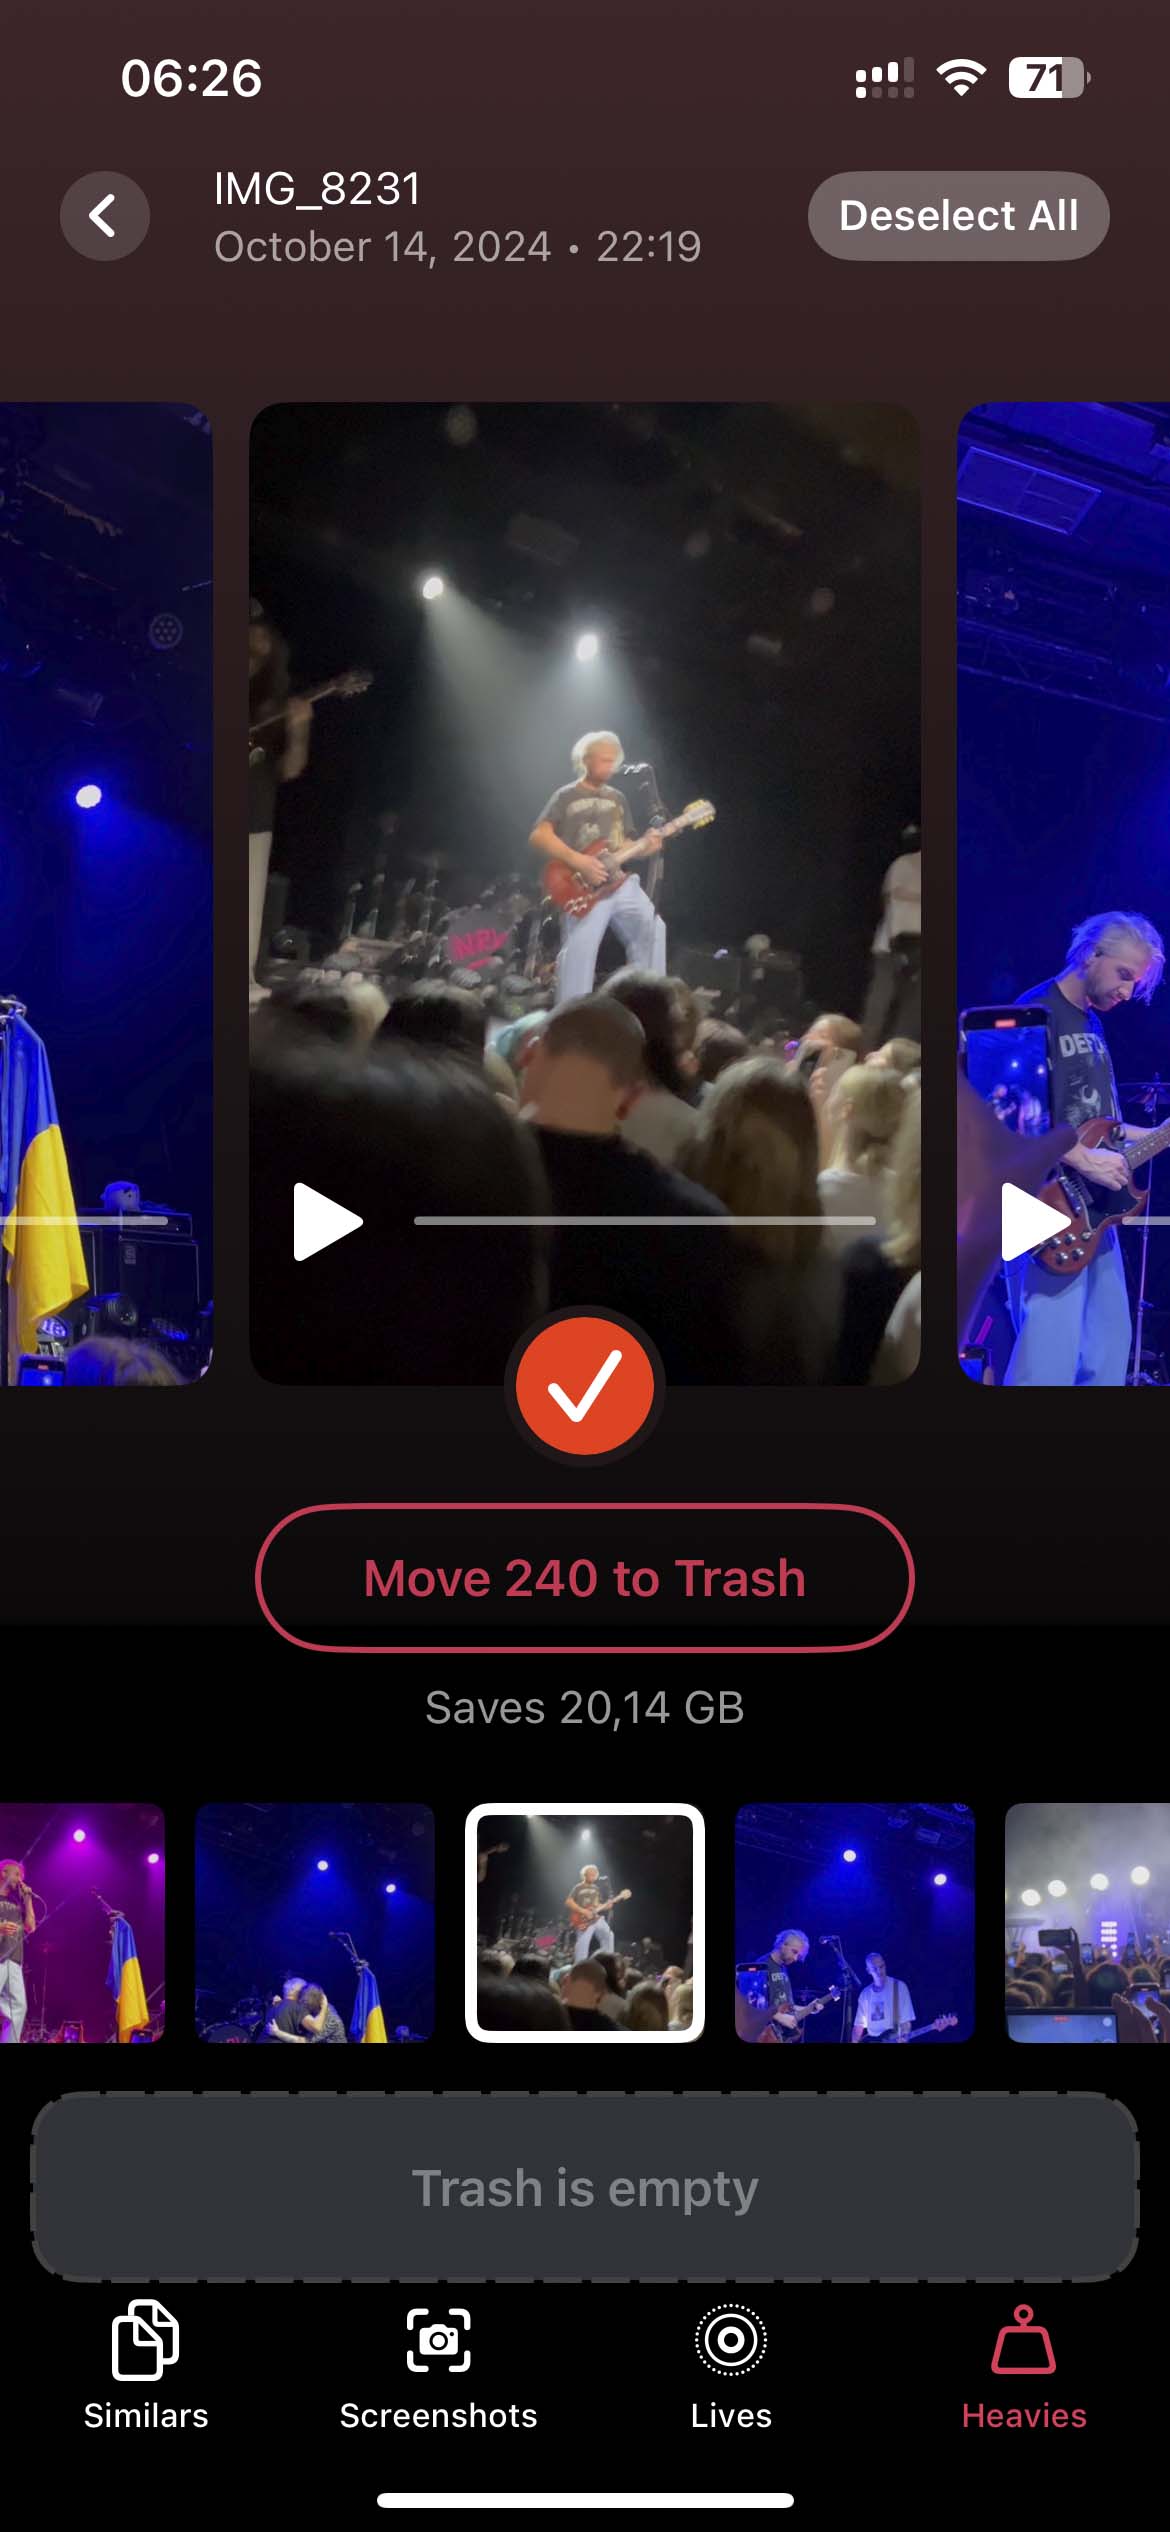
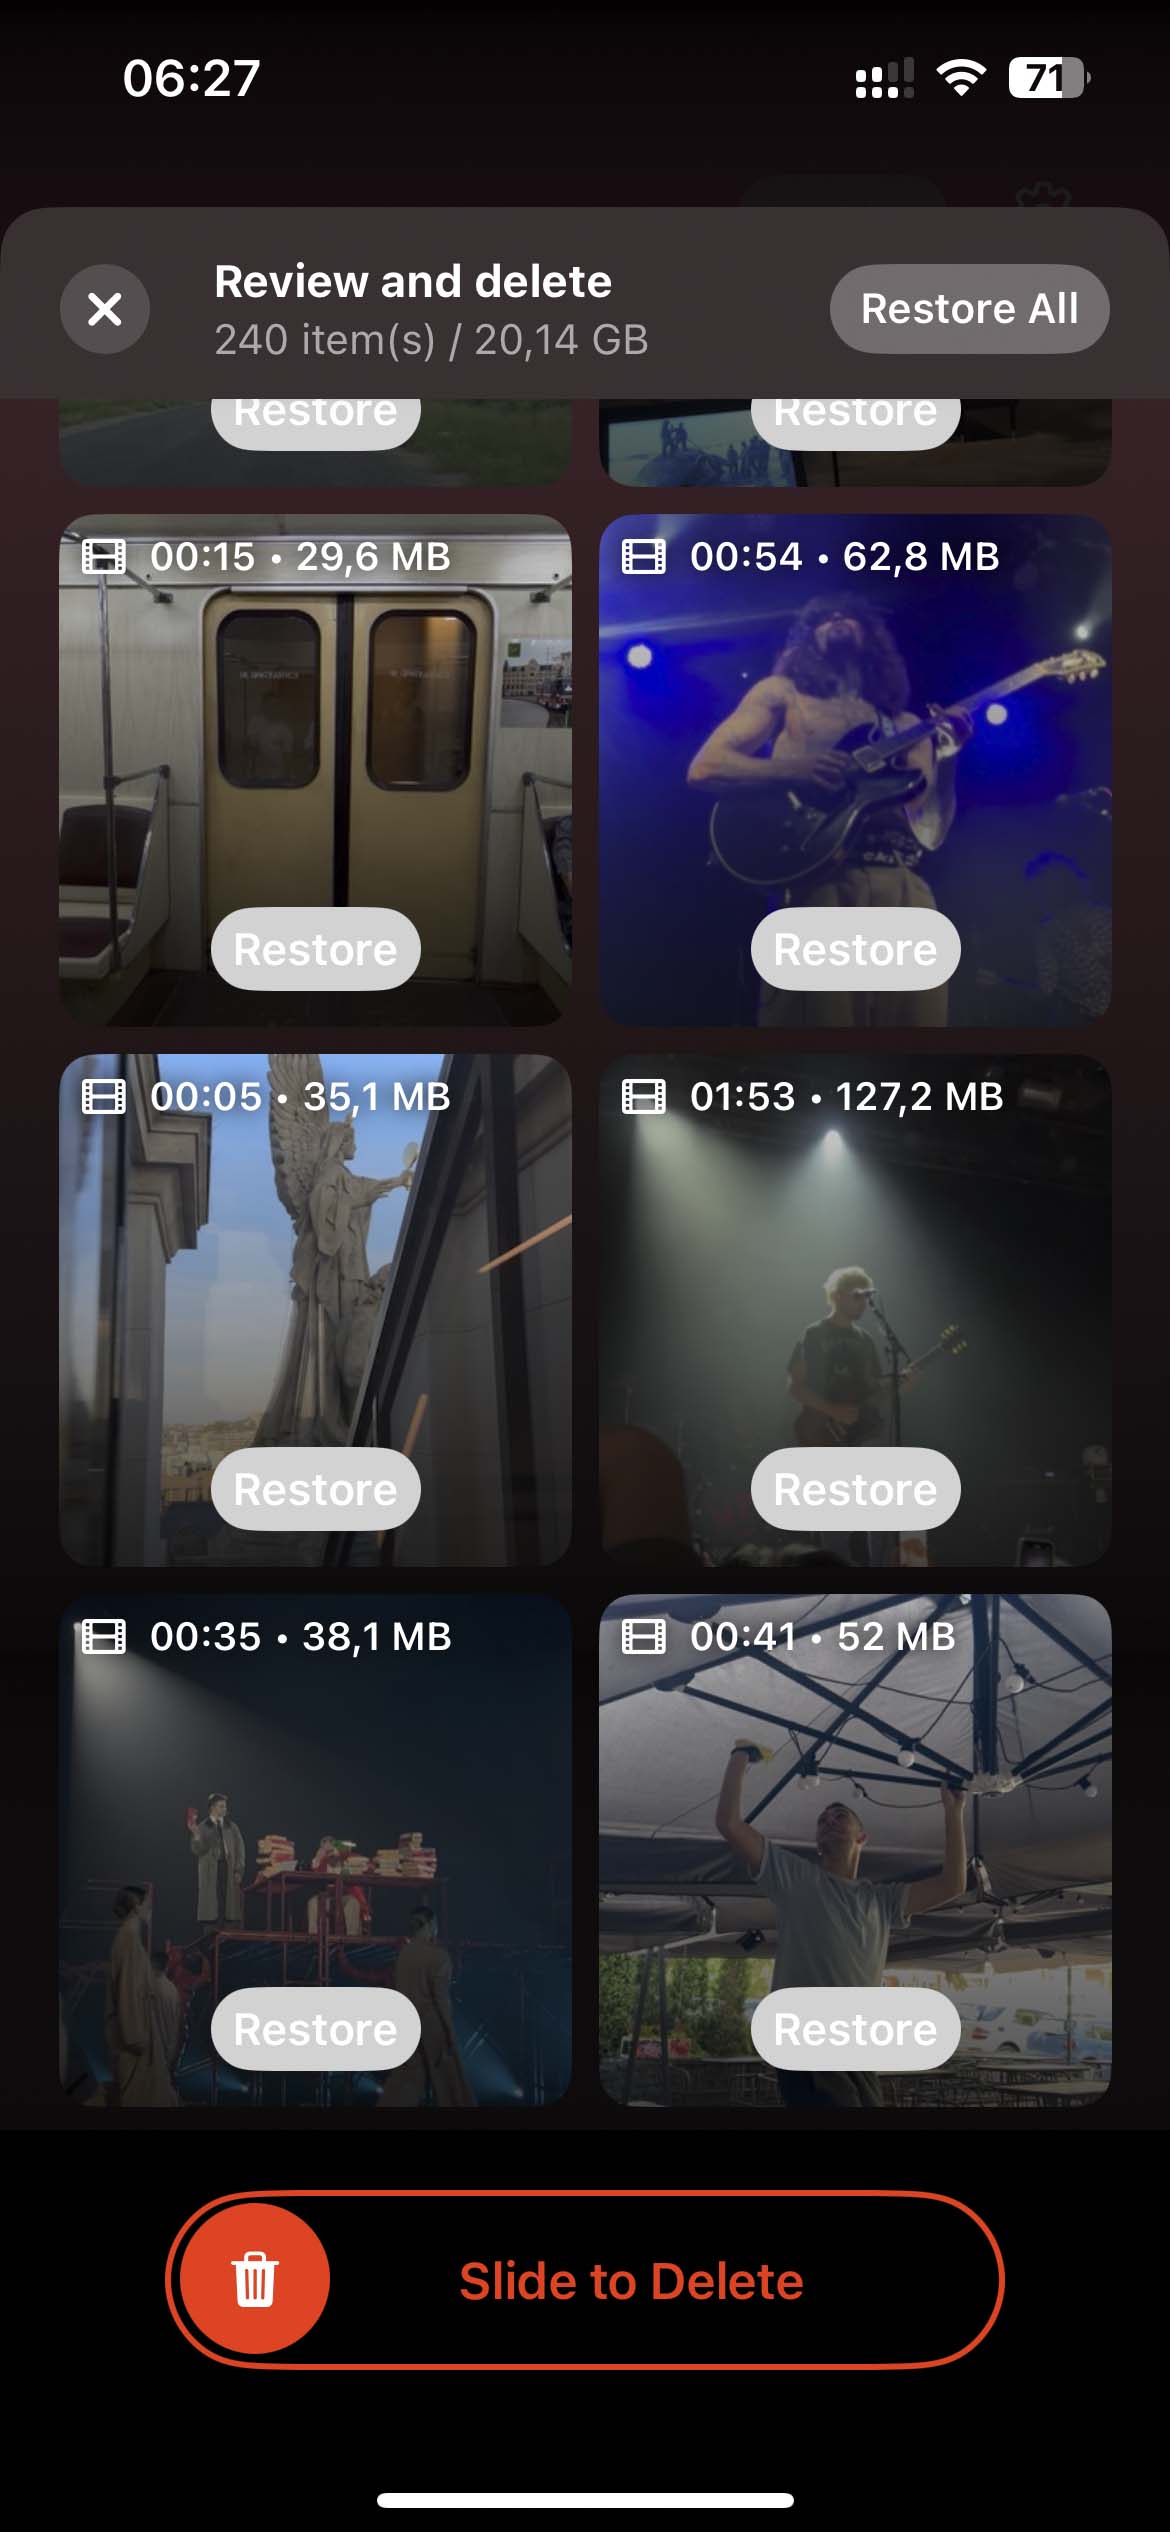
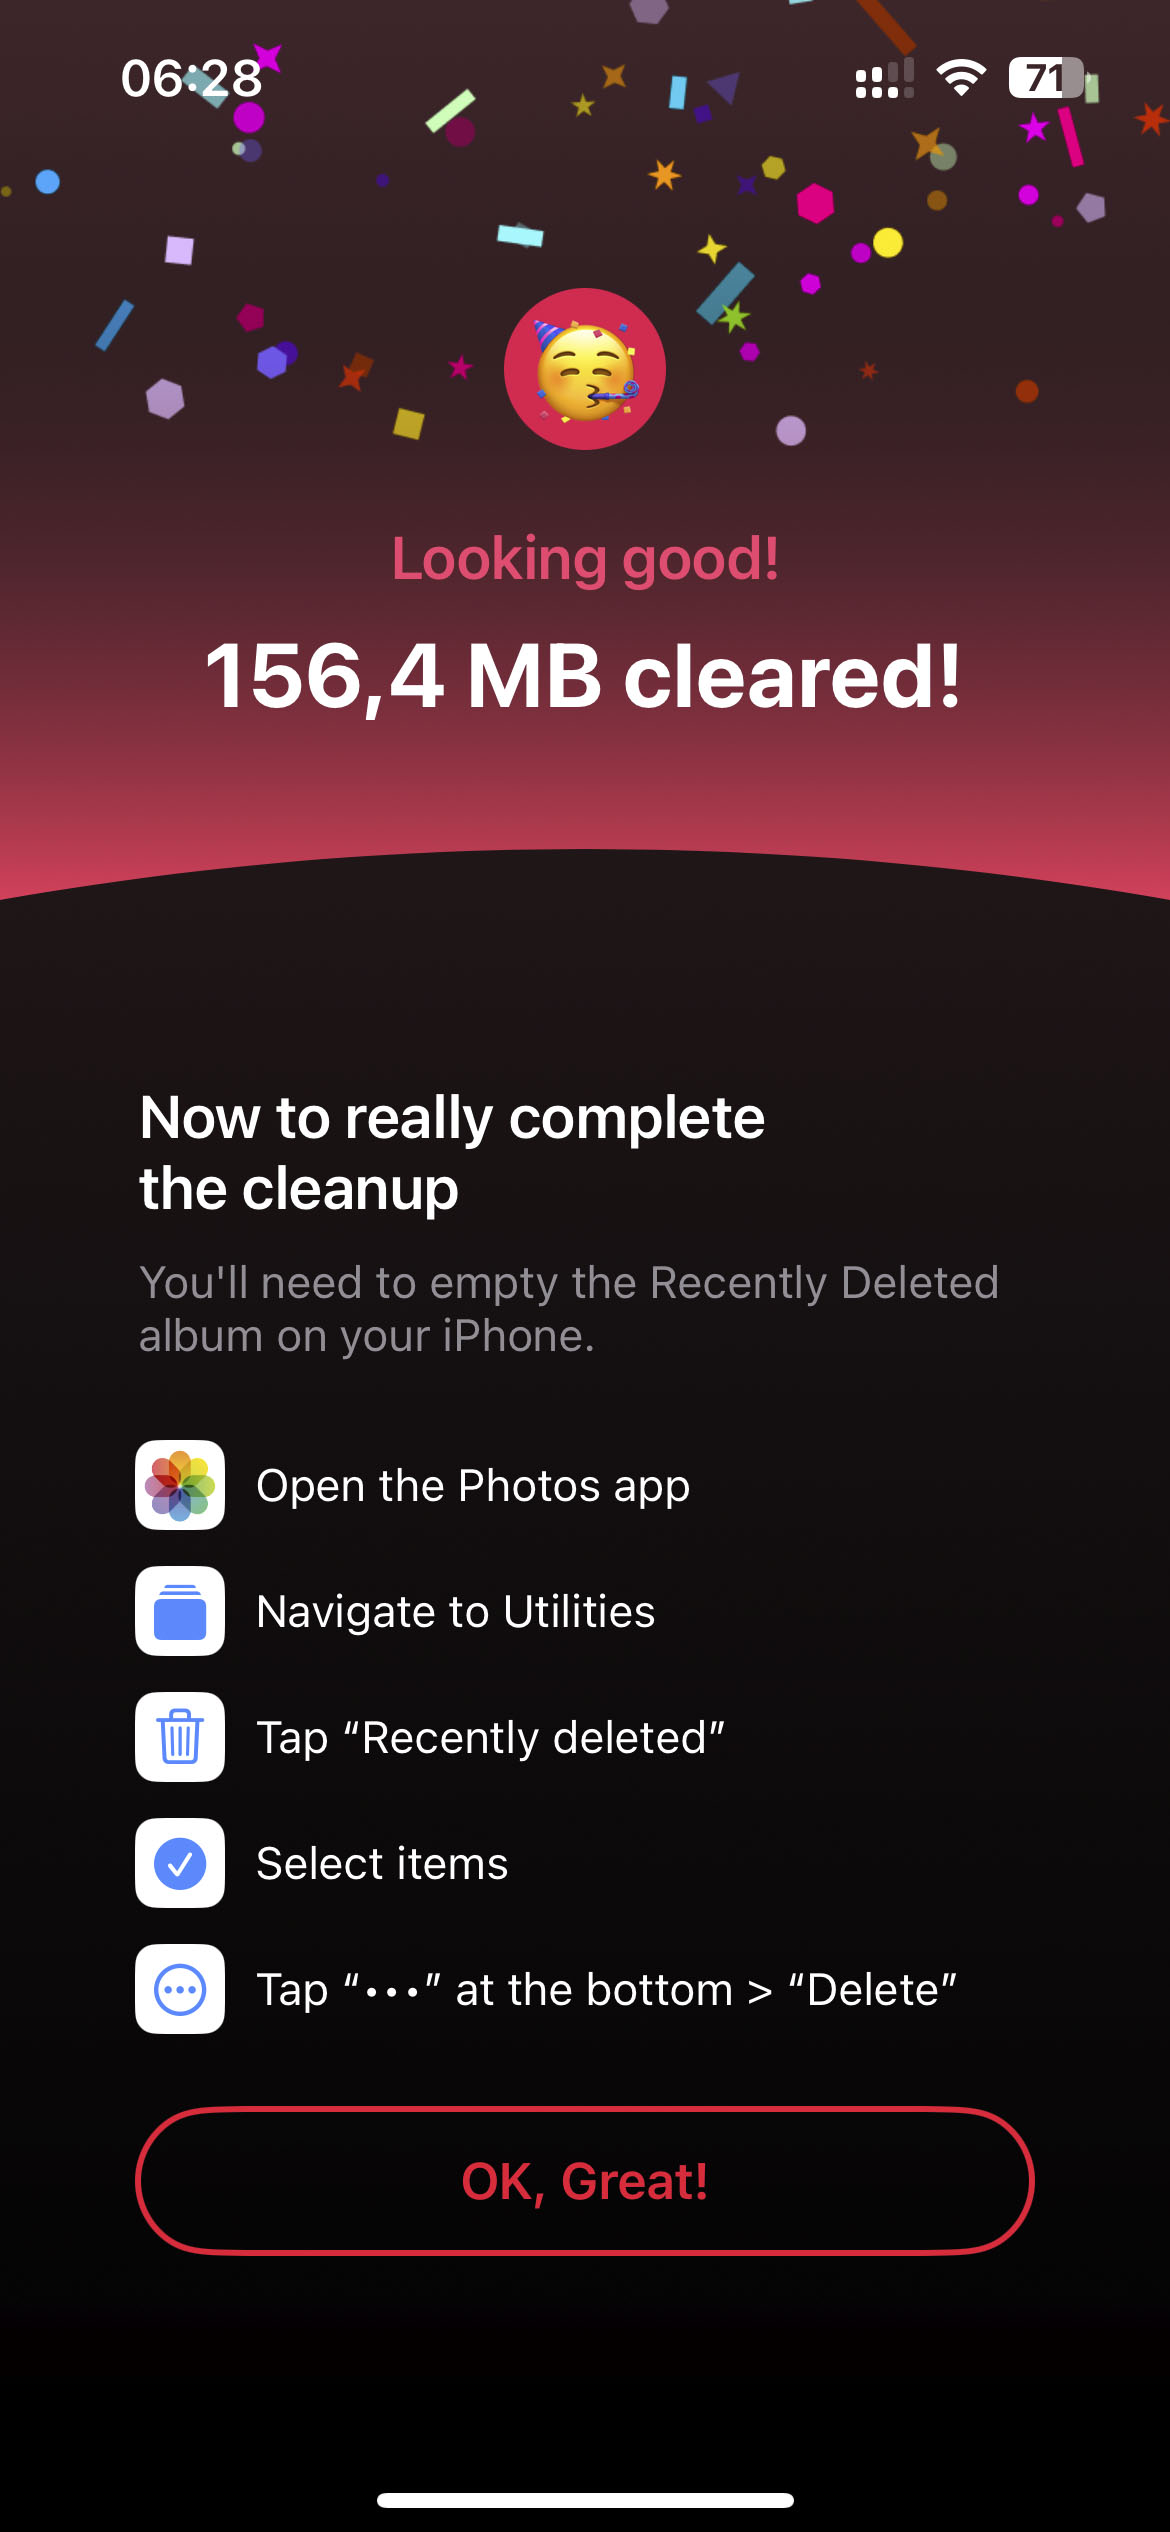
- The selected files will move to the app’s trash, where you can review them and restore them if necessary. Once you review them, execute ‘Slide to Delete.’
- After deletion, the videos will move to the ‘Recently Deleted’ album in the Photos app, and the app will provide instructions on how to clean it or follow the steps from method three from the previous section.


As for the app’s other features, it can use AI to find and delete all duplicates and similar photos(what really stands out, because the built-in iOS tool does not handle detecting similar images at all). It can also clear out old screenshots you probably don’t need anymore and convert Live Photos into regular still images by removing the sound and motion effects. The steps for each feature are pretty similar, so you shouldn’t have any trouble using them. But if you want a more detailed walkthrough or a full overview, you can always check out the official Clever Cleaner website.
FAQ
Conclusion
We hope this guide helped you figure out how to delete downloads on your iPhone, no matter what type of files you’re dealing with or where they’re stored.
To quickly sum it up, there’s no one-size-fits-all method for clearing downloads. The best way really depends on where your files are stored.
If you usually download files through a browser or save content in the Files app, start there. Check the Photos app if you’re getting attachments through messages or messaging apps. If you’re big on streaming music or watching videos offline, take a look at the apps you use for those. And if you tend to download apps but rarely use them, it might be time to clean those up, too.
Bottom line? The best results come from checking every possible location where downloads might be hiding.